- Get Started
- Individual Task Card
- Pending Task Card
- Quick Payment Card
- Individual Message Card
- Transaction Status Card
- Quick Balance Card
- Key Account Balance Card
- Bulk Import Card
- Account Position Card
- Quick Navigation Card
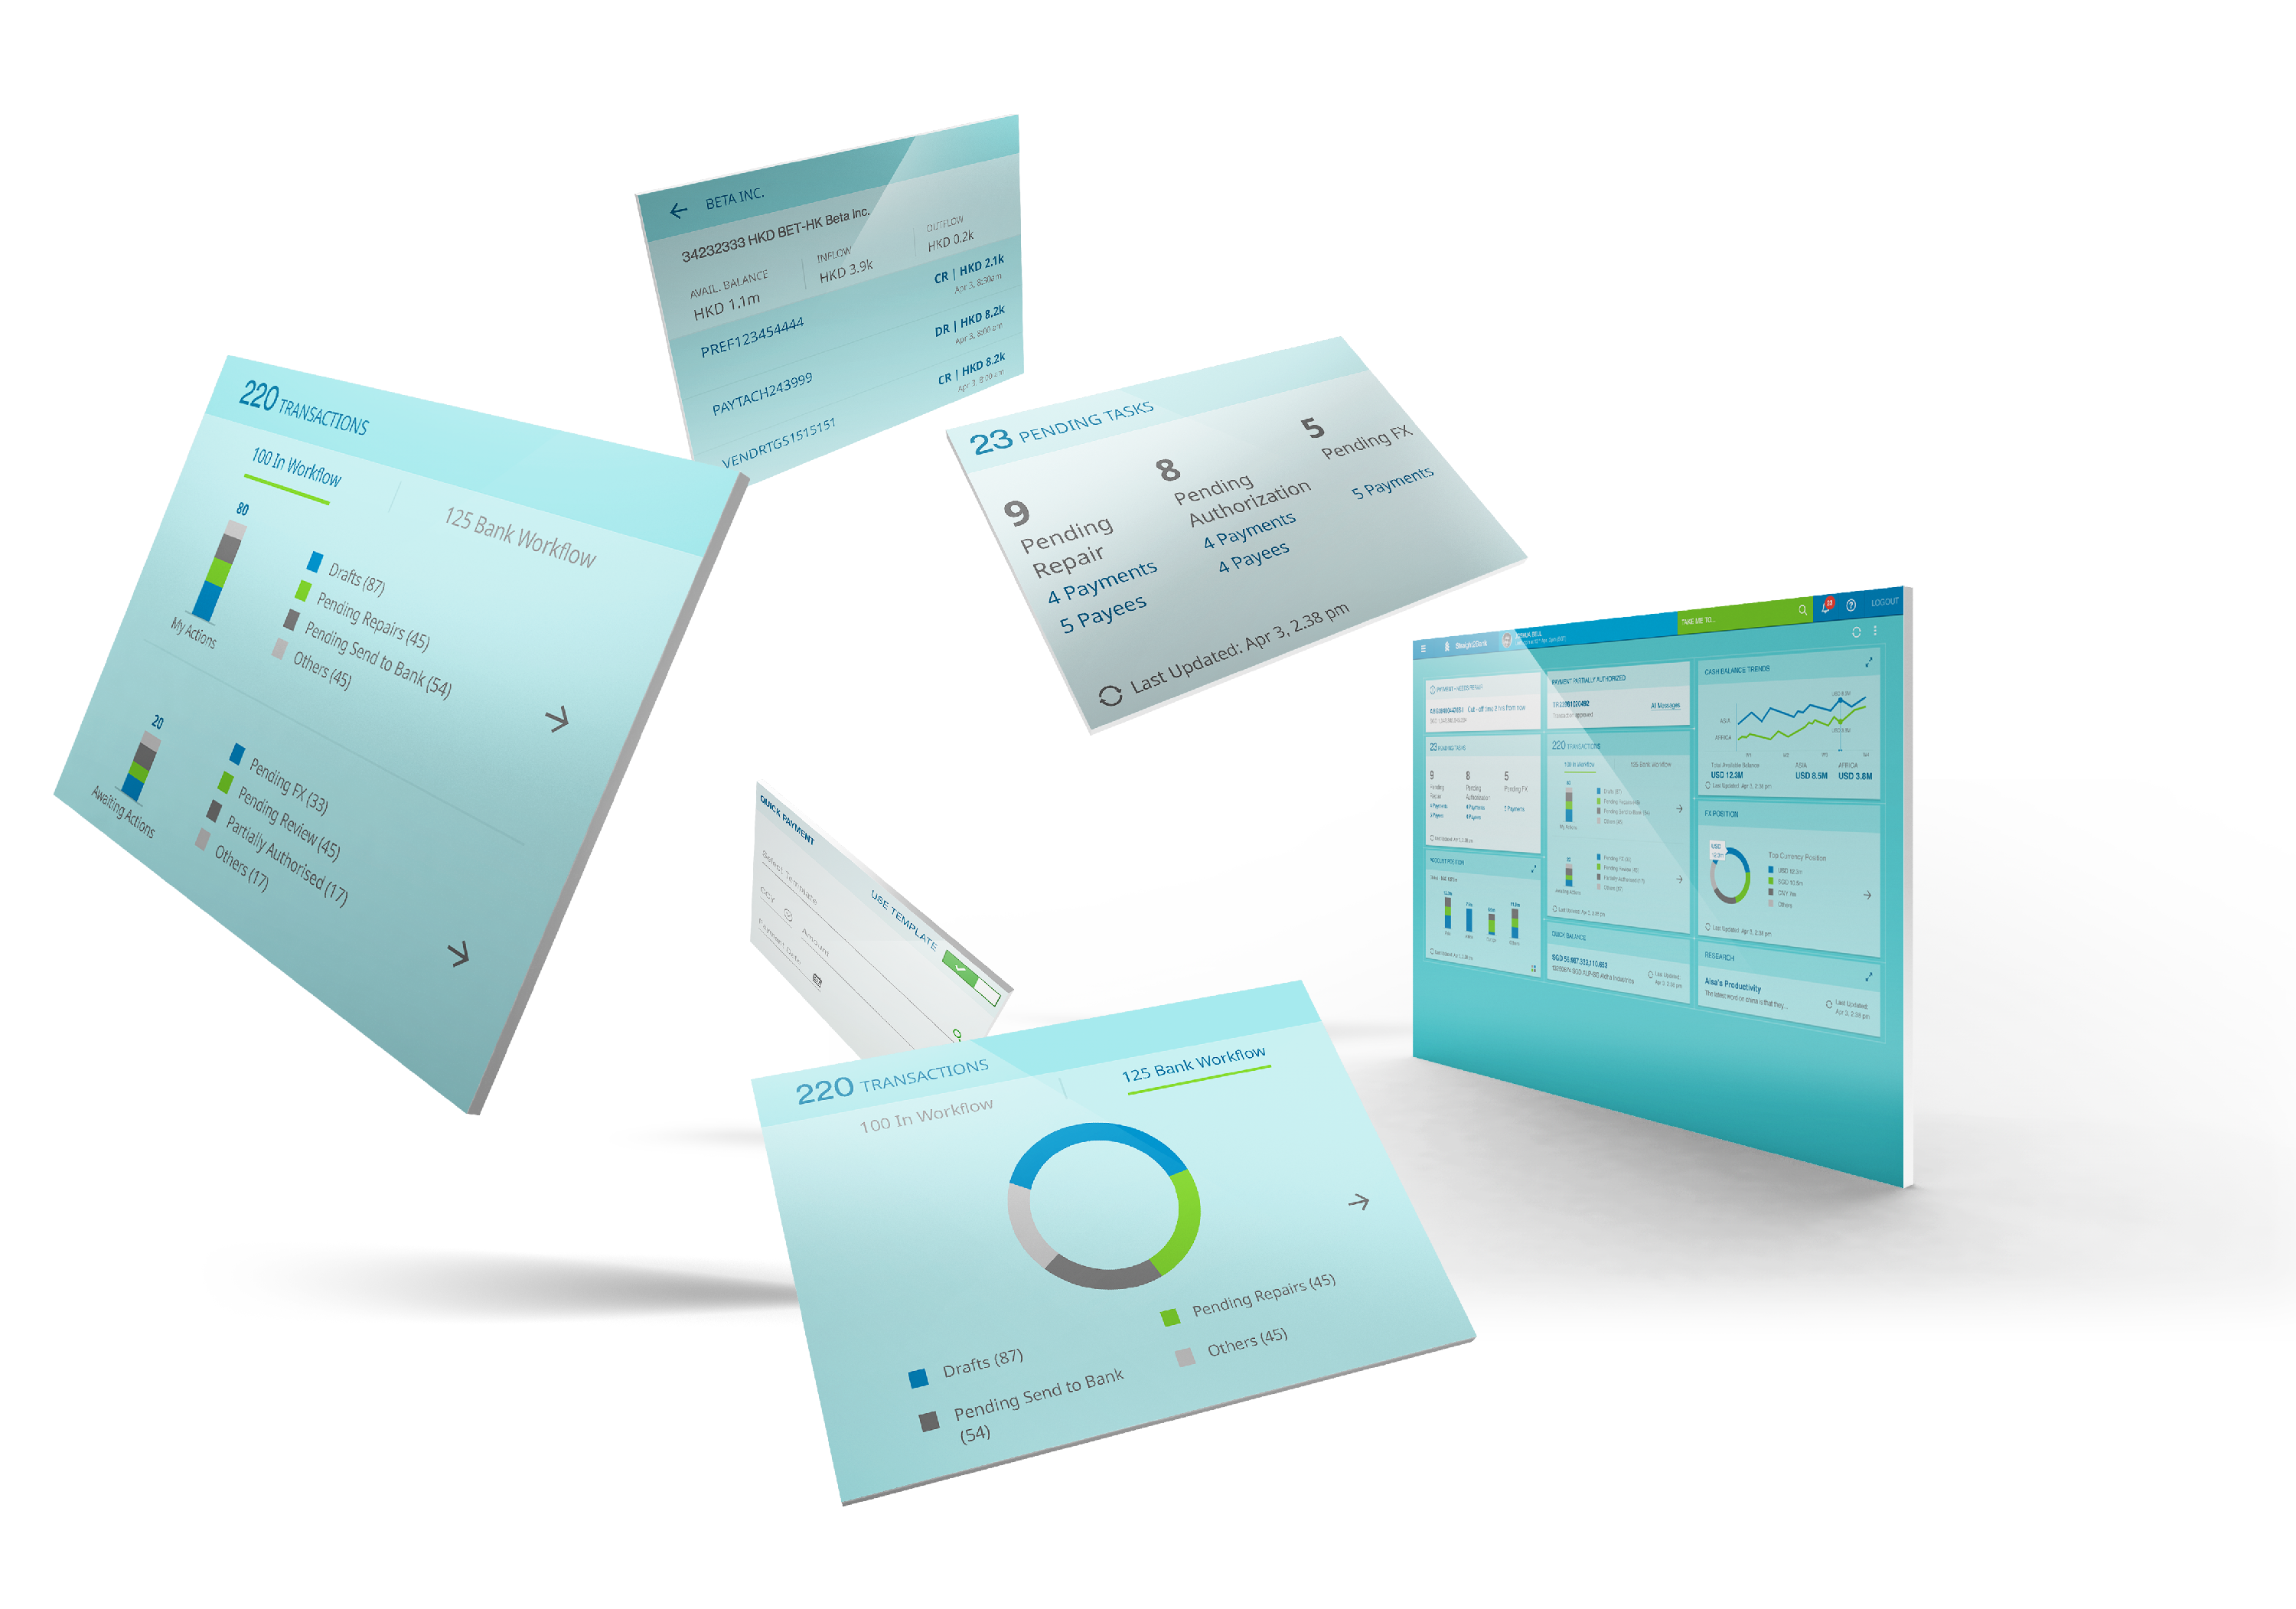
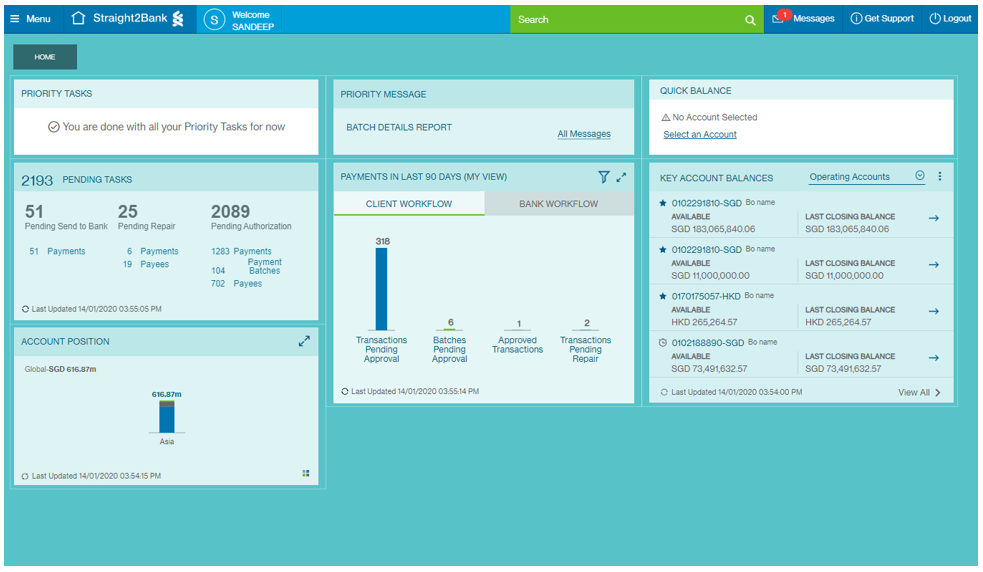
Overview of Dashboard
Dashboard is the first landing page the user see after login to Straight2Bank with the intend to provide the user a quick overview of account balances, key transactions information and messages that are important for his day-to-day activities.
Based on the role of the user ( Initiator / Approver ) set-up in Straigh2Bank, relevant cards will be loaded on dashboard for user information and direct access for quick action.
Initiator Dashboard View
Dashboard is the first landing page the user see after login to Straight2Bank with the intend to provide the user a quick overview of account balances, key transactions information and messages that are important for his day-to-day activities.
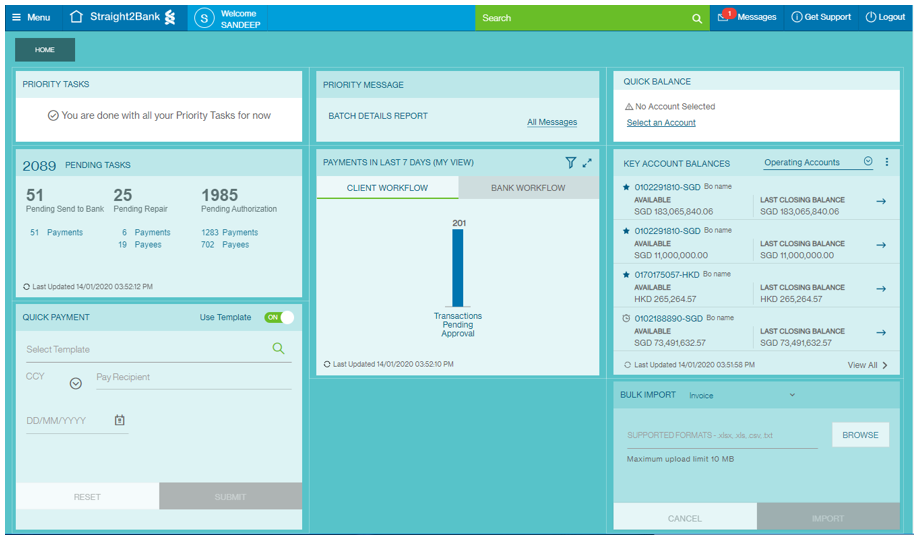
Individual Task Card
Display the tasks with highest priority in the user queue awaiting the user instruction.


Quick Payment Card
Make quick payments and complete the payments journey at a relatively shorter duration.

Individual Message Card
Provide the details of the most recently received unread message in message center .

Transaction Status Card
Displays the status of all transactions initiated by the group and shows which transactions are in a) your workflow and b) the bank’s workflow
Quick Balance Card
Provide the user the latest balance of an account which is selected by user.
Key Account Balance Card
Provides the balances of the all accounts in the group; use the dropdown list to filter between Operating Accounts, Loan Accounts and Deposit Accounts.
Bulk Import Card
To import payments directly from the dashboard using payments files.
Approver Dashboard View
Dashboard is the first landing page the user see after login to Straight2Bank with the intend to provide the user a quick overview of account balances, key transactions information and messages that are important for his day-to-day activities.
Individual Task Card
Display the tasks with highest priority in the user queue awaiting the user instruction.
Account Position Card
Display the overall fund position of a group across all regions, countries, entities and currencies.
Individual Message Card
Provide the details of the most recently received unread message in message center .
Transaction Status Card
Displays the status of all transactions initiated by the group and shows which transactions are in a) your workflow and b) the bank’s workflow
Quick Balance Card
Provide the user the latest balance of an account which is selected by user.

Key Account Balance Card
Provides the balances of the all accounts in the group; use the dropdown list to filter between Operating Accounts, Loan Accounts and Deposit Accounts.
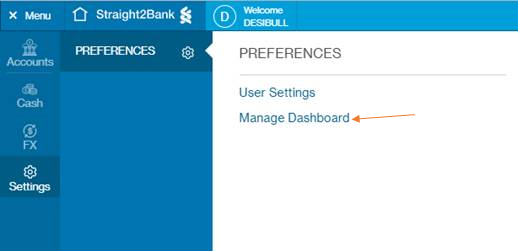
Manage Dashboard
One of Straight2Bank’s greatest strength is customisation. This feature enable users to customise widgets on landing page, upon clicking on the manage dashboard button under the more options menu.
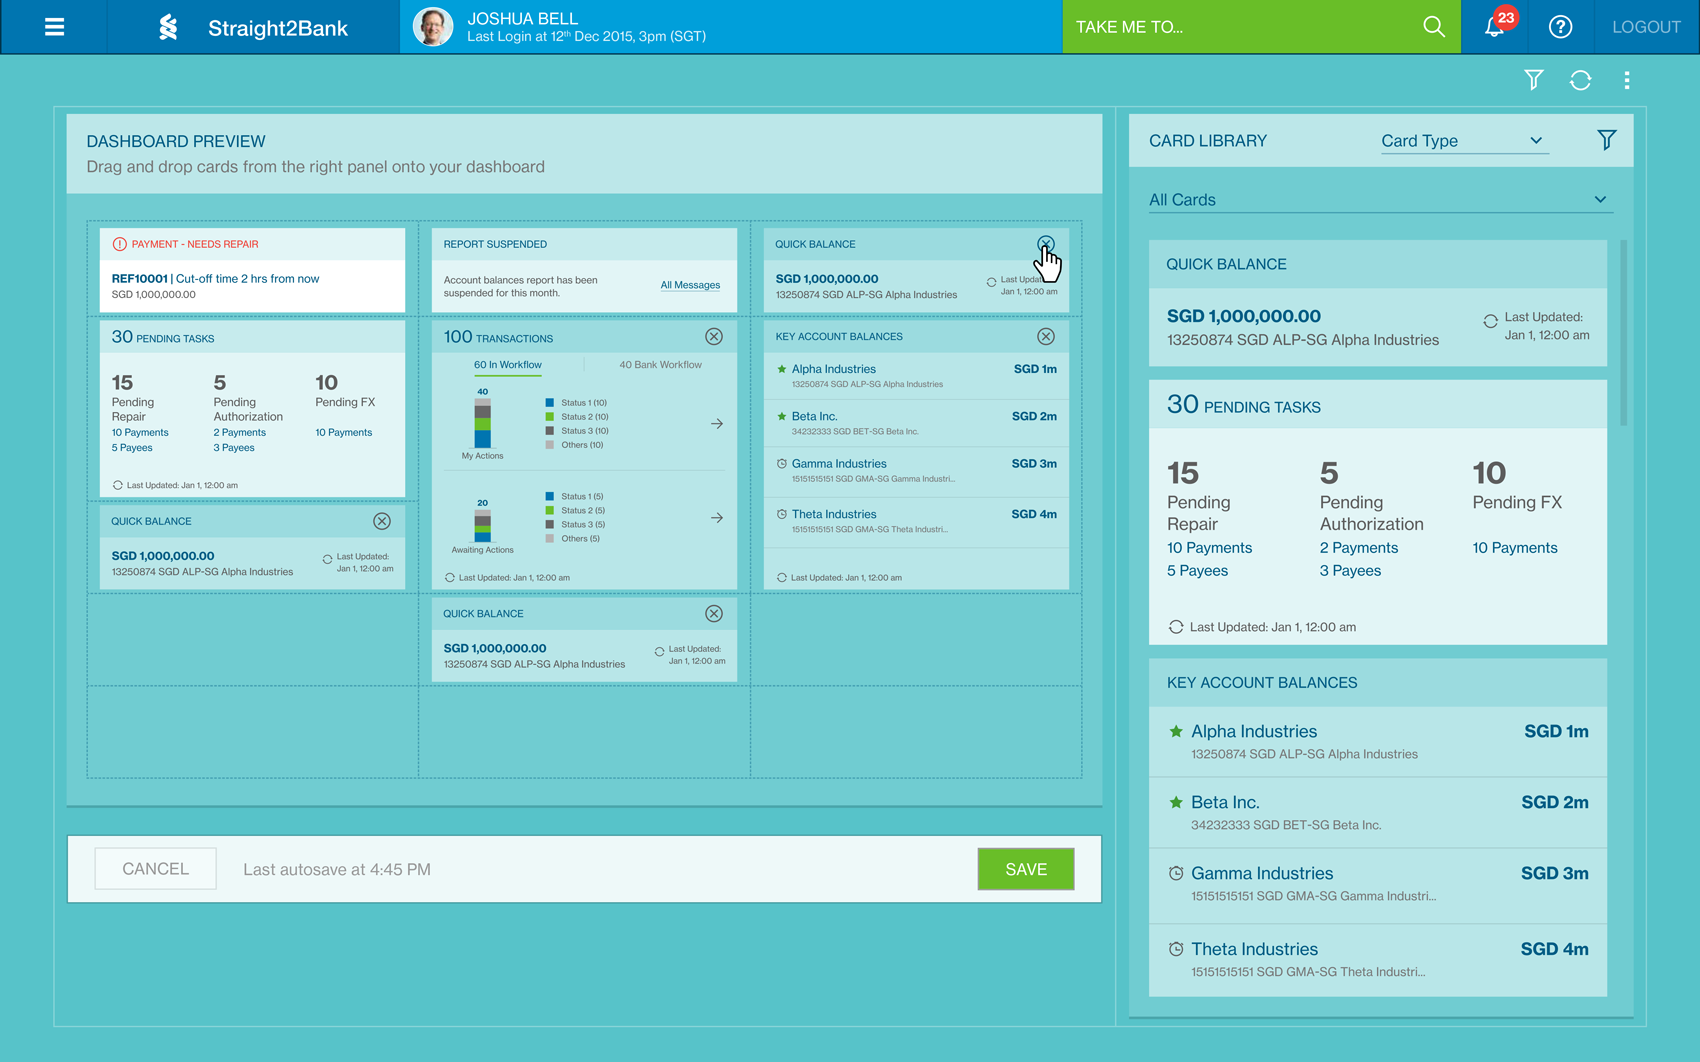
When the user clicks on the manage dashboard button, the card library populated with widgets appears. The widgets in the card library will be images of actual widgets that give the user an idea of how the widget with actual data would look like.
The user can drag these widgets from the card library to the dashboard and place them where space is available. The dashboard screen can be divided into a matrix of 3 columns * 6 rows (18 slots) which will hold the widgets on the screen.
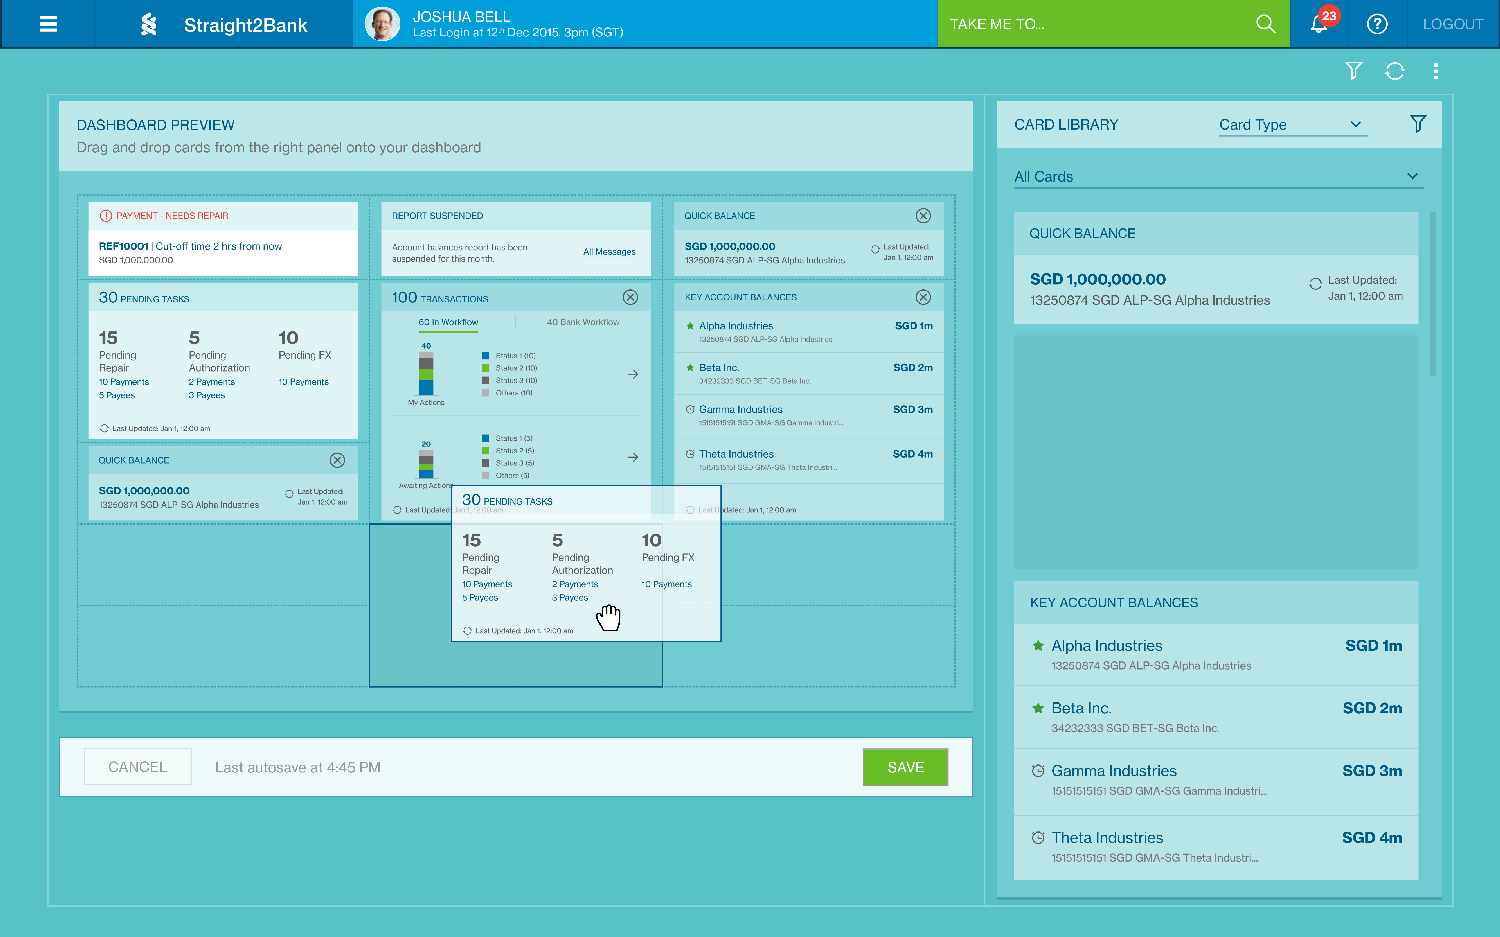
The user can filter the card library using card type or by filtering using the card dimensions.
All widgets that can be removed are shown with an opaque white overlay with a symbol on the top right corner. The user can use this is remove the widget from the dashboard.
The Individual Task Card and Pending Task Card are sticky widgets that cannot be removed from the dashboard.


Individual Task Card
Individual Task Card displays the tasks with highest priority in the user queue awaiting the user instruction with basic information of the payment reference and transaction detail.

When the transaction detail is selected, the card will display 2 other options for user:
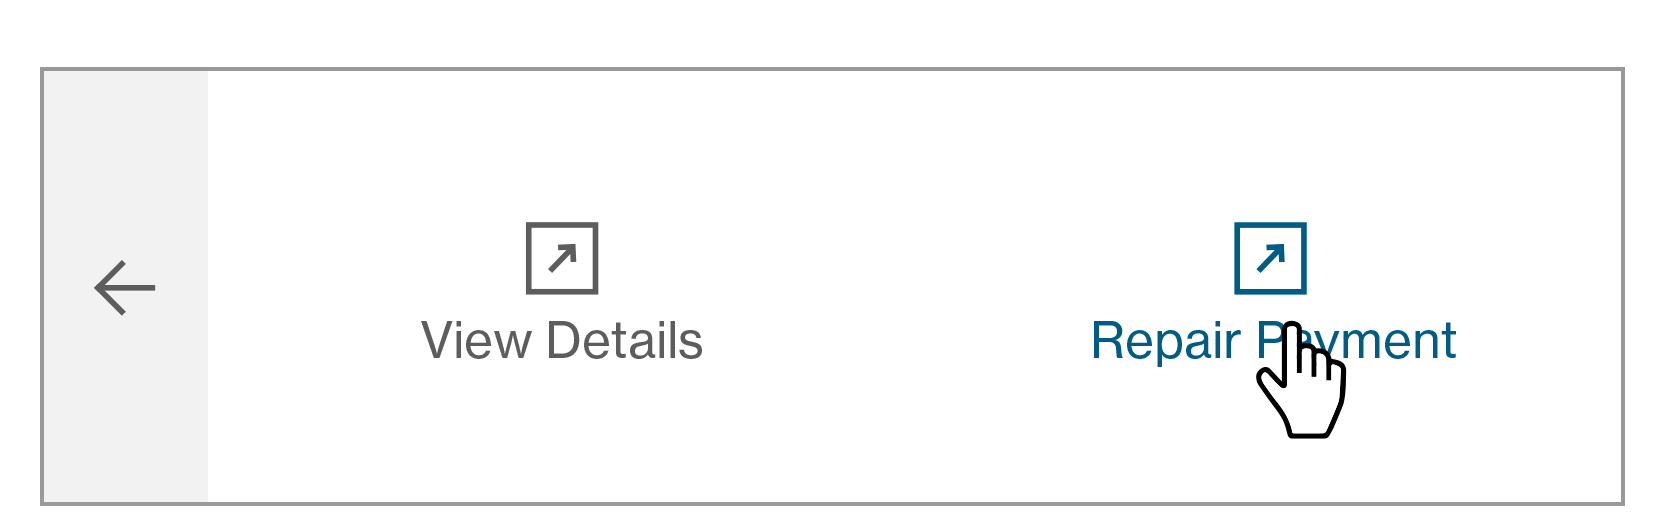
View Details
When “View Details” option is selected, the detail Payment Summary Screen will be presented.
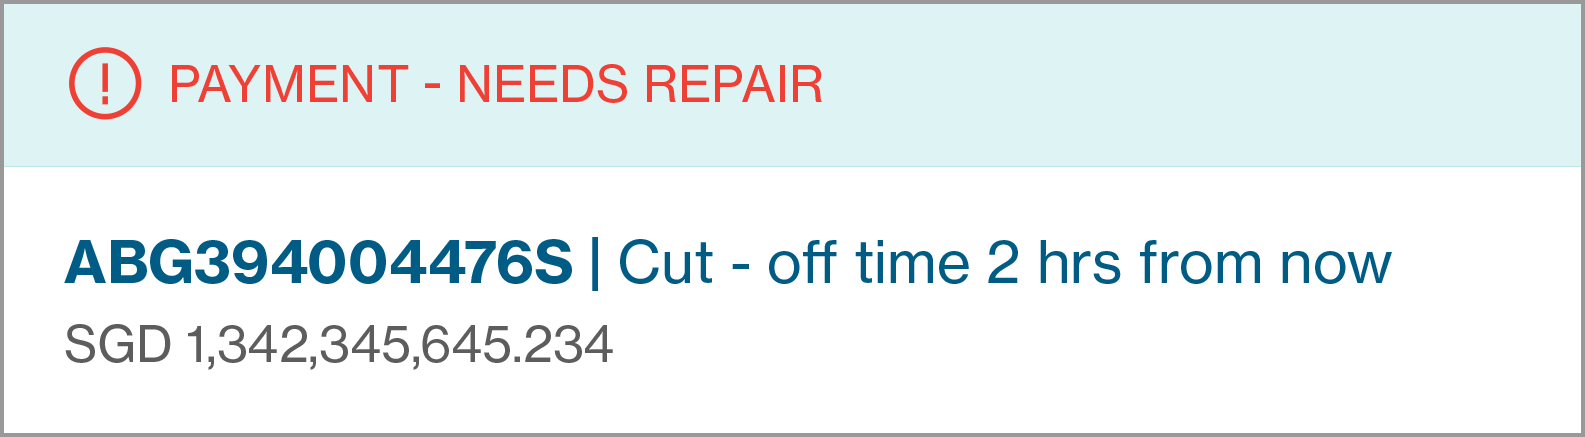
Repair Payment
When “Repair Payment” option is selected, the Repair Payment Screen will be loaded with payment details for further amendments.
Once the transaction is repaired, the “Payment – Needs Repaired” will disappear and the next pending task will be loaded on the Individual Task in Dashboard.

The card will indicate done status when all priority tasks are completed.
Role-based Tasks
Initiator
| Task Name | Possible Actions | What Does It Do |
| Repair Transaction | Repair | User is taken to the transaction repair journey screen which will display the complete transaction details of the particular transaction and the authorizer comments, if any. |
| View Details | User is taken to the transaction journey screen which will display the complete transaction details of the particular transaction reference with end-of-page actions relevant to the transaction status. | |
| Assign FX | Assign FX | User is taken to the transaction journey screen for assigning FX to a transaction. |
| View Details | User is taken to the transaction journey screen which will display the complete transaction details of the particular transaction reference with end-of-page actions relevant to the transaction status. | |
| Send to Bank | Send to Bank | Transaction send to bank and next high priority task displayed on widget. |
| View Details | User is taken to the transaction journey screen which will display the complete transaction details of the particular transaction reference with end-of-page actions relevant to the transaction status. Transaction reference with end-of-page actions relevant to the transaction status. |
Approver
| Task Name | Possible Actions | What Does It Do |
| Approve Transaction | Authorize | When the user clicks on this option the user is re-directed to display the user transactions signing page on the screen. |
| Reject | When the user clicks on this option, an overlay will be displayed for the user to capture the reject reason along with “Ok” and “Cancel” button. Once the user clicks on the “Ok” button the transaction reject reason is captured as part of the transaction and if the user clicks on cancel then the transactions is rejected without the reject reason. | |
| View Details | User is taken to the transaction journey screen which will display the complete transaction details of the particular transaction reference with end-of-page actions relevant to the transaction status. | |
| Send to Bank | Send to Bank | User is taken to the transaction journey screen for assigning FX to a transaction. |
| View Details | Transaction send to bank and next high priority task displayed on widget. | |
| Send to Bank | Send to Bank | Transaction send to bank and next high priority task displayed on widget. |
| View Details | User is taken to the transaction journey screen which will display the complete transaction details of the particular transaction reference with end-of-page actions relevant to the transaction status. |
Inquirer
| Task Name | Possible Actions | What Does It Do |
| Send to Bank | Send to Bank | Transaction send to bank and next high priority task displayed on widget. |
| View Details | User is taken to the transaction journey screen which will display the complete transaction details of the particular transaction reference with end-of-page actions relevant to the transaction status. |
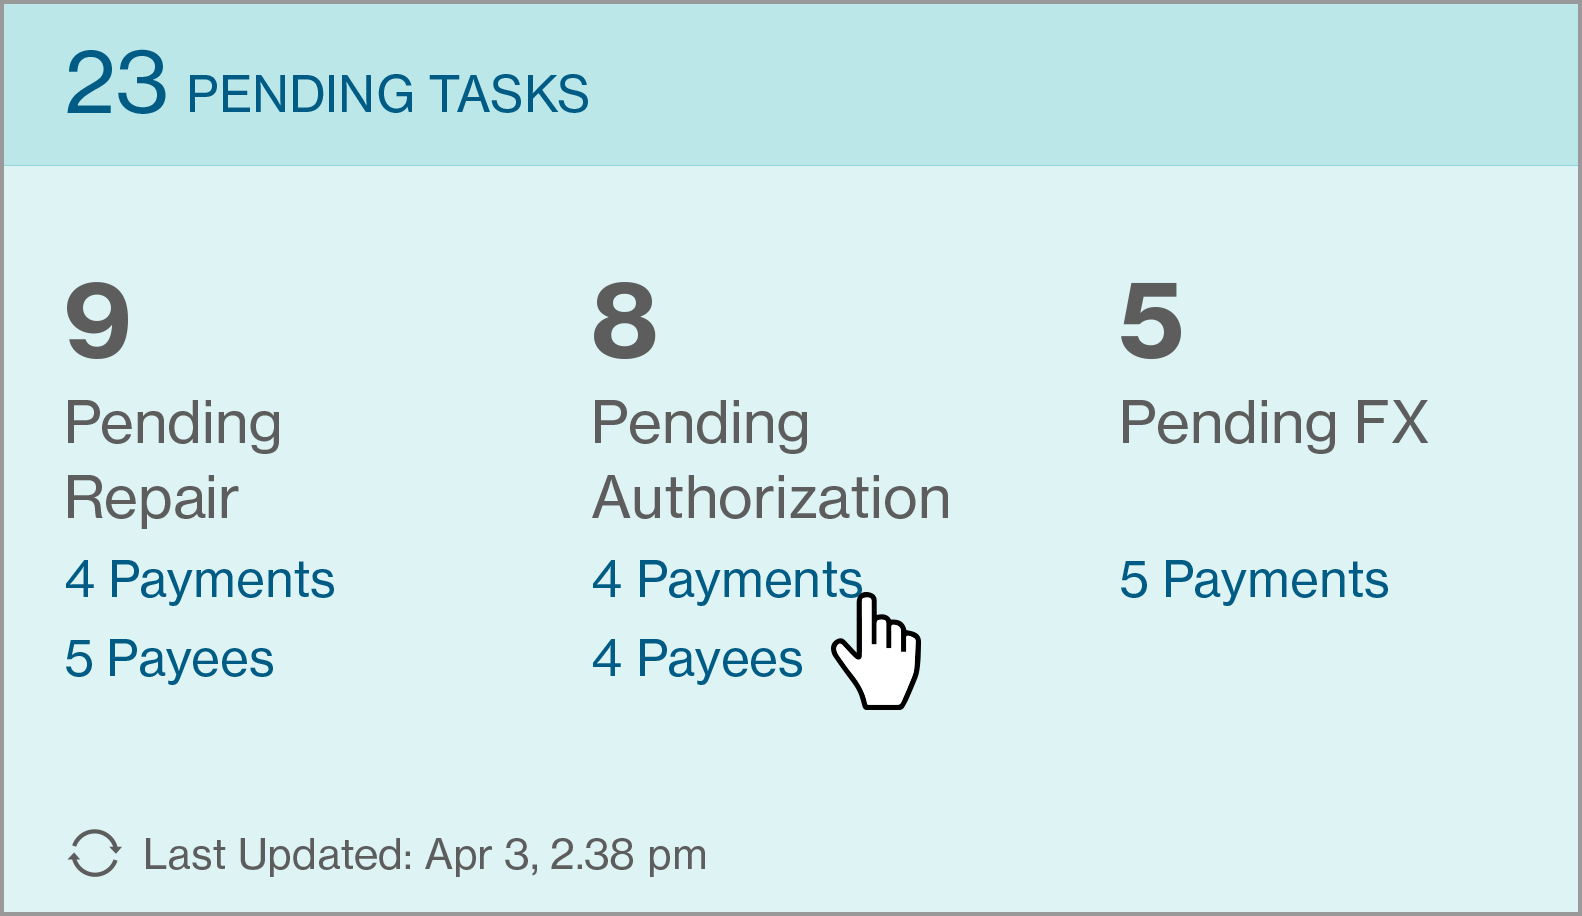
Pending Task Card
This card highlights the total pending tasks for the user at that moment.

When the user clicks on any of the links within the widget, the user is re-directed to the Manage/Approve Transaction/Payee Lists based on the user role, product and transaction status.
Initiator
| Pending Task Name | Product | Transaction Status | Possible Actions |
|---|---|---|---|
| Pending Repair | Payment | Pending Repair | View Transaction list |
| Pending Repair | Payee | Pending Repair | View Payee list |
| Pending Send to Bank | Payment | Fully Signed | View Transaction list |
| Pending FX | Payment | Pending FX | View Transaction list |
Approver
| Pending Task Name | Product | Transaction Status | Possible Actions |
|---|---|---|---|
| Pending Authorization | Payment | Completed/Repaired/ Partially Signed | View Transaction list |
| Pending Authorization | Payee | Completed/Repaired/ Partially Signed | View payee list |
| Pending Send to Bank | Payment | Fully Signed | View Transaction list |
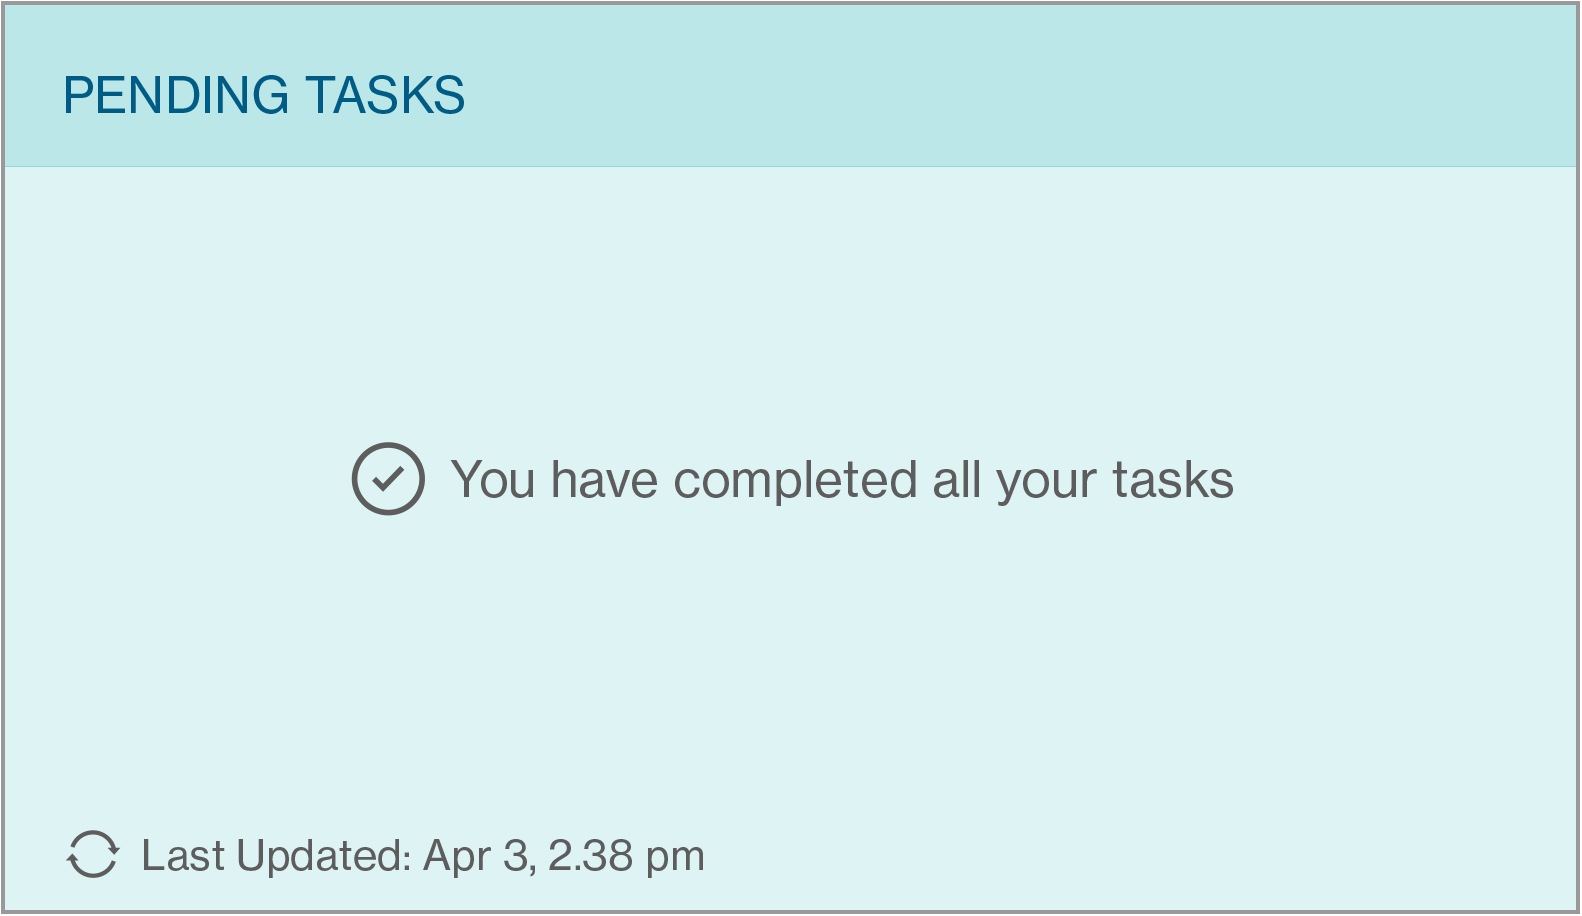
Once all the tasks are completed , the pending tasks information on the card will be removed, and it will indicate “You have completed all your tasks”.
Quick Payment Card
Quick Payment Card enables users to make quick payments so that they do not have to undergo the entire manual payment journey and complete my payments at a relatively shorter duration.
Using Template
When you want to use a template for quick payment, you are supposed to have access to create a payment from one or more templates, and the same templates will be available to initiate quick payment.
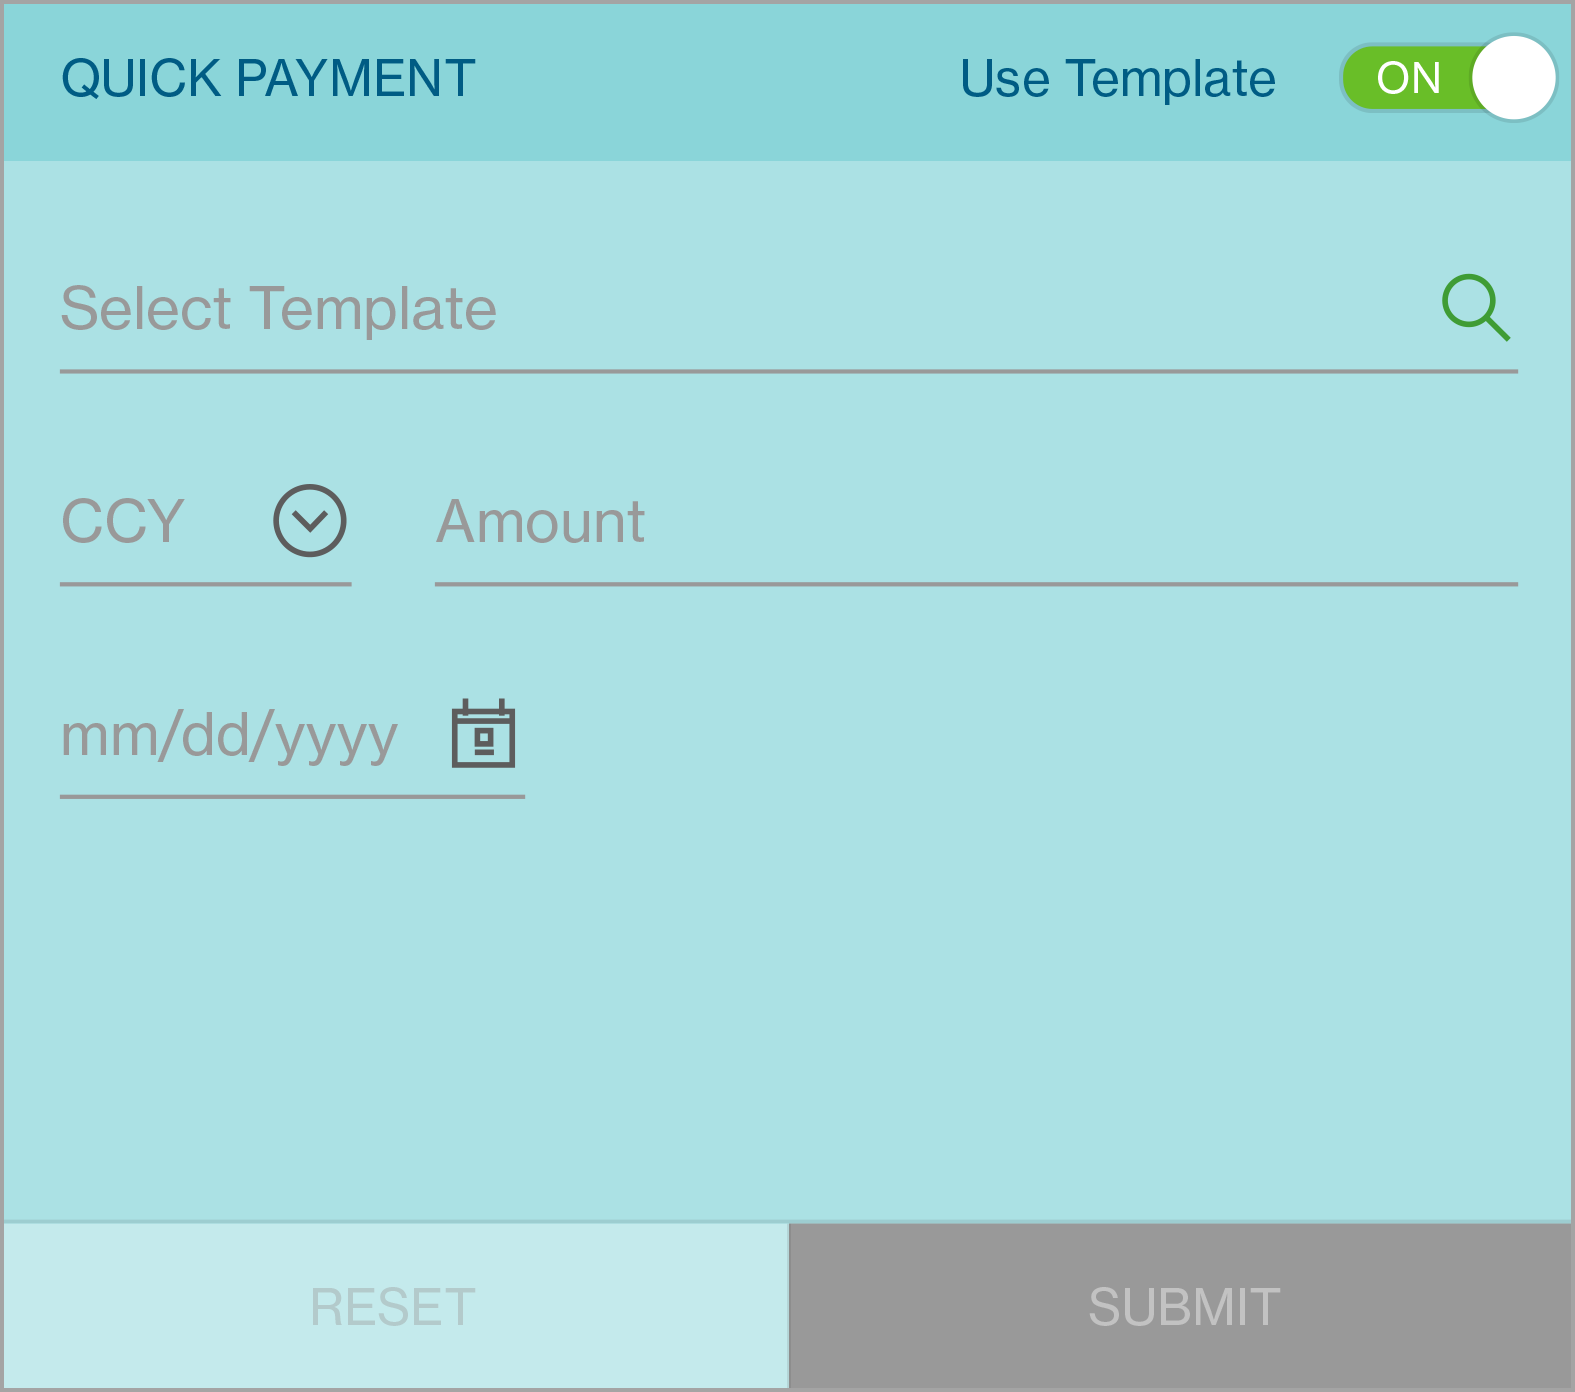
Firstly, make sure Use template toggle is made ON. (Default state of the toggle is ON )
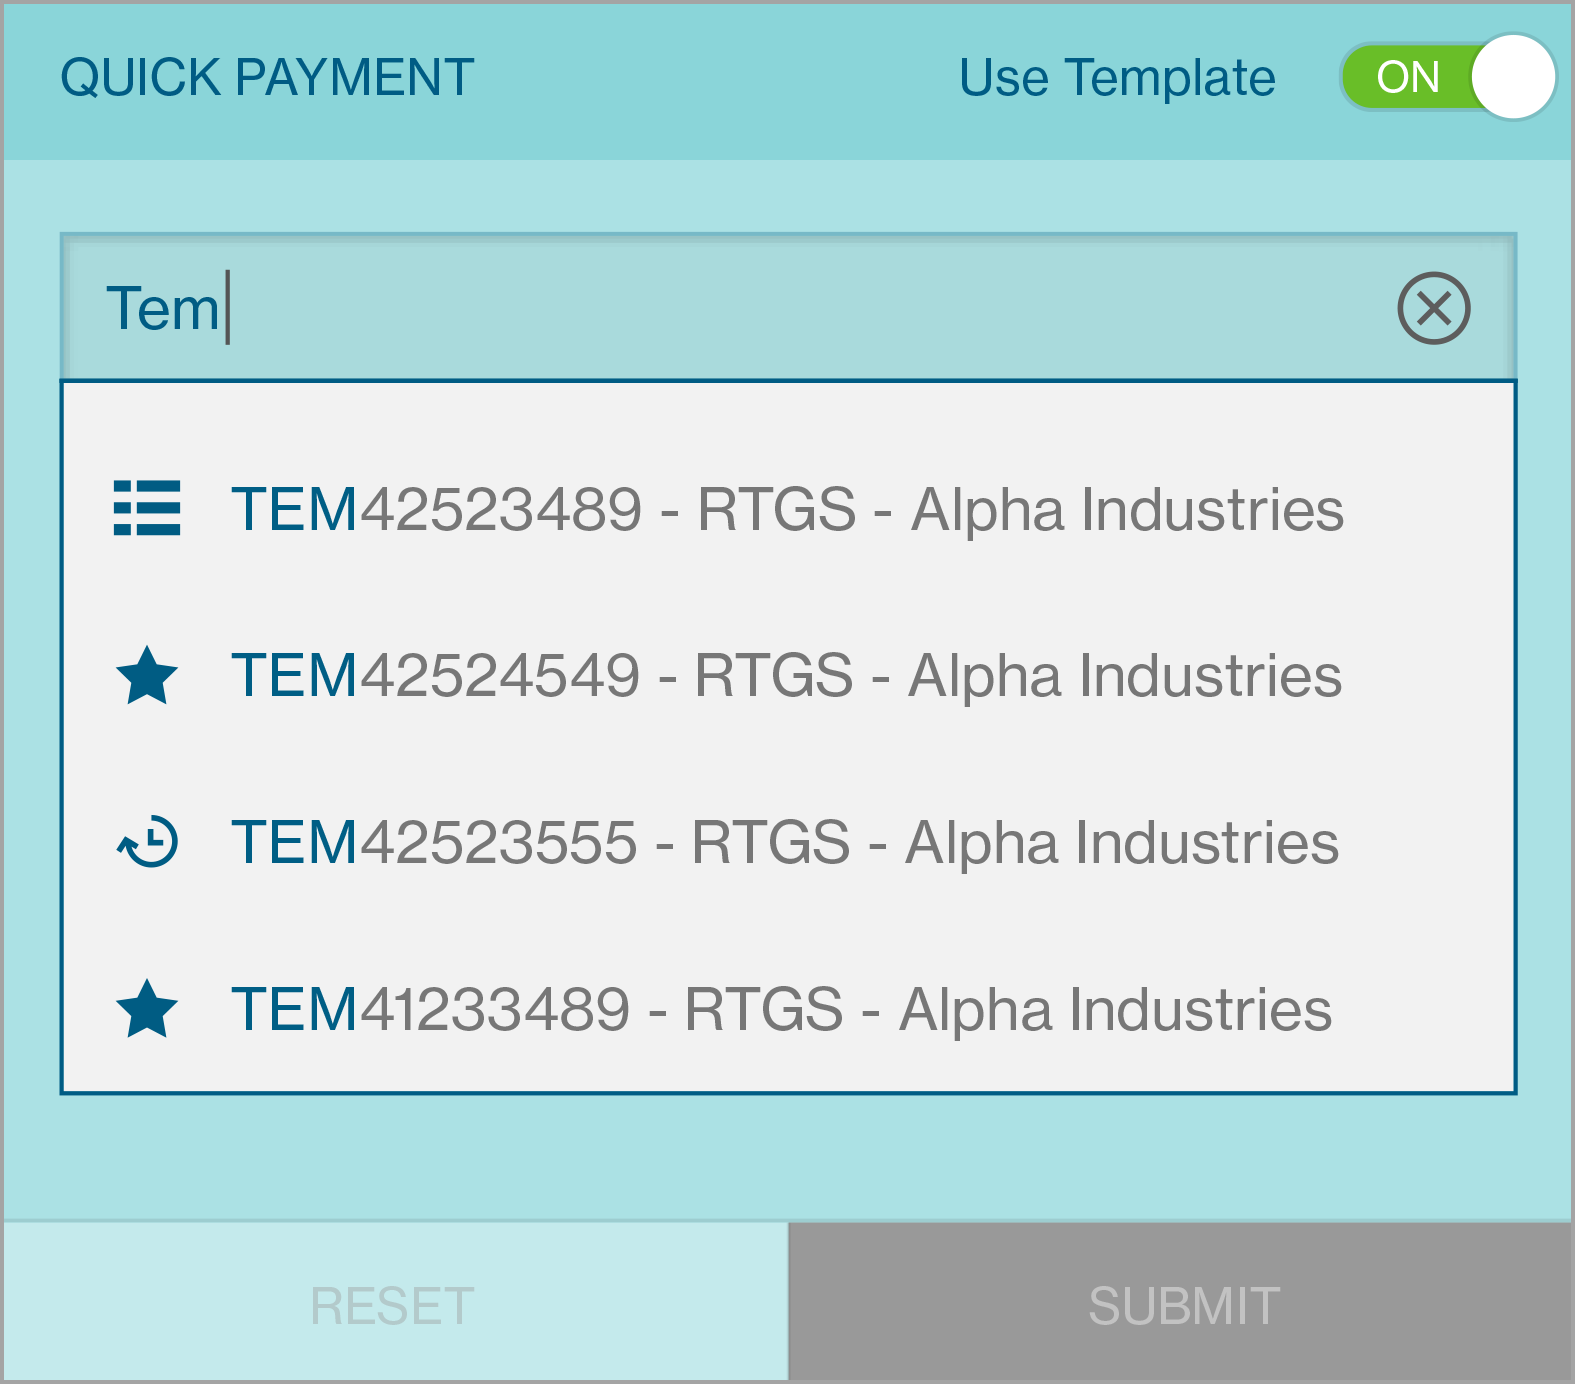
Now select the template you want to use by keying in relevant data in the auto suggest.
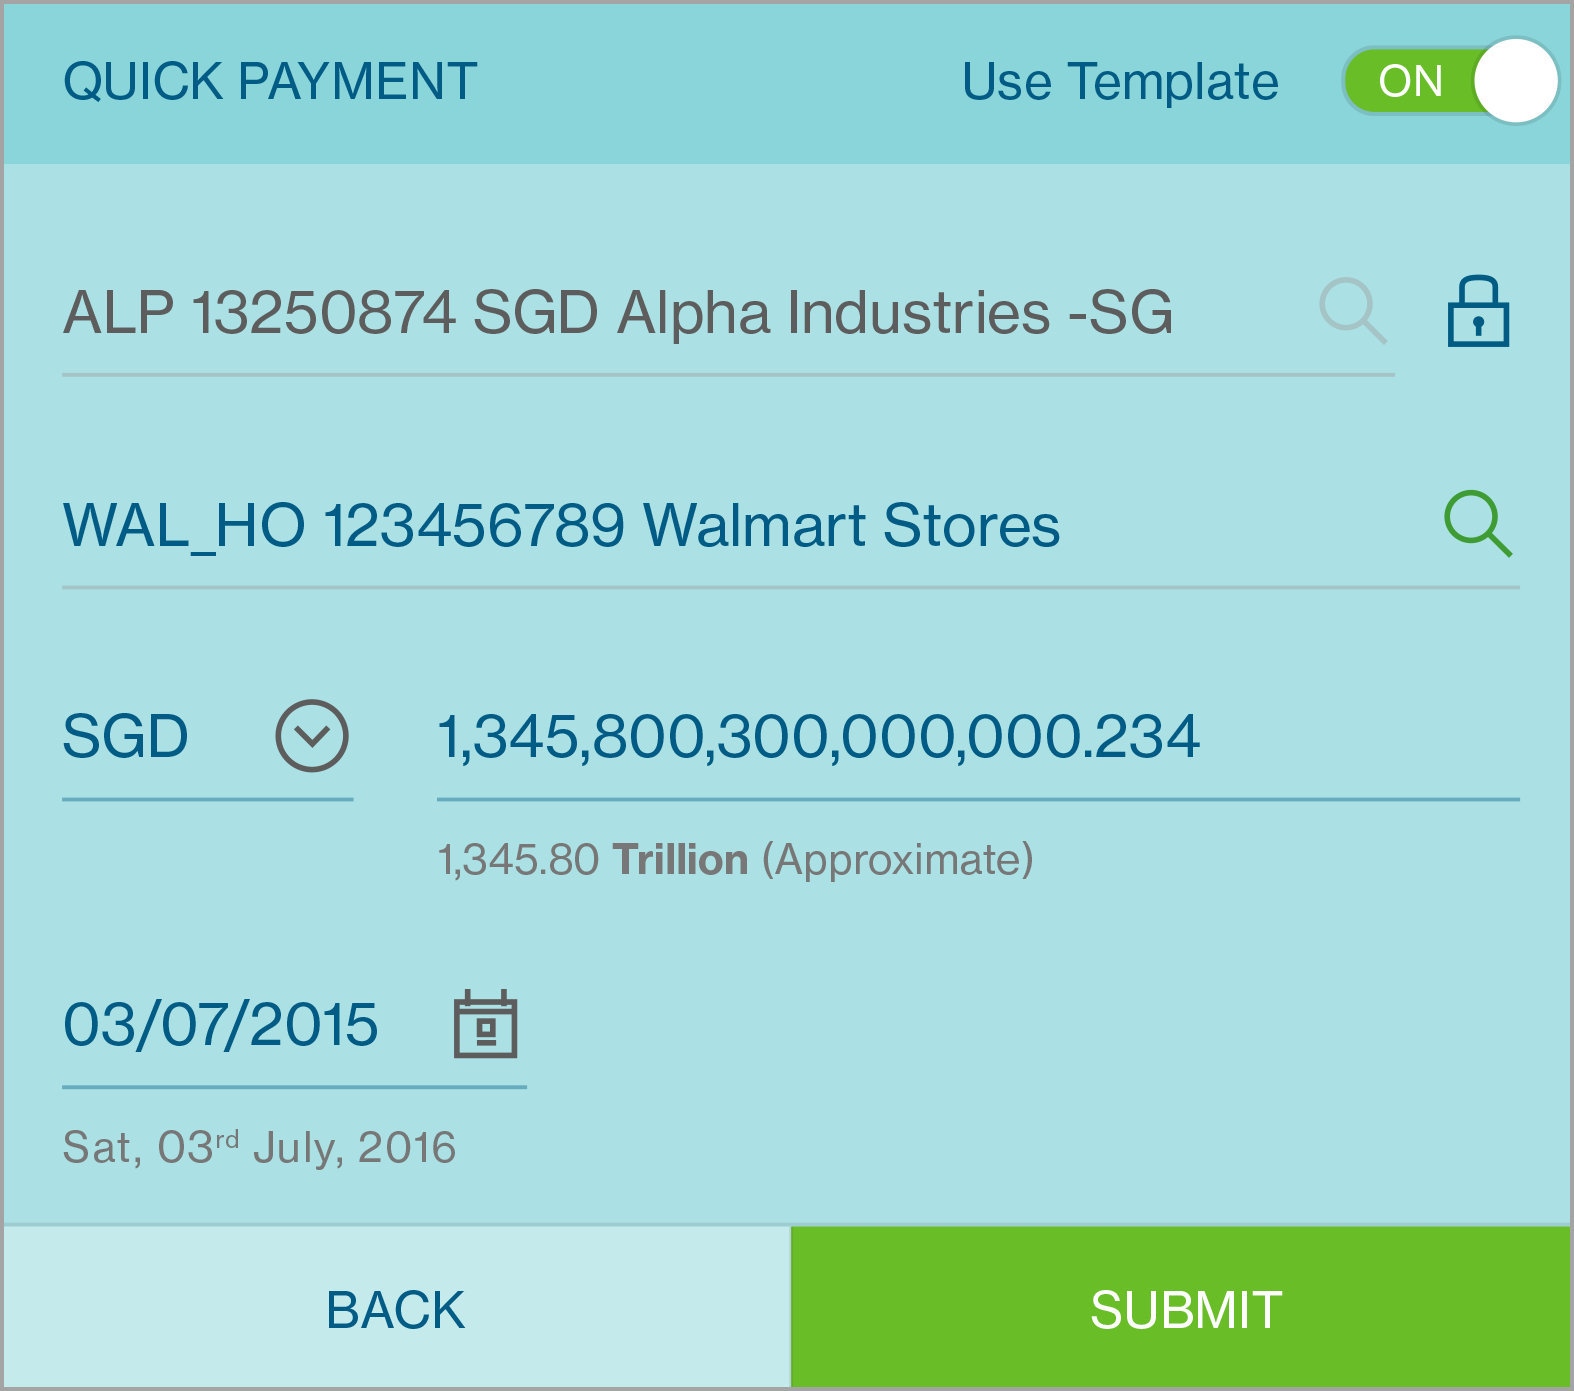
The template details will be prefilled. The currency mentioned in the template gets pre-filled, else the default currency type for that debit account is entered.
Then, you can submits the payment using Submit
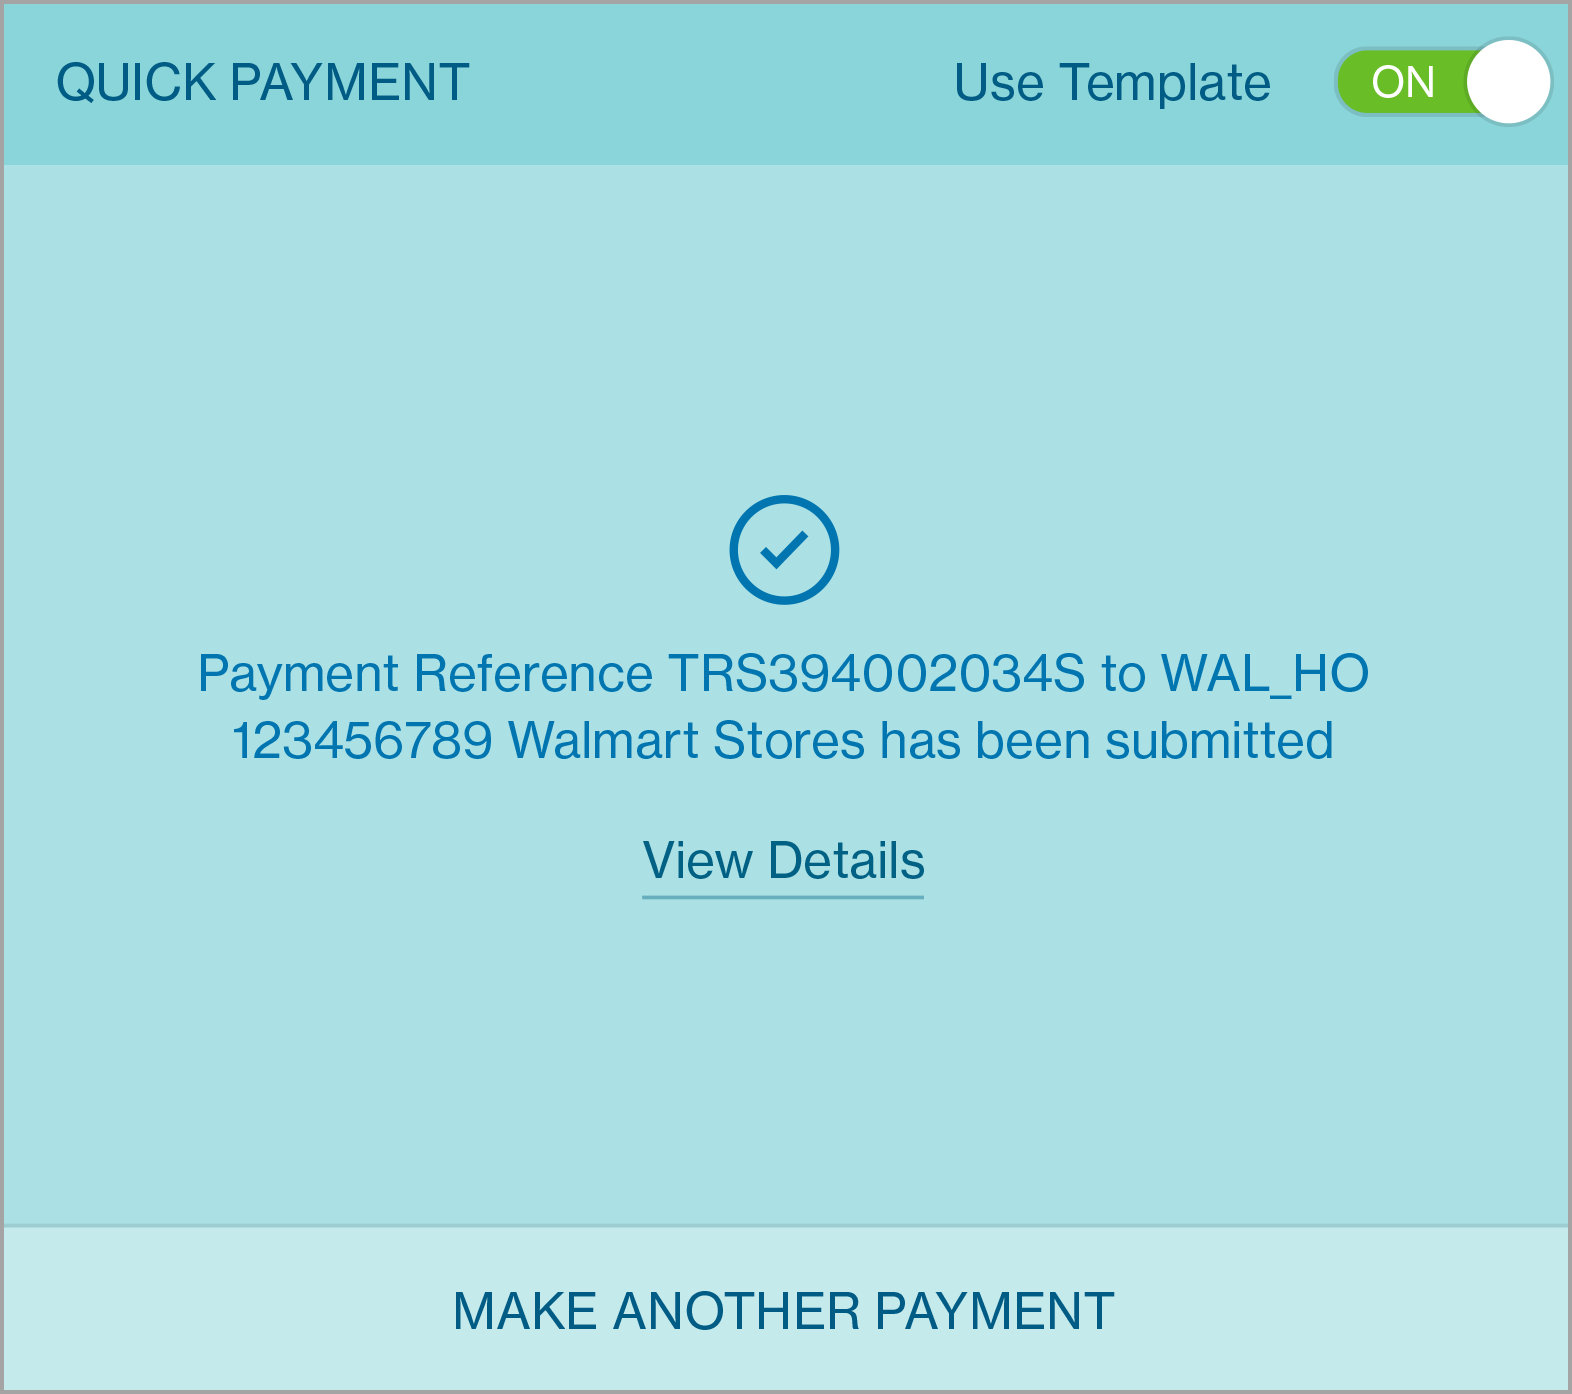
The payment confirmation message is displayed along with a View Details option below the message.
Manual Input
When you do not have/want to use a template, you can also initiate a quick payment without using a template.
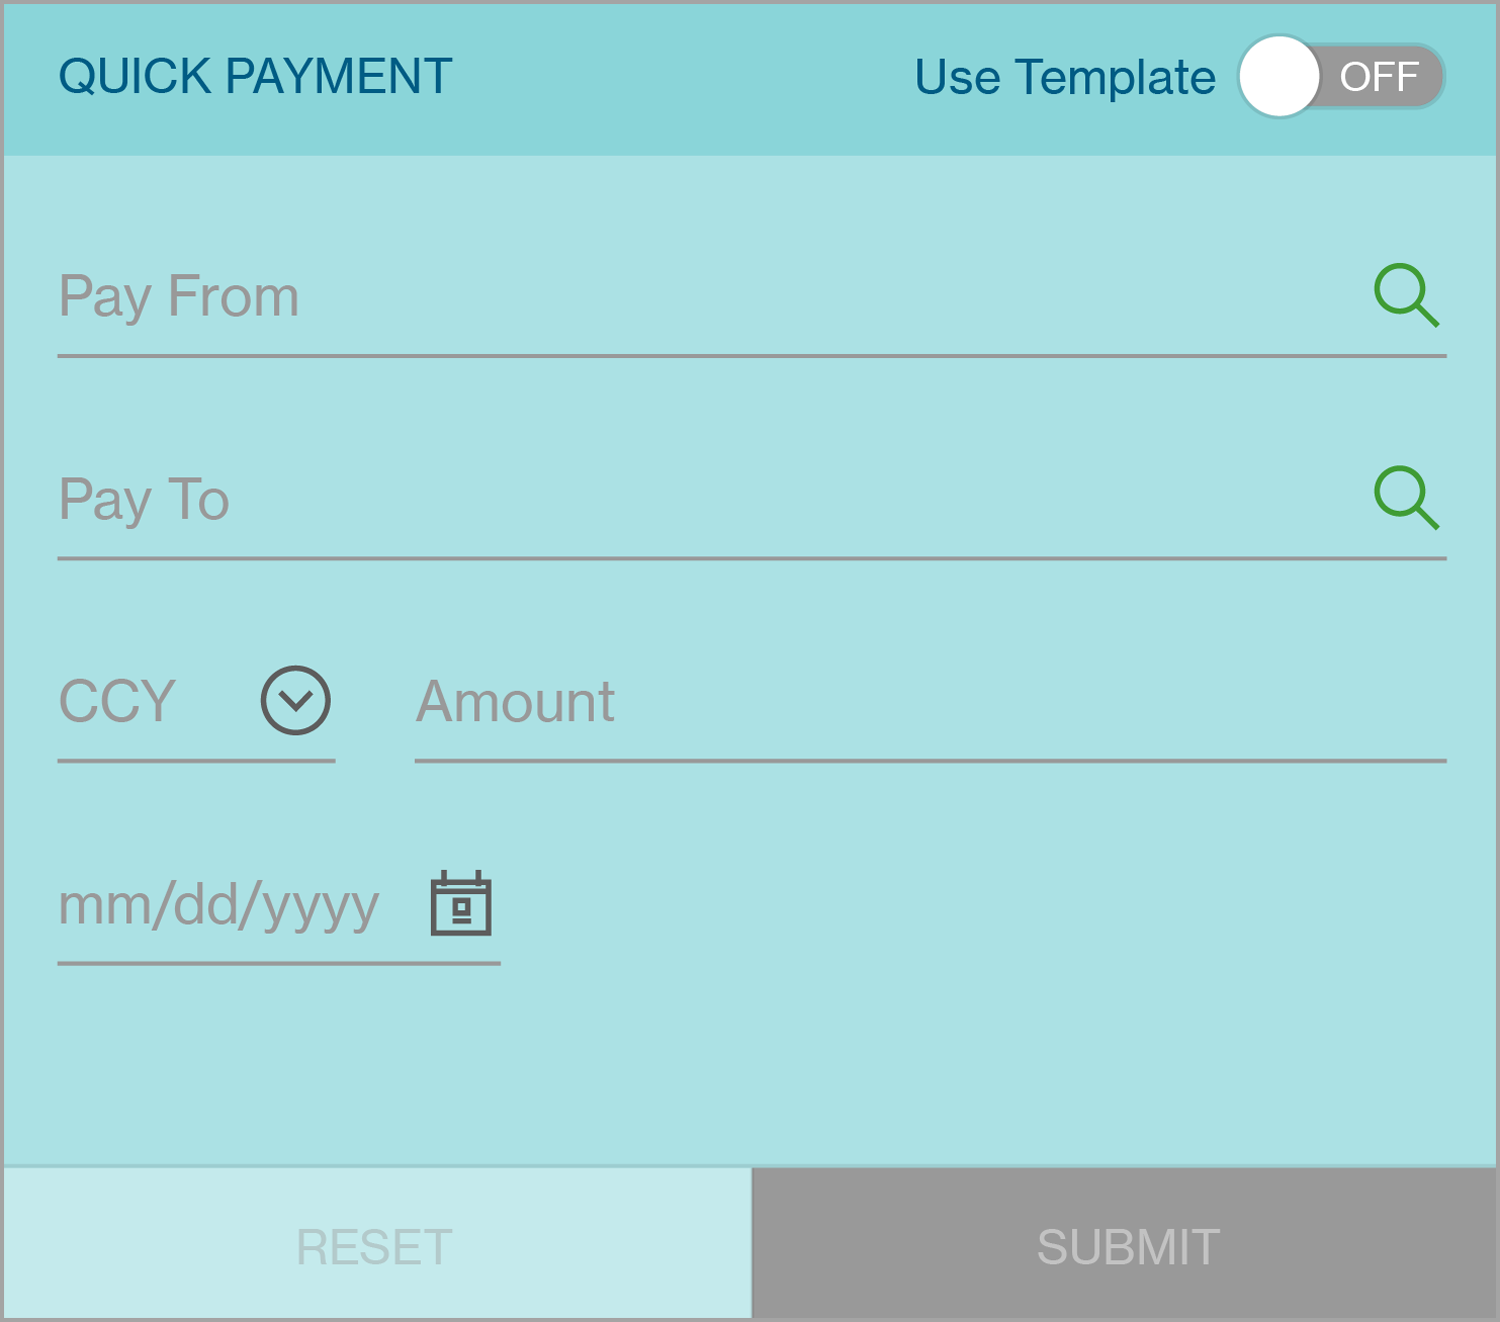
Firstly, make sure Use Template toggle is made OFF (Default state of the toggle is ON )
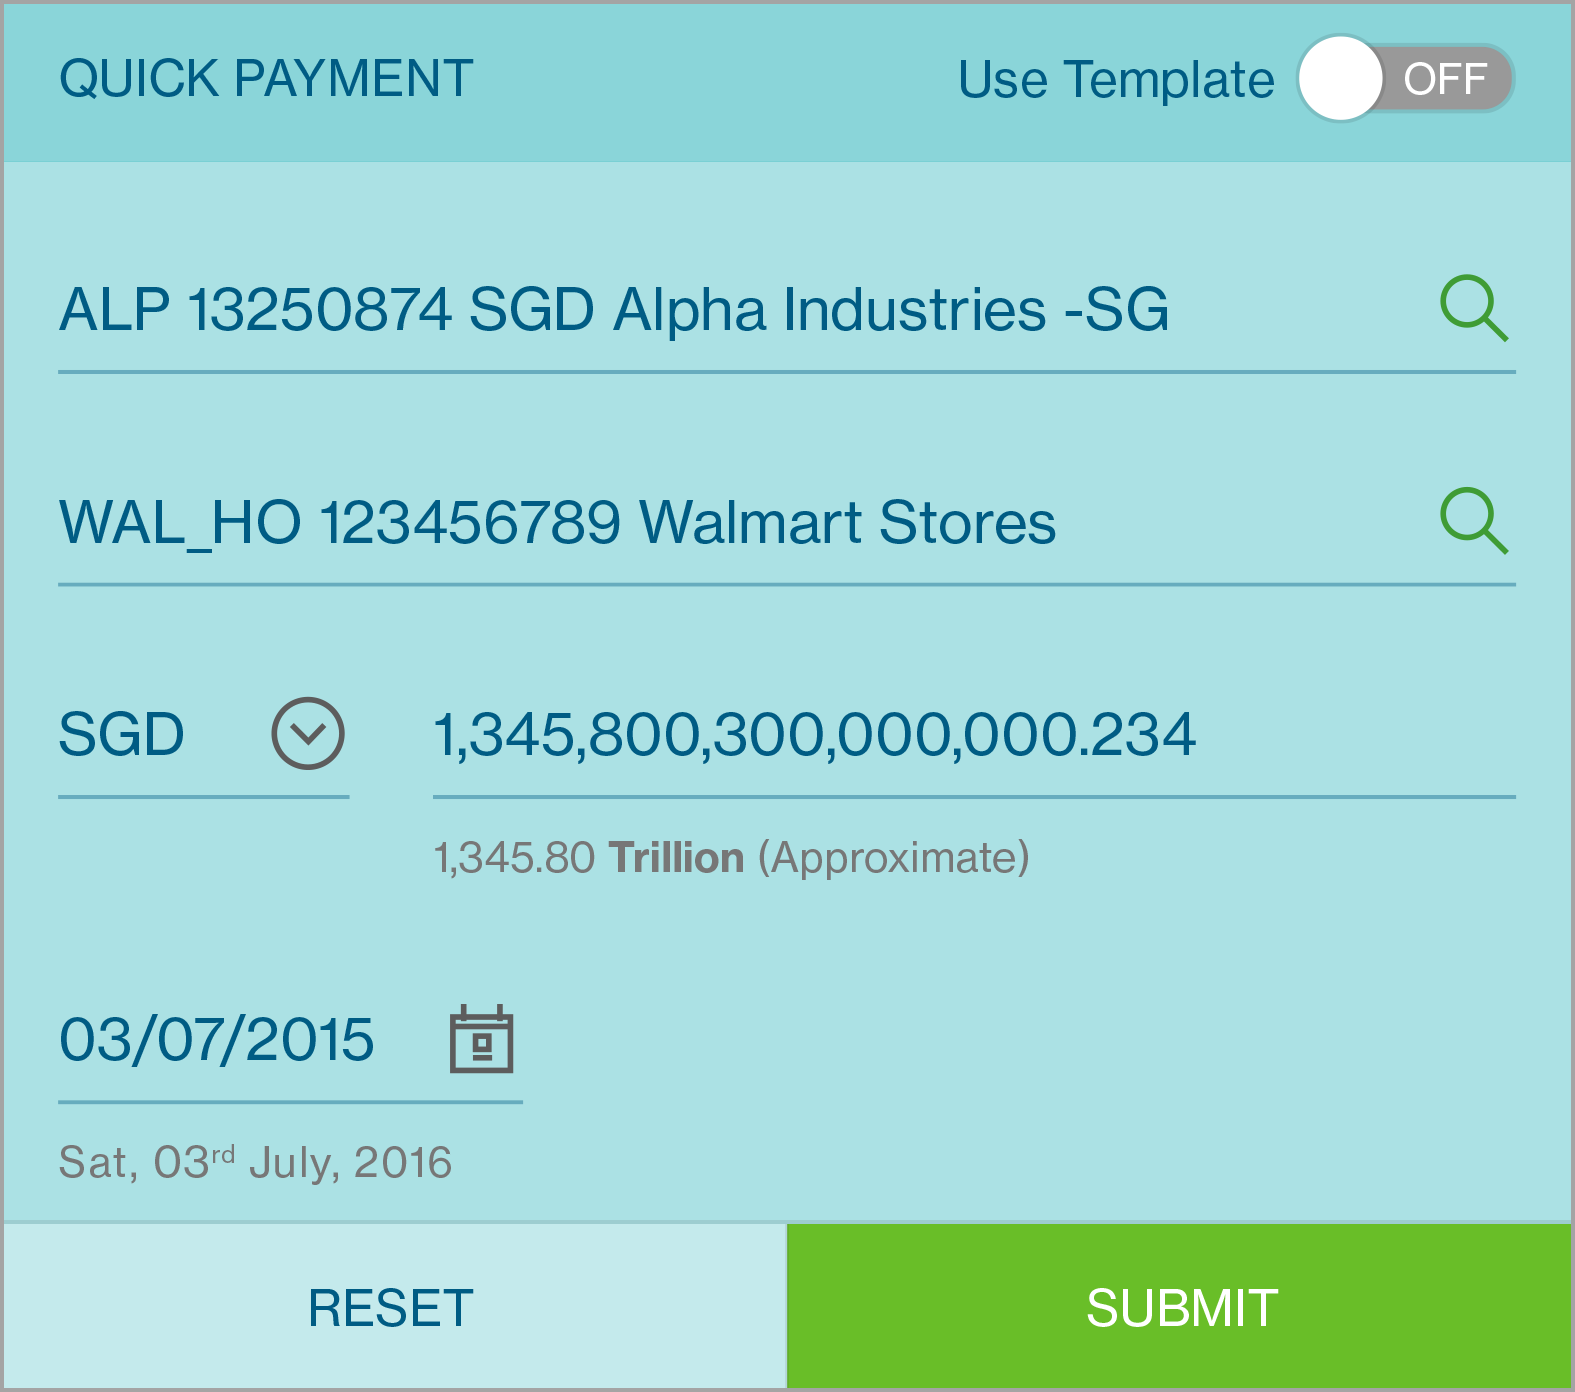
You can initiate the transaction by entering basic information (all fields are mandatory) :
- Pay From
- Pay To
Currency
- Amount
- Payment date
Then, you can submits the payment using Submit.
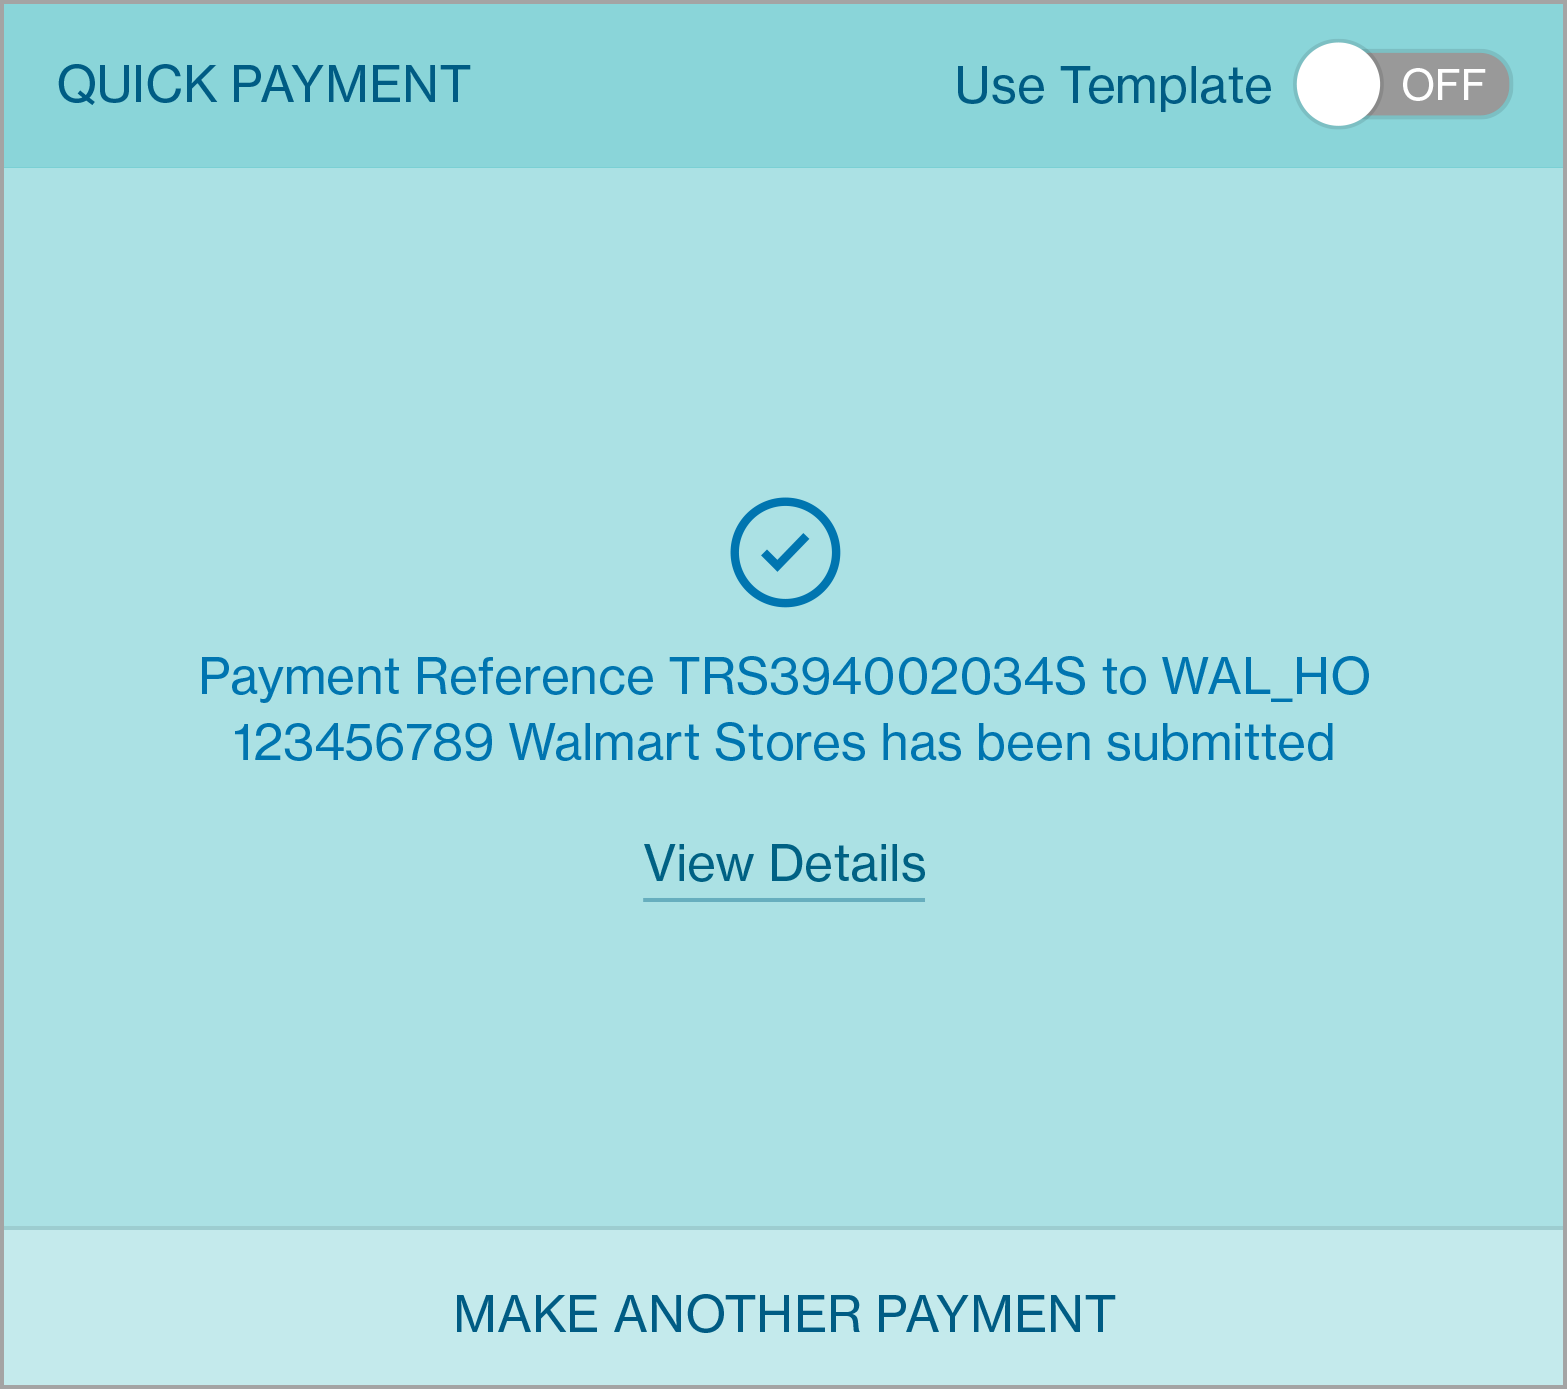
The payment confirmation message is displayed along with a View Details option below the message.
On Click of Submit if the Payment Failed
The reason for payment failure would be displayed as a short message in place of the confirmation message along with an option to Modify Details .
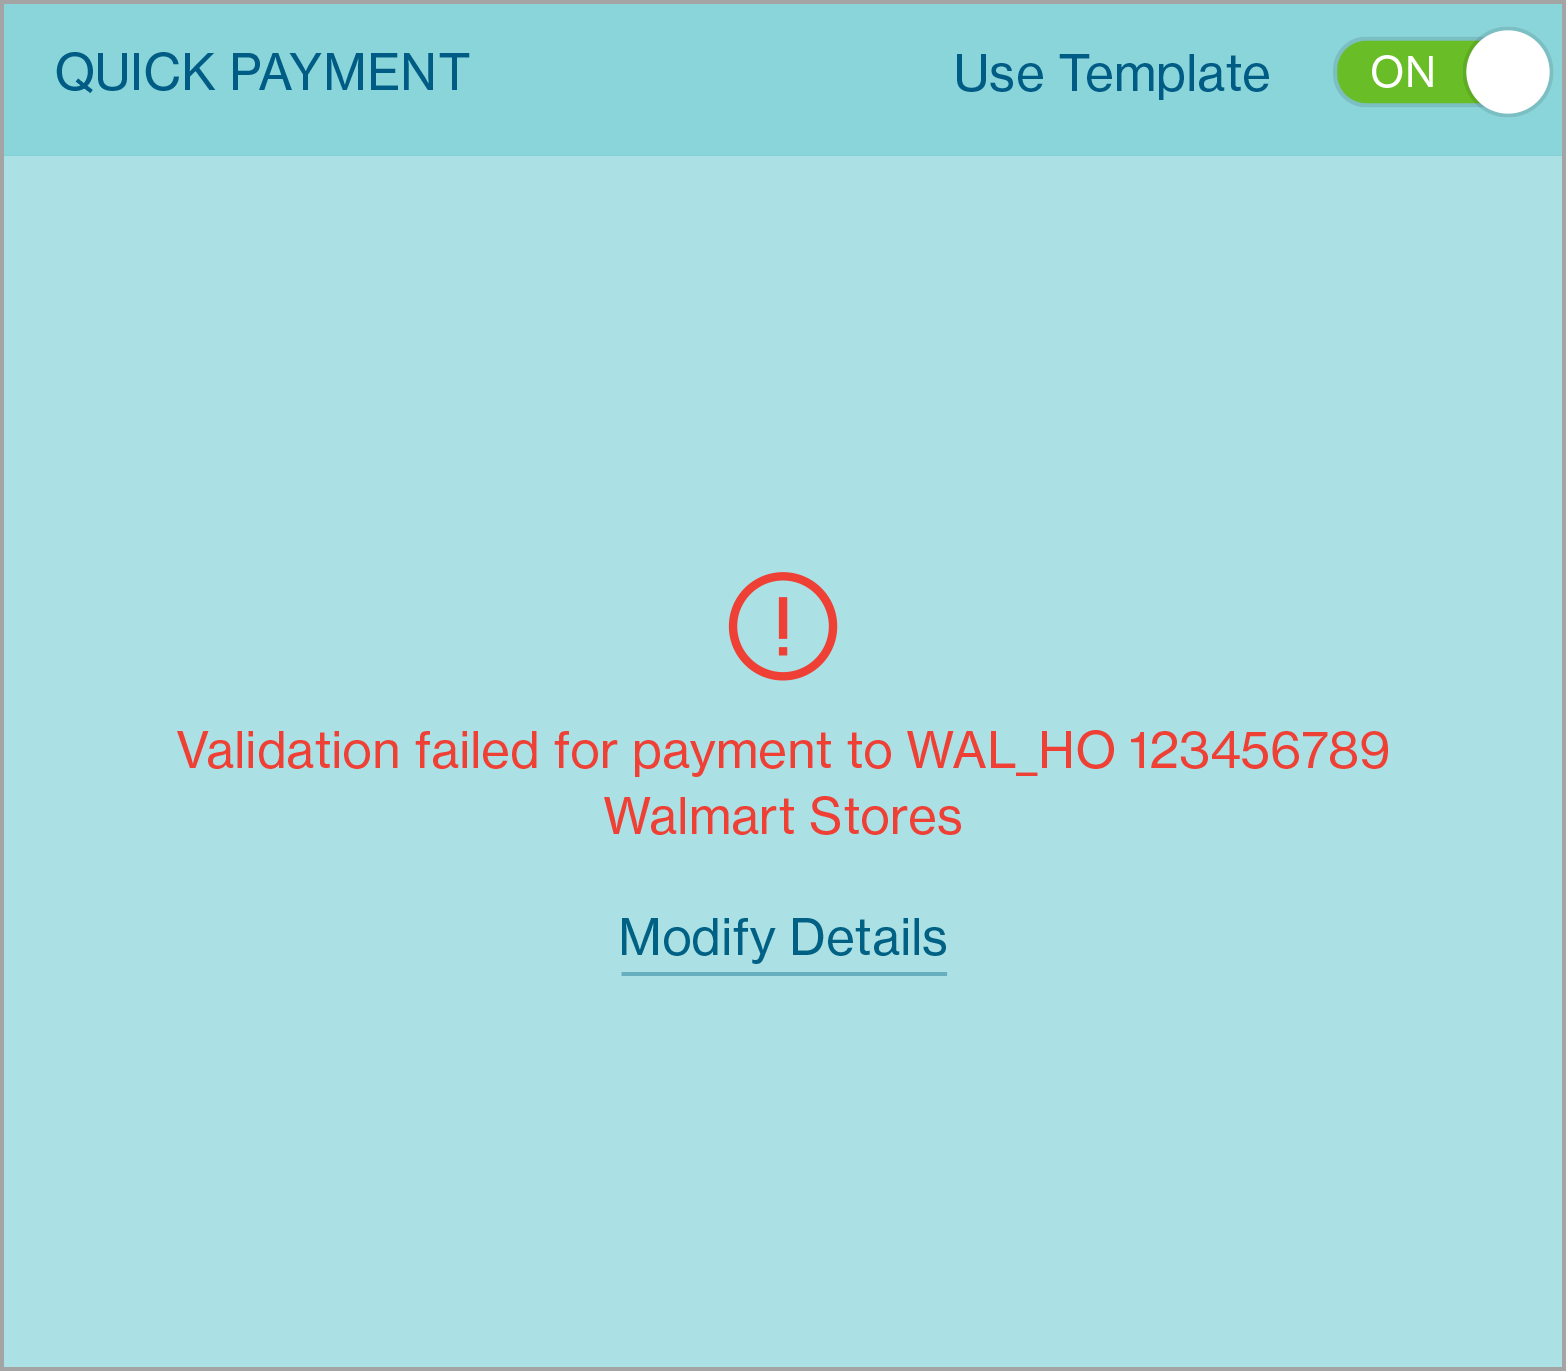
If you want to view the payment summary , the view details option should be clicked and this would display the entire payment summary.
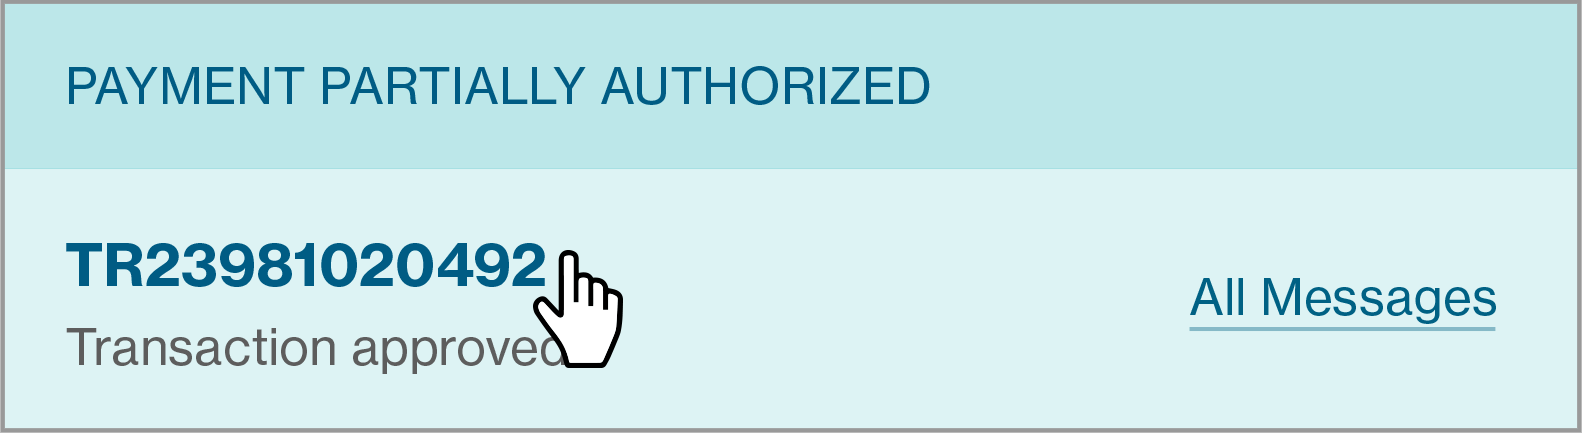
Individual Message Card
This card provides the user with a count of unread messages and details of the most recently received unread message .

When message is selected, further action option will be presented.
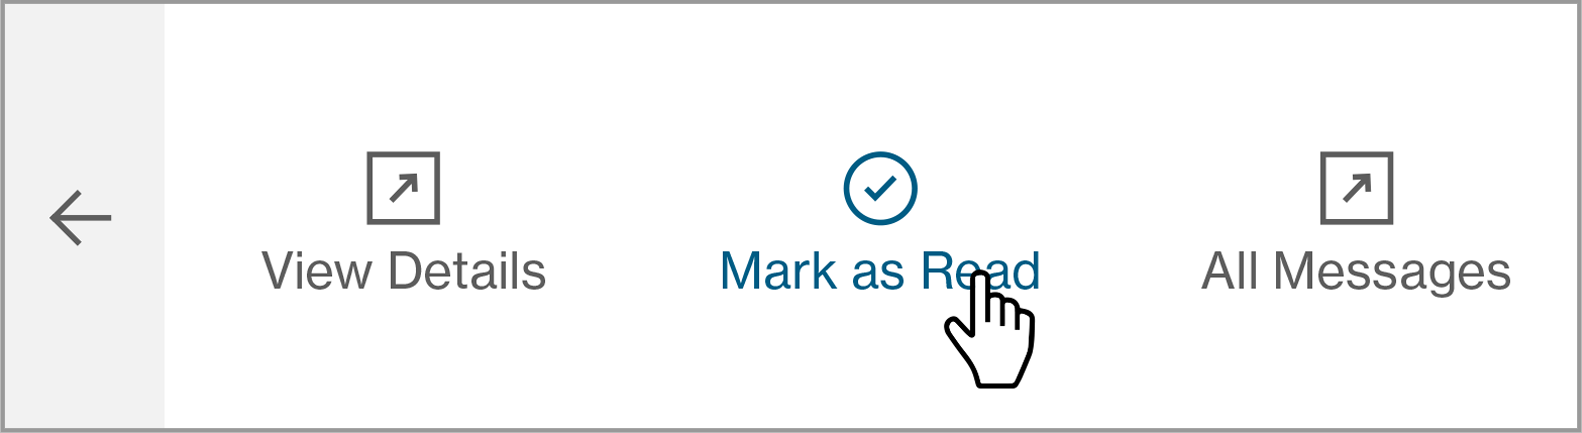
View Details
When “View Details” option is selected, the detail Payment Summary Screen will be presented.
Mark as Read
When “Mark as Read” option is selected, the next unread message will be presented in the card.
All Messages
When “All Messages” option is selected, the Message Center Screen will be presented with all the message header and details.
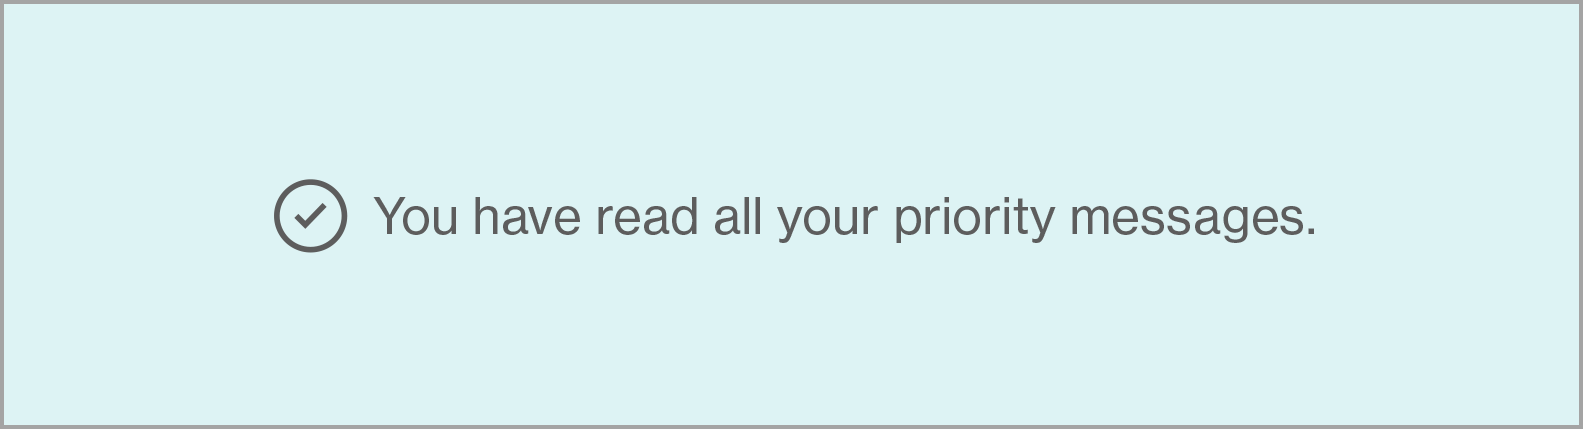
When all unread message has been displayed. The following screen will be presented to indicate no more outstanding message.
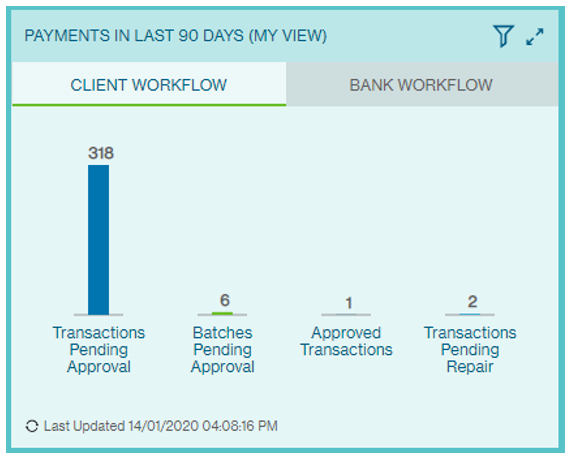
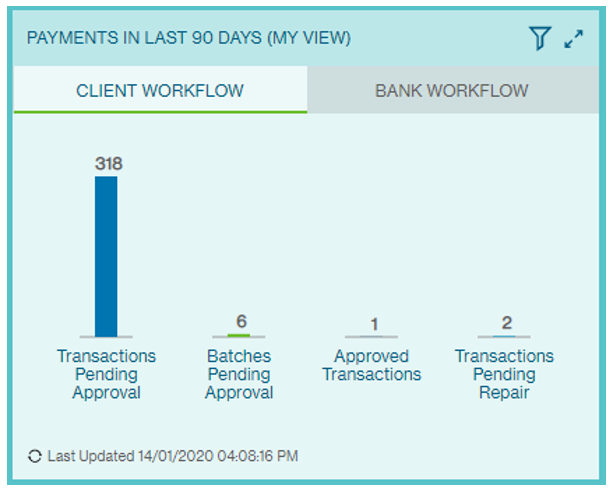
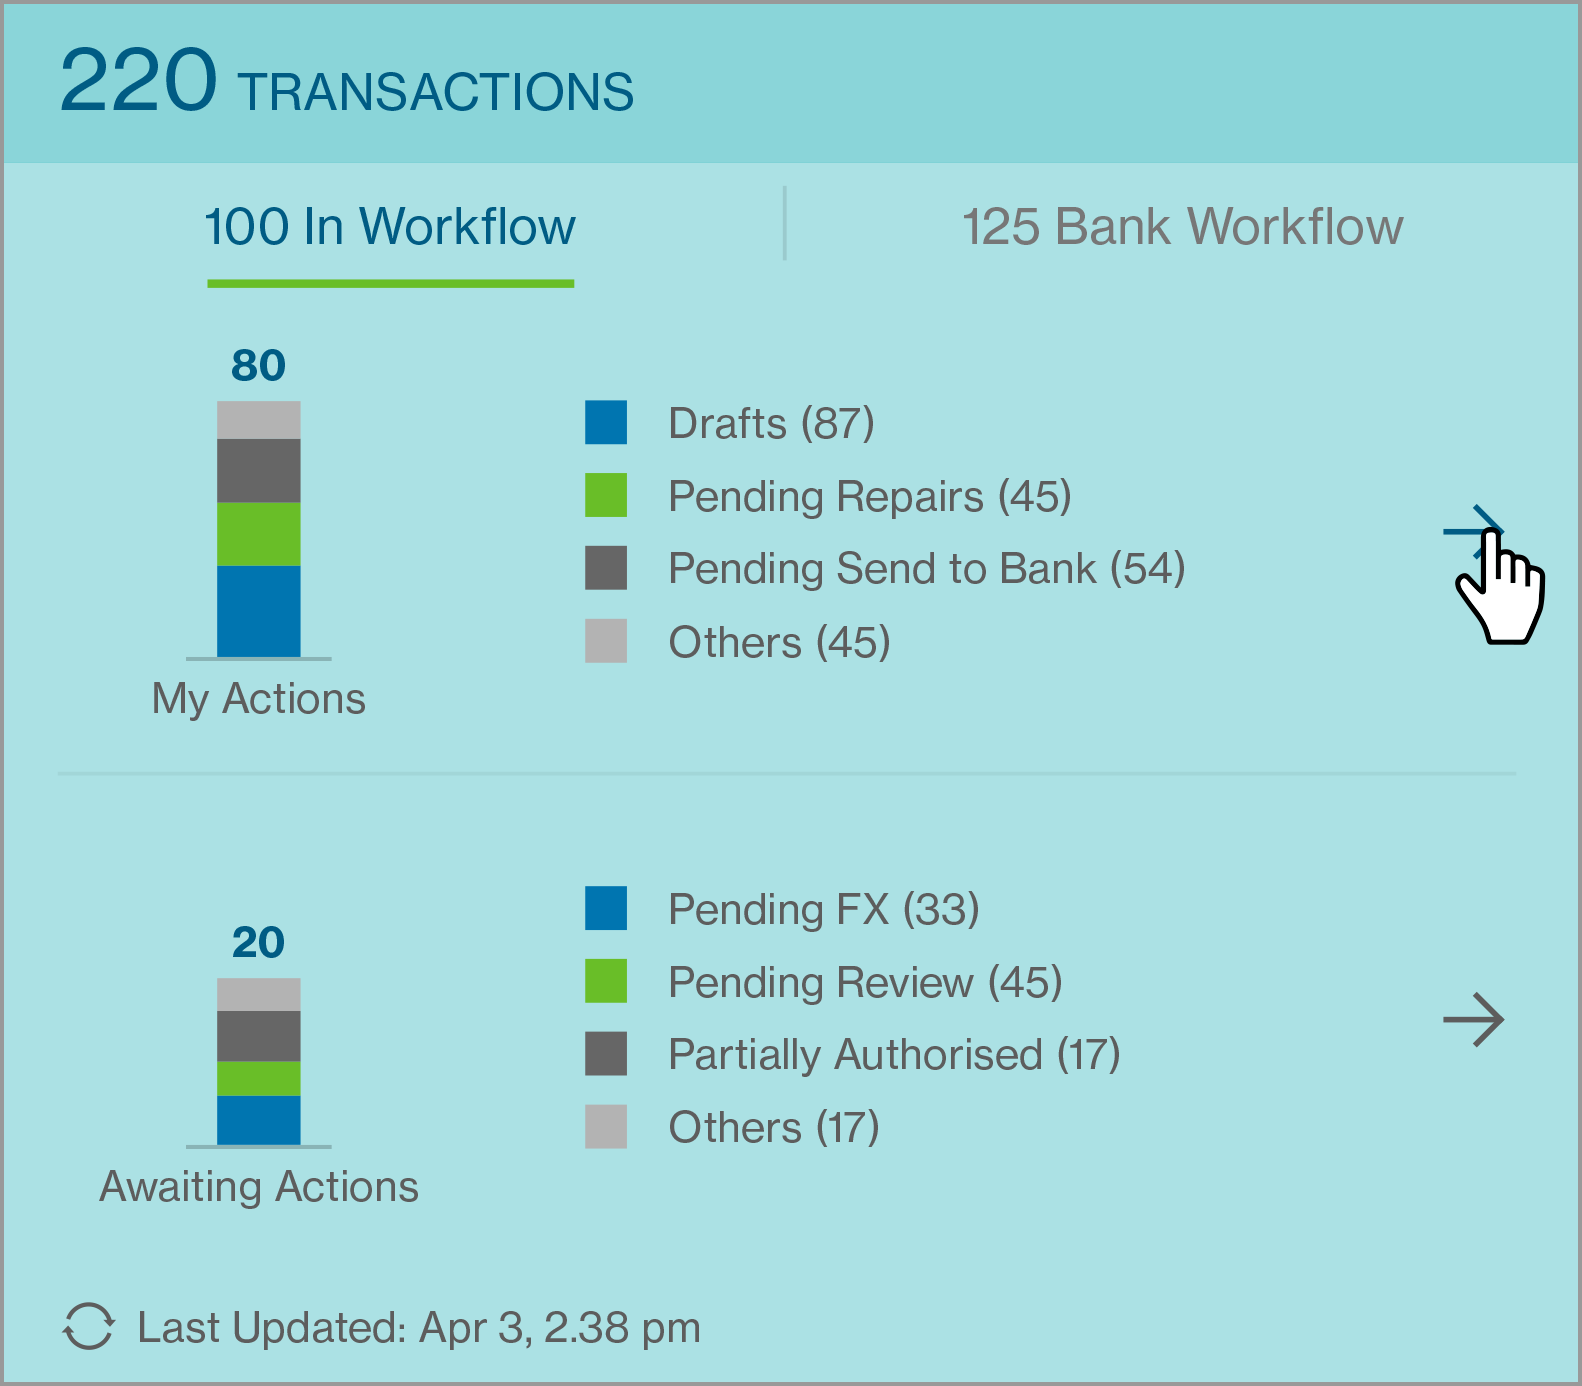
Transaction Status
Click on the filter button and choose to view transactions over a few time periods: 2 days, 7 days, 30 days and 90 days. To view transactions that have been submitted to the Bank for further processing, click Bank Workflow.
Click on the expanding arrows icon to get an overview of all payment transactions and the respective statuses based on the selected time period and view.
To obtain more information on the transactions under each transaction status, click on the transaction status.
Transaction Status Card
This card provides a quick summary of the various statuses of the transactions initiated by the group.
Clicking on arrow button will list all the instructions in the respective status on Manage Payment Screen .
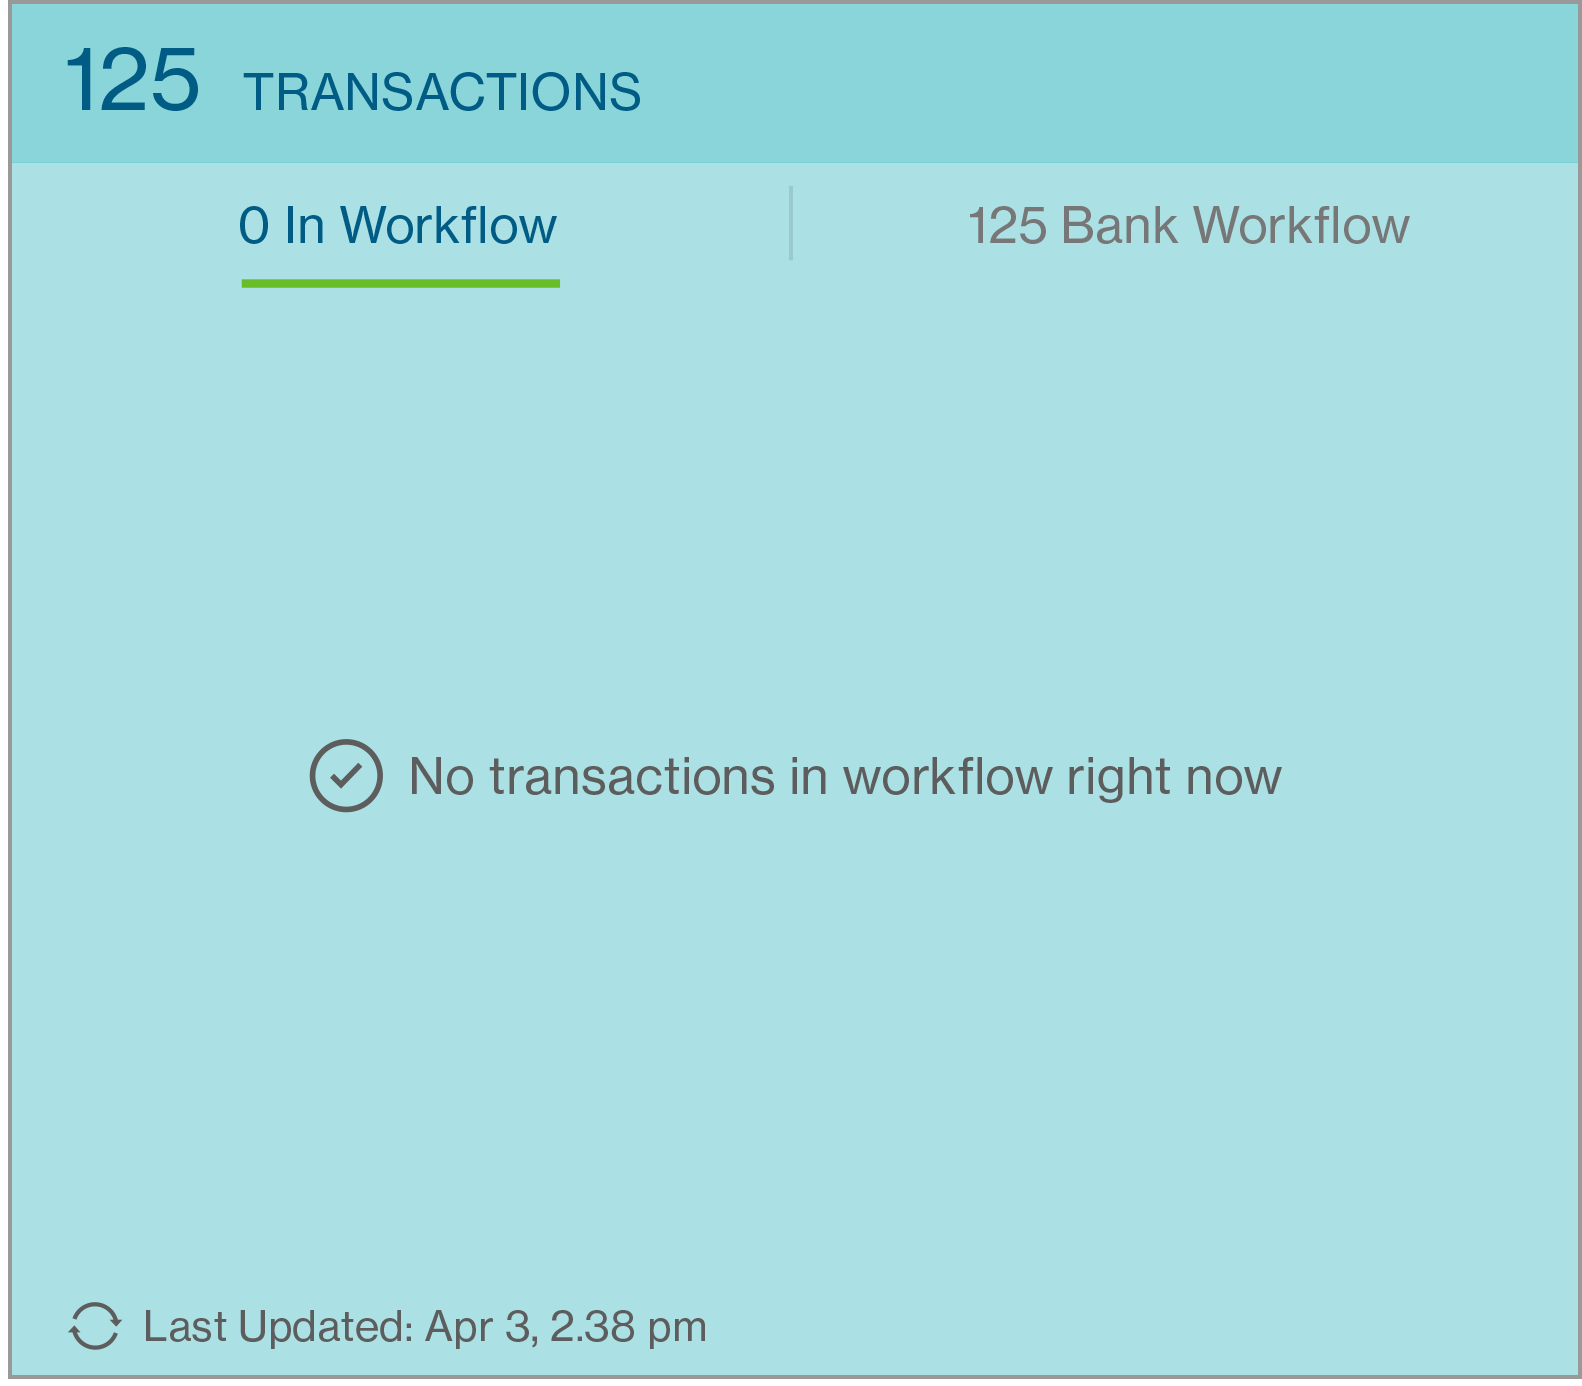
Once all the transactions are completed, the transactions status chart will be removed, and it will indicate “No transactions in workflow right now”.
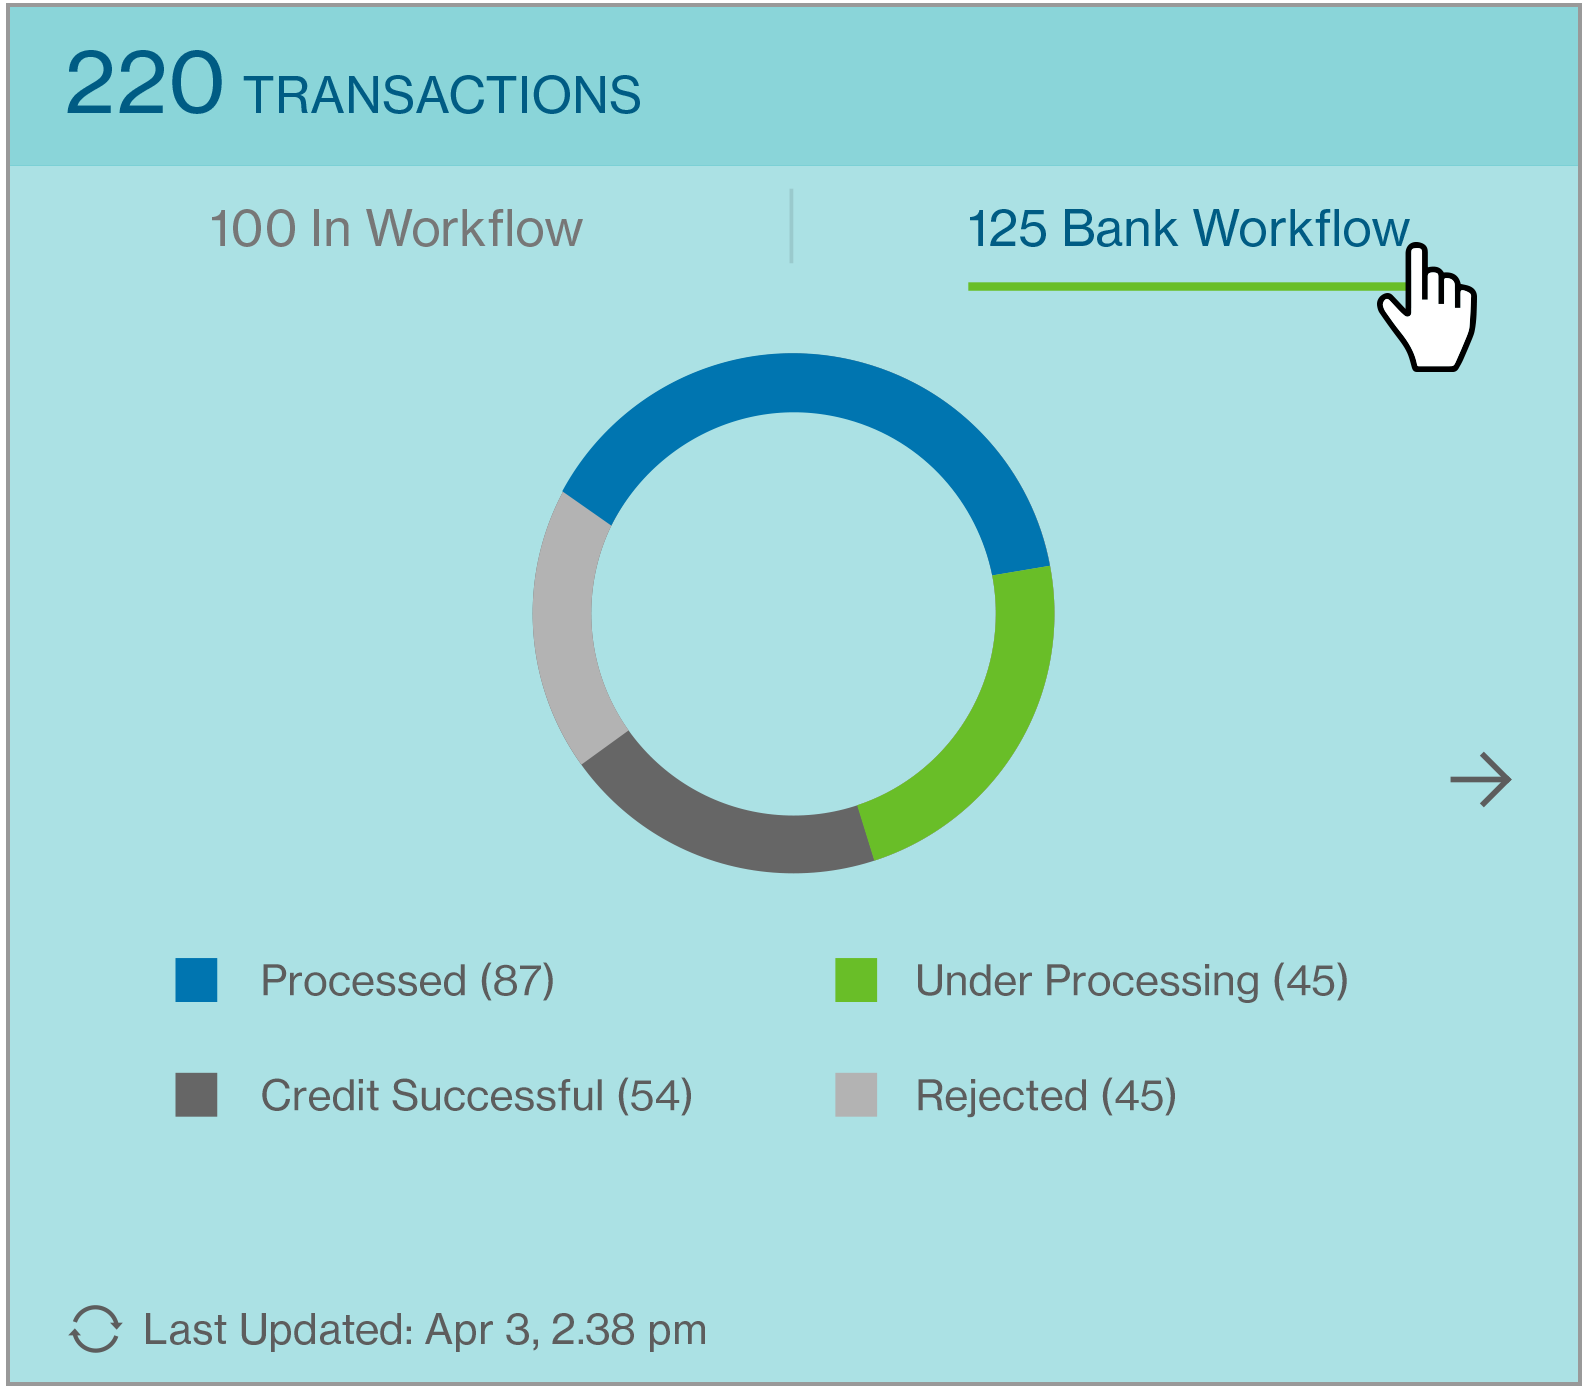
When the ‘Bank Workflow’ label is selected, the card will show the detail of the transaction status in pie chart. Transactions present here are all already “Submitted” to the Bank - now are awaiting for further processing.
Understanding Transaction Statuses
In Workflow
Completed
Payment has been created and submitted for further actions such as Authorisation or Batching.
In Workflow
Pending FX
Applies to cross-currency payments where FX has not been assigned during payment creation, instead “Assign FX Later” was chosen.
In Workflow
Pending Repair
Instead of rejecting a transction / payee creation instruction, the reviewer / approver will have the option to insert comments against the field that required.
In Workflow
Partially Authorized
Individual payment / Batched payment have been authorised by one or more authorisers. However they have not been fully authorised as yet.
In Workflow
Fully Authorized
All authorisers have successfully authorised the Payment / Batch and is pending to be Sent to the Bank.
In Workflow
Draft
Payment has not been submitted and is still in “Draft” mode. This status will also apply to payments that have failed validation during “Bulk Import”.
In Workflow
Rejected by Approver
Individual payments have been rejected by one of the approvers. The reason for rejection will be available in the detailed view.
In Bank Workflow
Processed
Payment has been successfully processed by the Bank.
In Bank Workflow
Released to bank
Payments have been Sent to Bank for further processing.
In Bank Workflow
Received
Payments have been received by the Bank for further processing upon Authorisation.
In Bank Workflow
Under Processing
Payments sent to the bank have been successfully received and are being processed.
In Bank Workflow
Rejected
Payments have been rejected by Standard Chartered. This could be due to various reasons, as available in the detailed view.
In Bank Workflow
Credit Successful
The credit to the beneficiary’s account has been successful.
In Bank Workflow
Credit Rejected
The payment to the beneficiary has been rejected by the beneficiary bank. This could be due to reasons like “Invalid Account”, etc. Reason for rejection will be available in the detailed view.
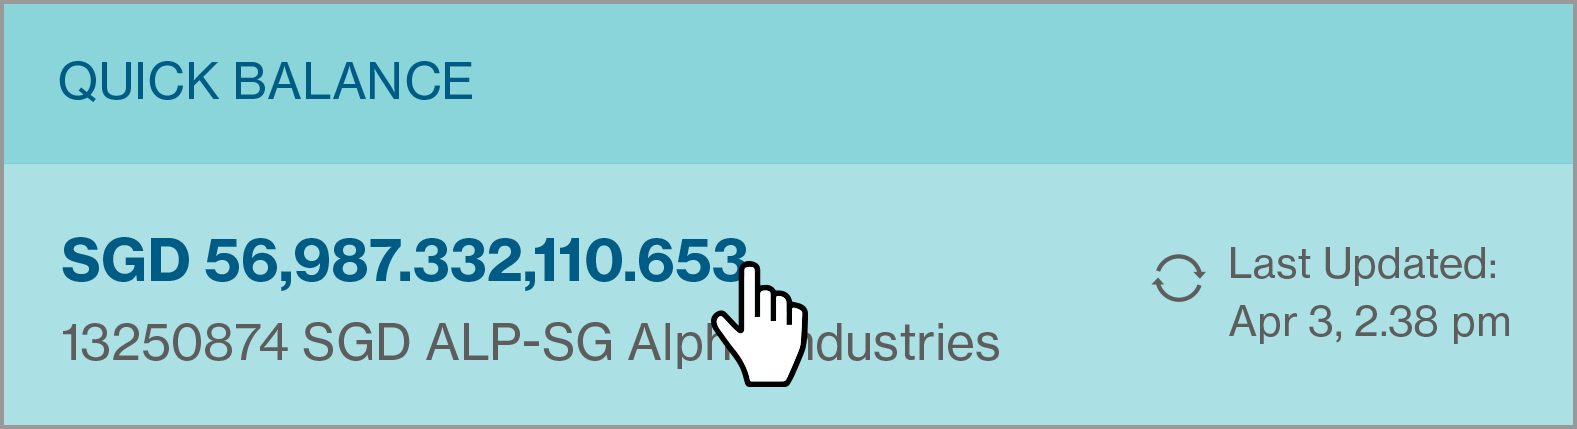
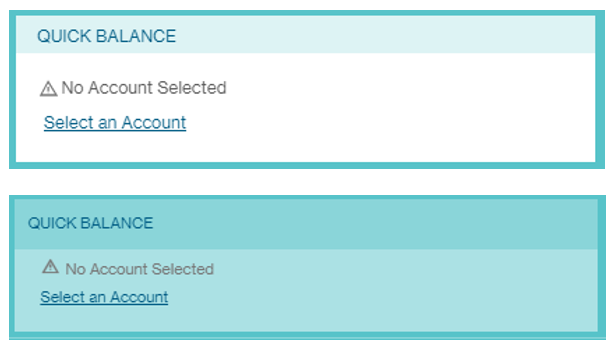
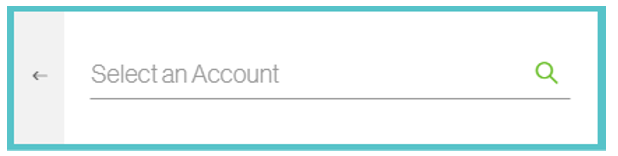
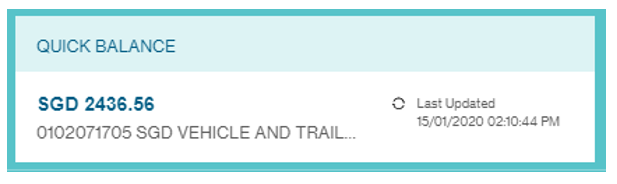
Quick Balance Card
This card provides a quick view of the balances of account selected to be displayed here without necessarily accessing them via the Menu. If there is no account selected, the card will prompt you to select an account.
Type in keywords to search for the account in the populated dropdown list.
After clicking on the selected account, the balance will be reflected in this card. To change to another account, click on the card.
Markers for the various account type:
Frequently used account ![]()
Favourite account ![]()
Recently used account ![]()
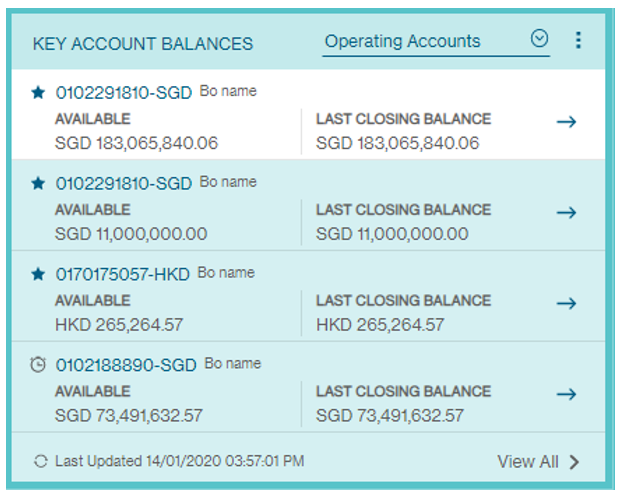
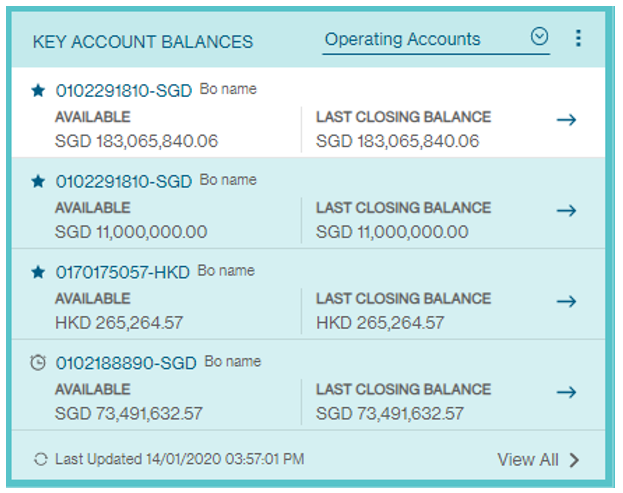
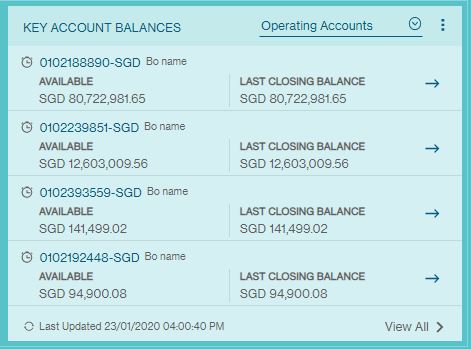
Key Account Balance Card
This card provides a quick view of the balances of accounts selected to be displayed here without necessarily accessing them via the Menu. Amount displayed in the widget has been properly formatted with commas and decimals. Click on the dropdown arrow to switch between Operating, Loan and Deposit accounts.
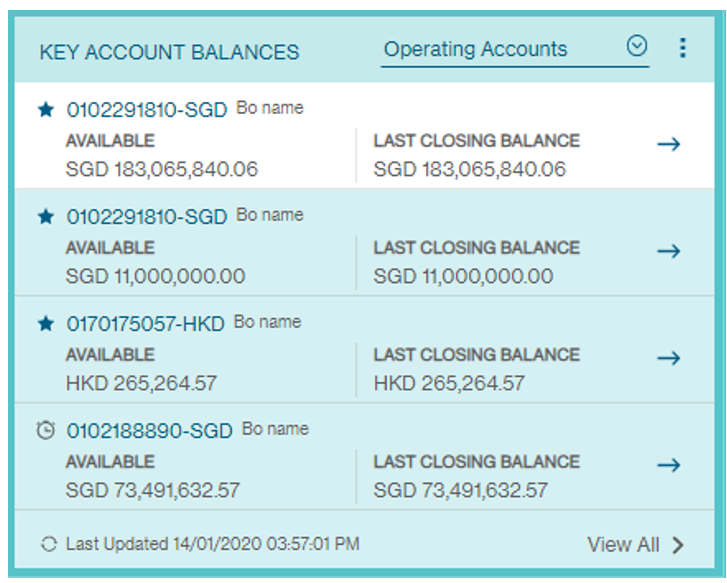
The default Key Account Balance Card will display based on the Account Type in the following order:
![]() Favourite account
Favourite account
![]() Recently used account
Recently used account
you will be directed to the account details page where you can also view the account details for other accounts across your Operating, Loan, and Deposit accounts.
Key Account Balances List View
You can click on View All option on the bottom right corner. All the accounts that you have entitlement to and all the transactions that belong to the accounts will be presented with the Key Account Balances List view.
The left pane lists all the accounts the user has entitlement to. The right pane or the main list contains all the transactions that belong to the account selected in the left pane.
The accounts are listed by listing using the following criteria:
- The favourite accounts are listed first.
- All other accounts are then listed and sorted alphabetically in ascending order
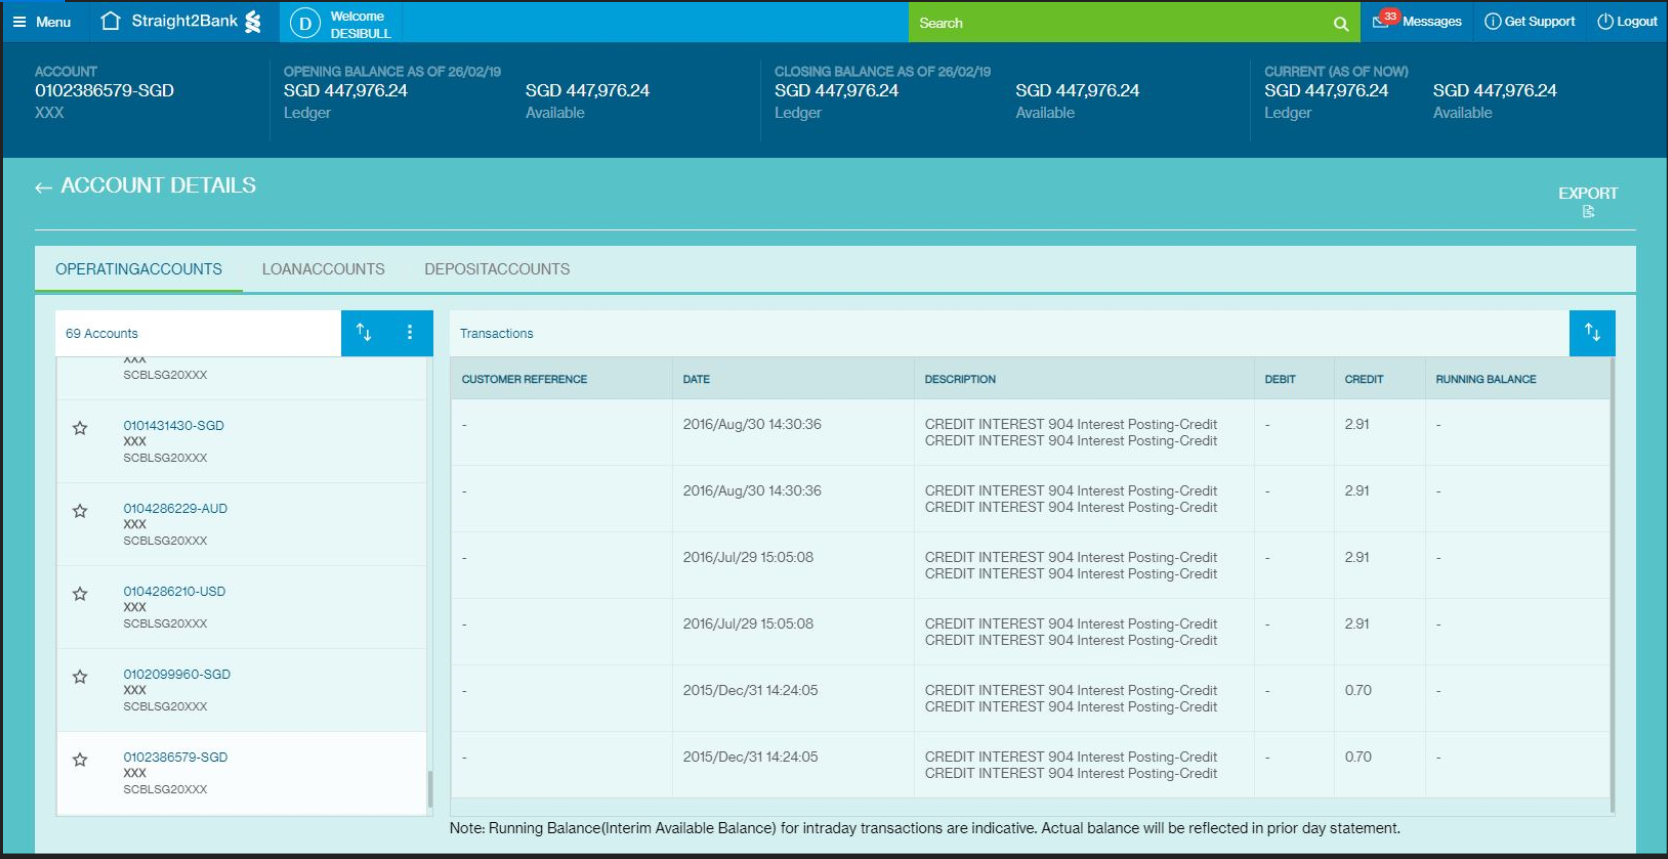
You can use the filter button to sort the account list in ascending/descending order, or sort transaction list via Amount / Value Date.
You also have the option to view the account balance in base currency equivalent (BCE) or account currency equivalent (ACE). The selection will be saved for future display.
Clicking on the Back button will take you back to the Dashboard page view.
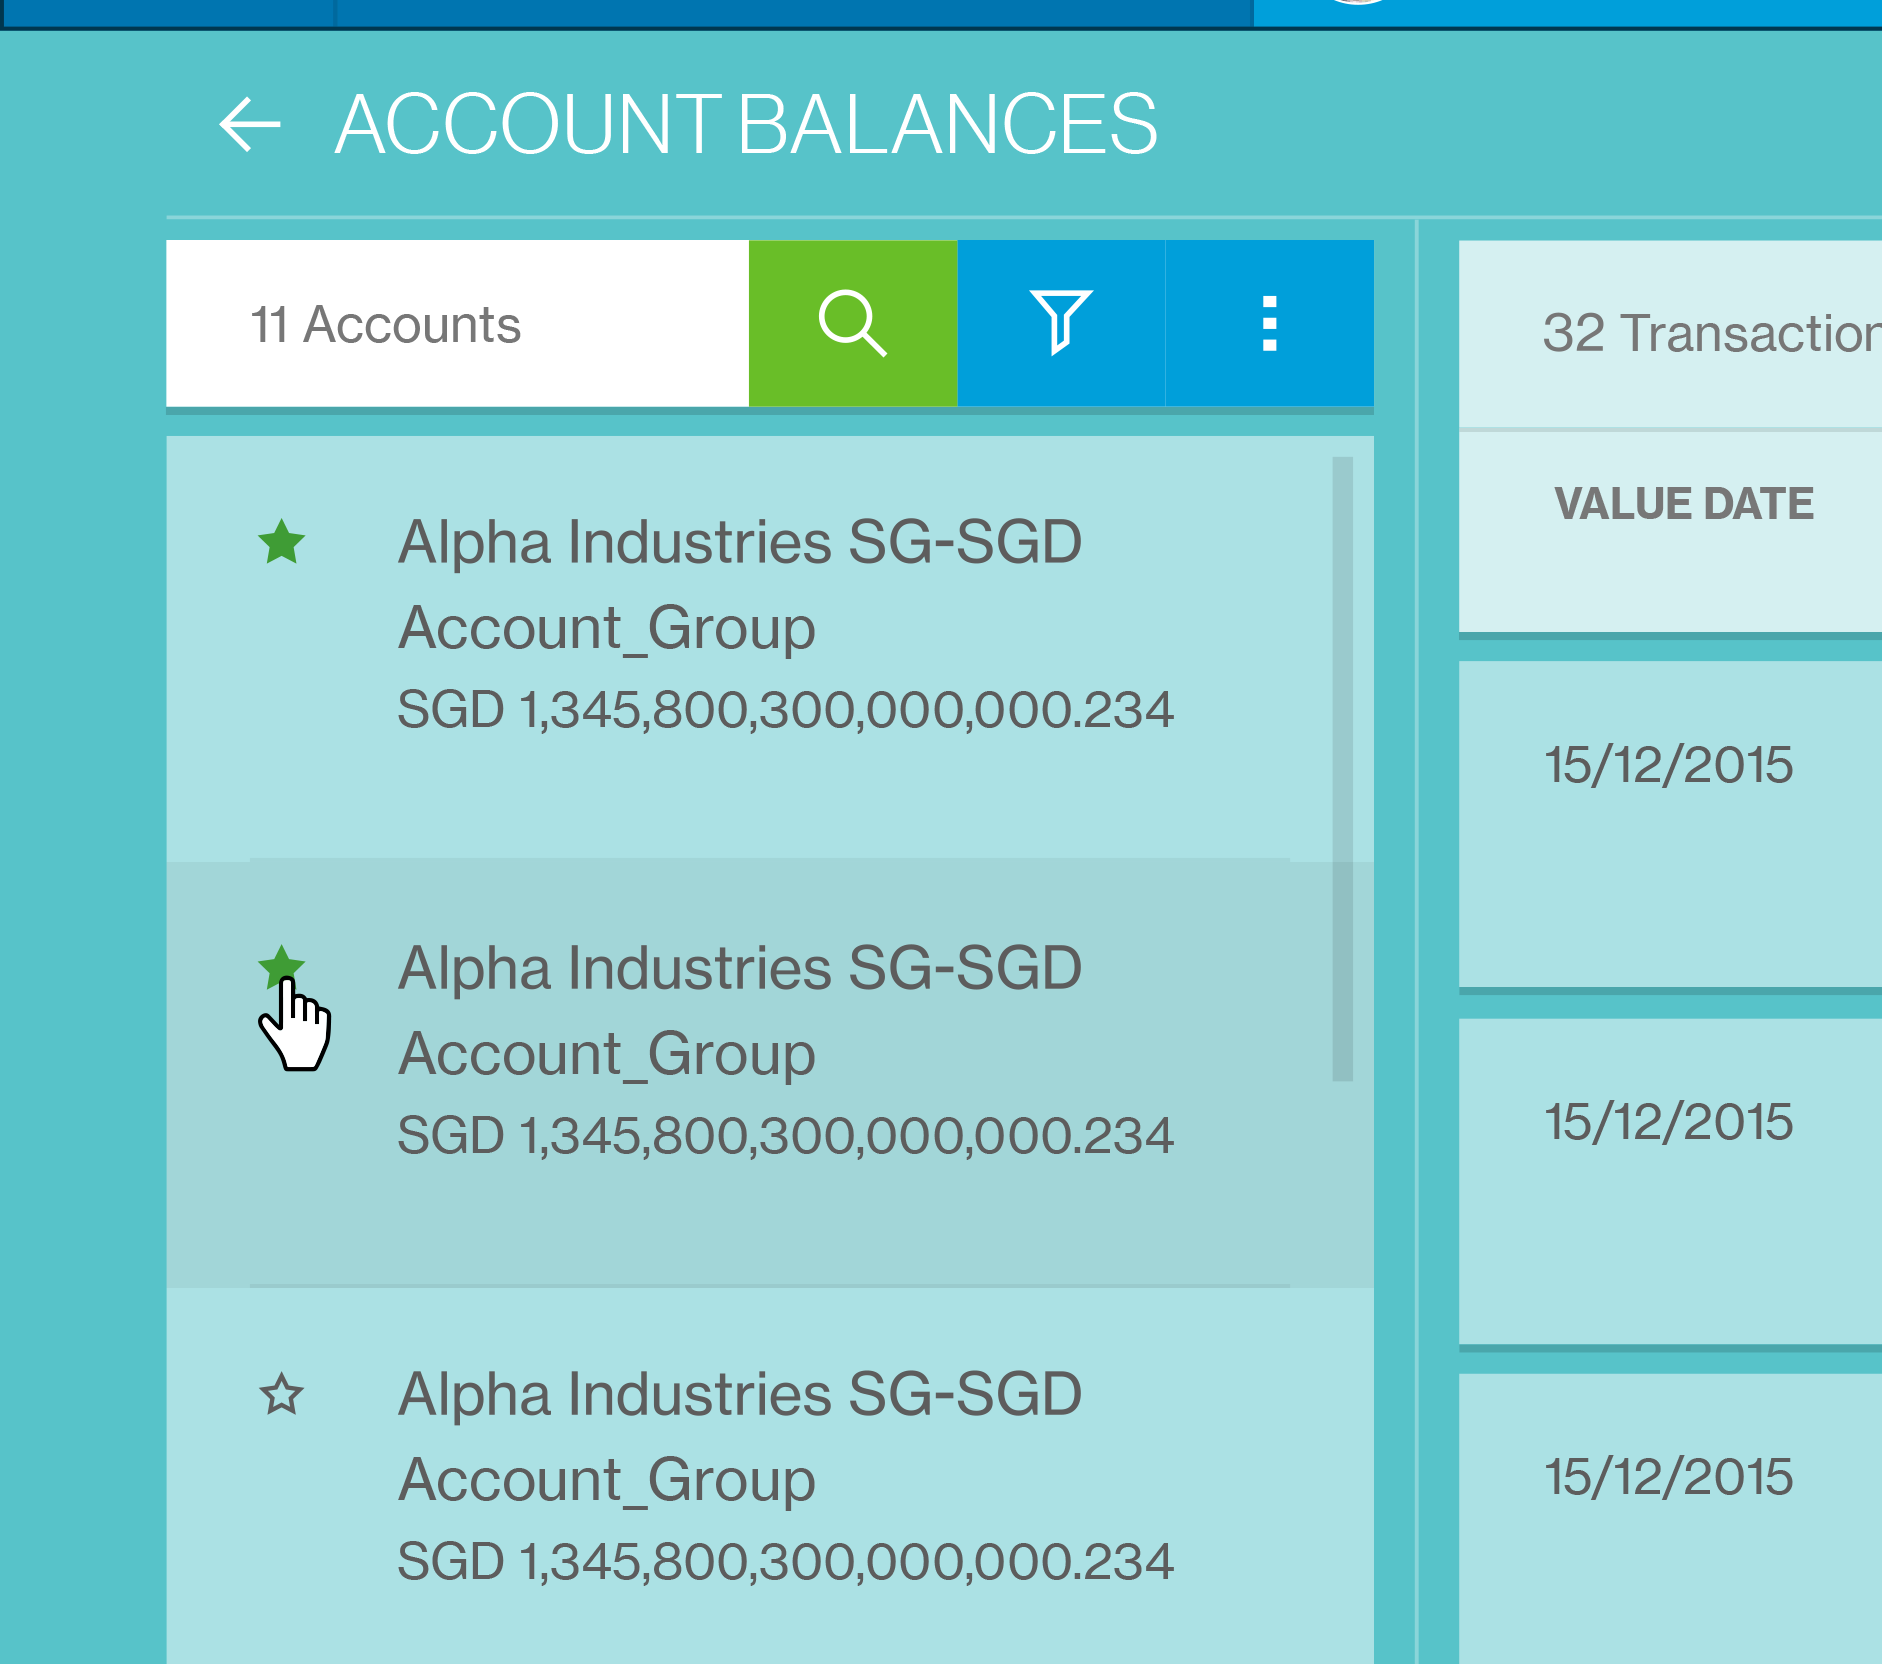
Favourite Accounts
In order to mark on or more accounts as Favourite Accounts , you can click on View All option on the bottom right corner. All the accounts that you have entitlement to and all the transactions that belong to the accounts will be presented with the Key Account Balances List view.
The left pane lists all the accounts the user has entitlement to.
Favourite account will be marked once the user has clicked star icon of the selected debit account.
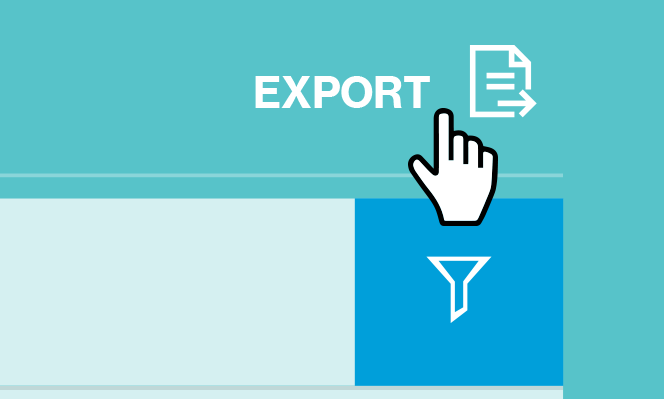
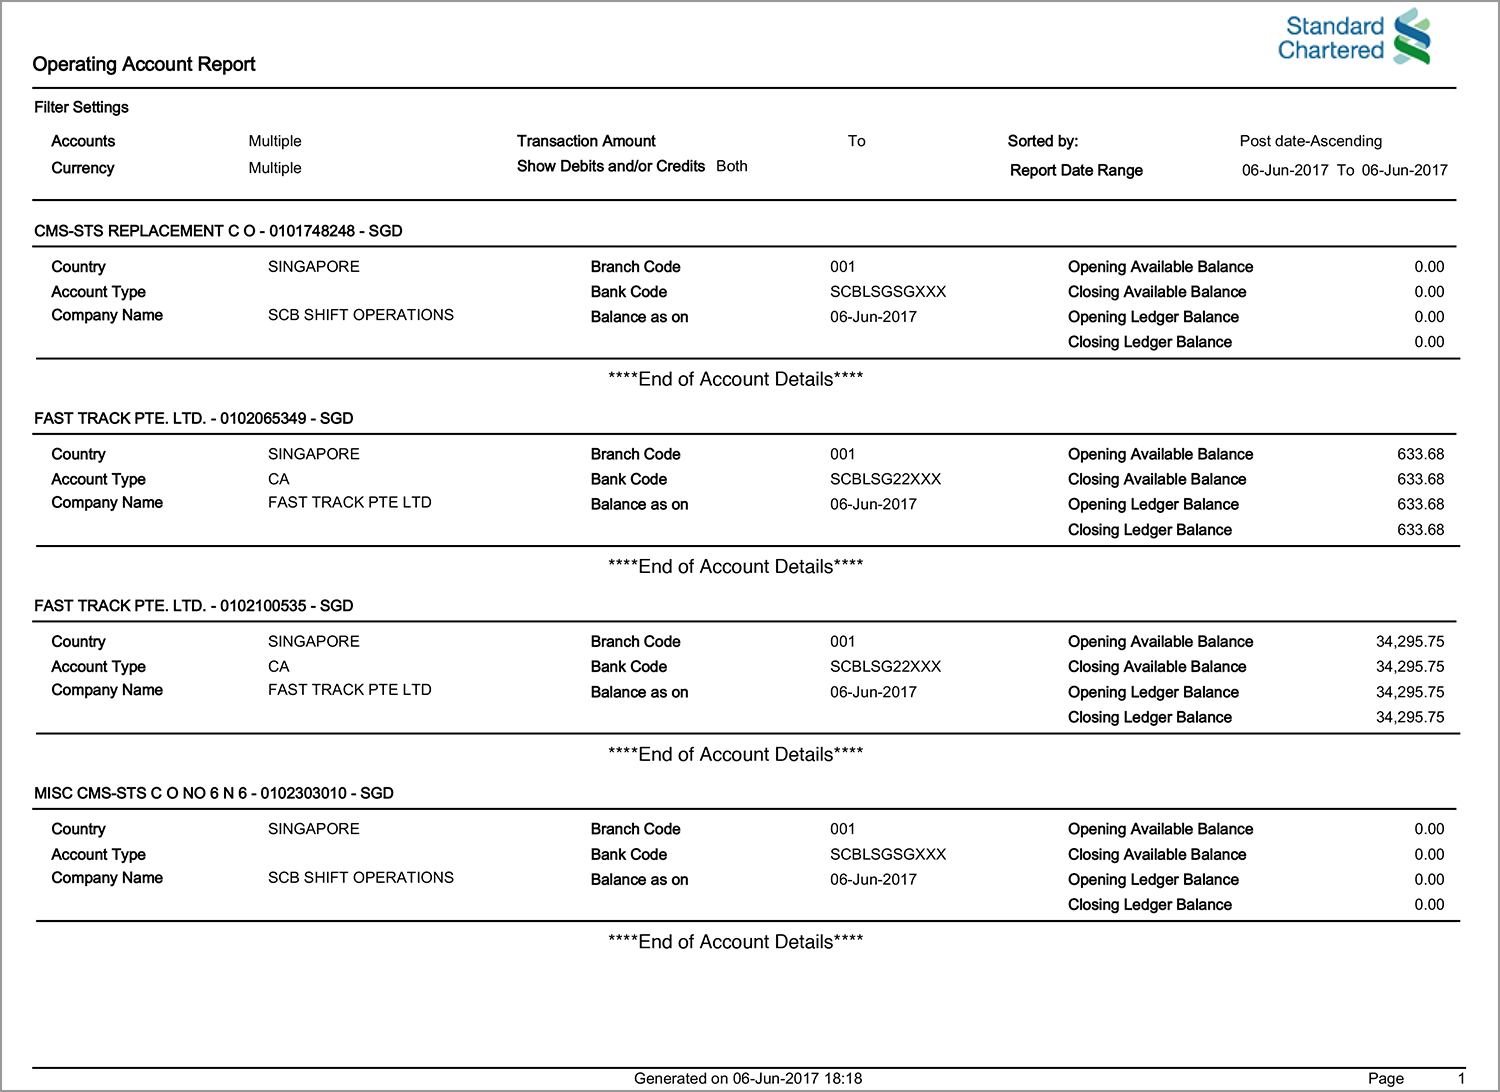
Export Account Balances
You can clicks on Export option on the top right corner of Key Account Balances List View screen.
You will be given the option to select the time period (Date Range Filter) you want to export account balances data:
- The filter is mandatory and the de fault value shown is for 1 month with the t o date as the current date
- You can select the date range for a maximum of 3 months only: in case the range selected is greater than 3 months, error message is shown: "The selected date range can not exceed 3 months. Please select the dates accordingly."
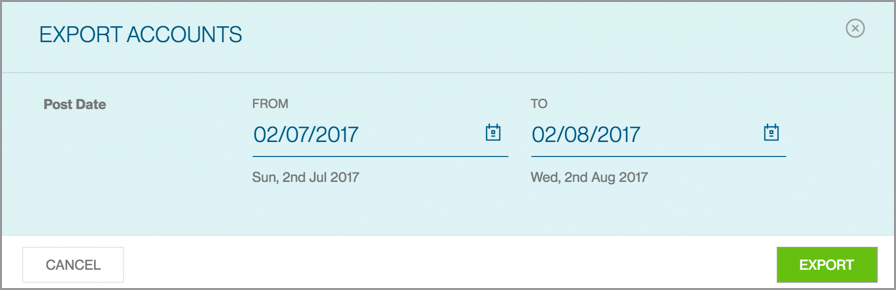
The list of transactions of all the accounts as per selected will be downloaded to the local driver in PDF format:
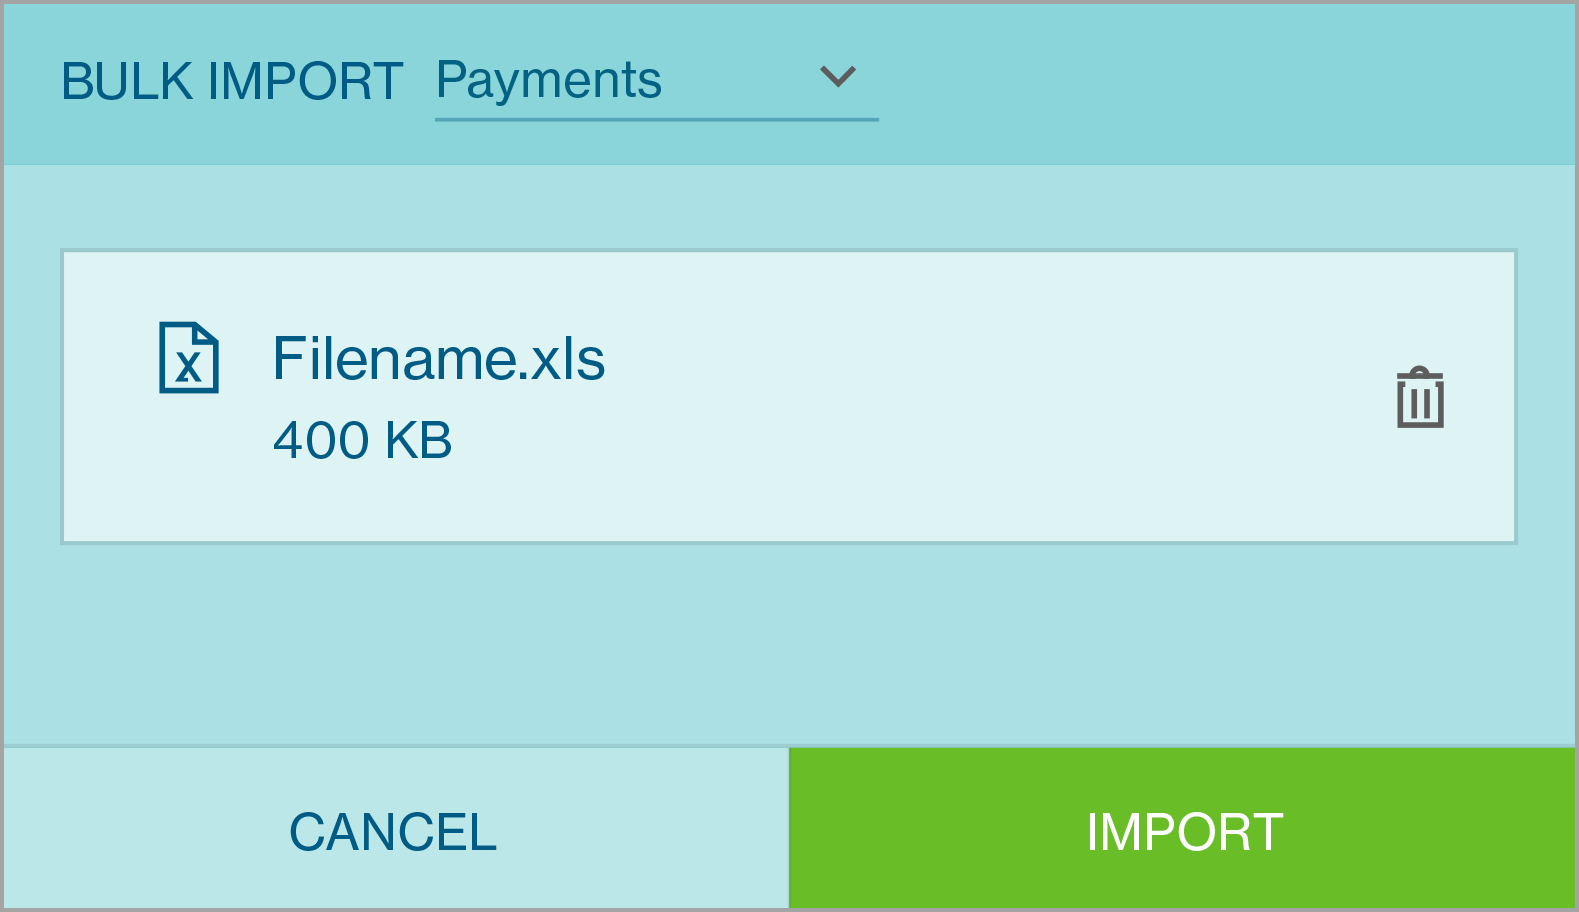
Bulk Import Card
The “Bulk Import” feature allows you to upload several payments generated out of Enterprise Resource Planning (ERP) or accounting software onto Straight2Bank in bulk . It saves time in re-doing these transactions on Straight2Bank and improves efficiency. The file to be uploaded must be in a standard/bank defined format.
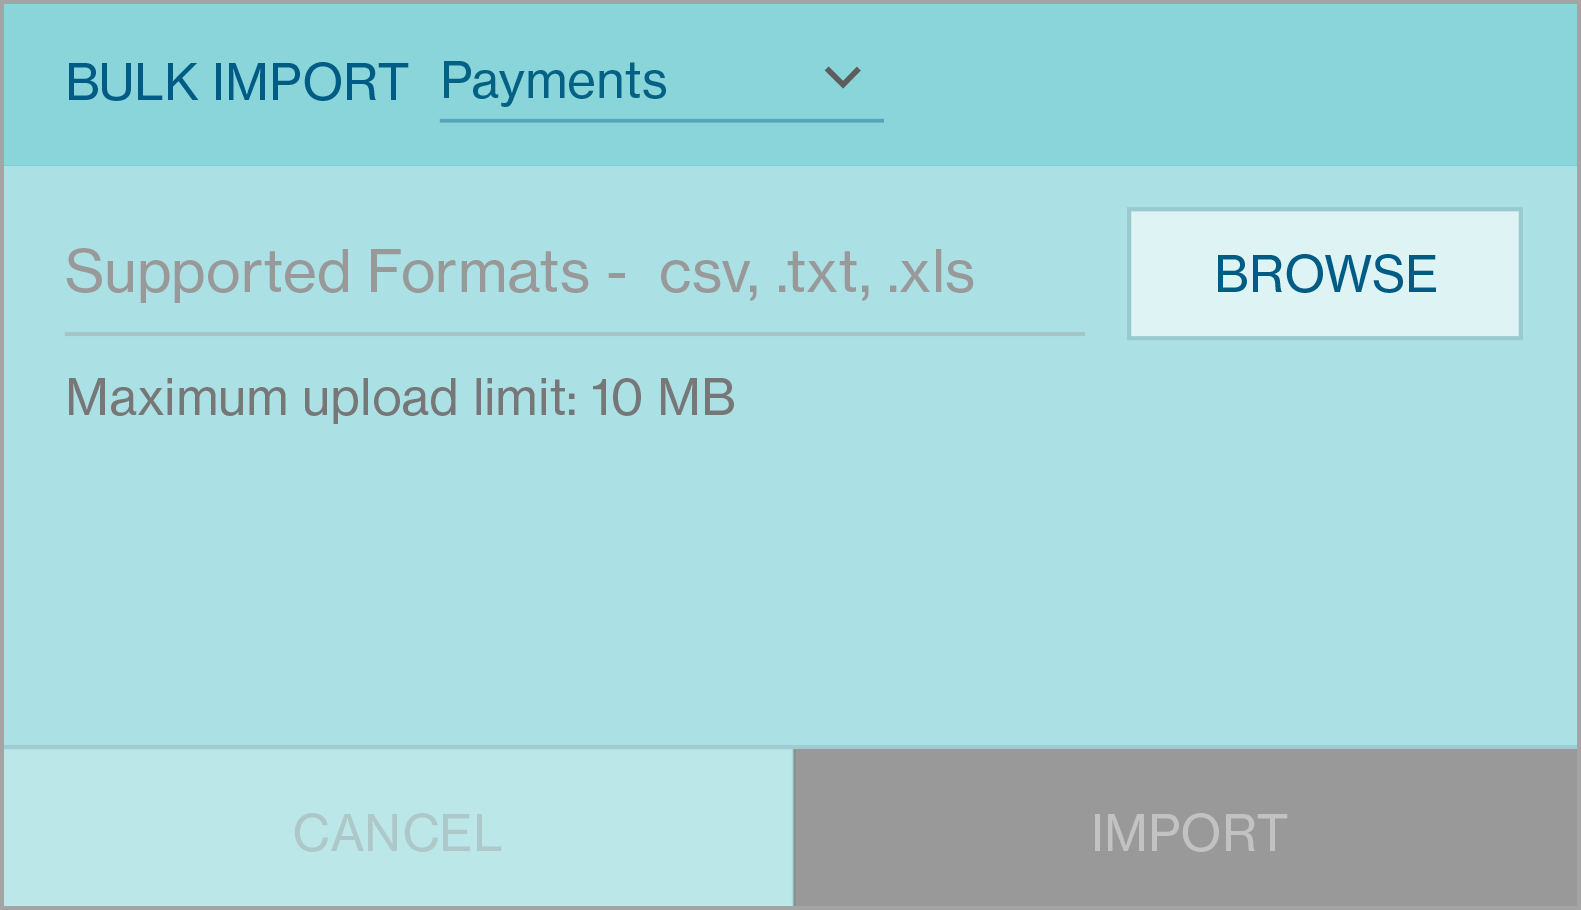
Based on your entitlements, the following file types can be uploaded via this card –
- Biller
- ID Registration
- Payments
- Template Payment
- Payees
- Direct Debits
- Mandates
- Data Templates
Once you have selected the file to be uploaded, click Import.

If file format is unsupported, you will see the error message below.

Upon processing, the payments within the file will be available through the Manage Payment List Screen and further action (e.g.) ‘Authorise’, ‘Batch’, ‘repair’, etc can be performed.
The Bulk Import Card will be reset to the initial state for you to perform another upload.
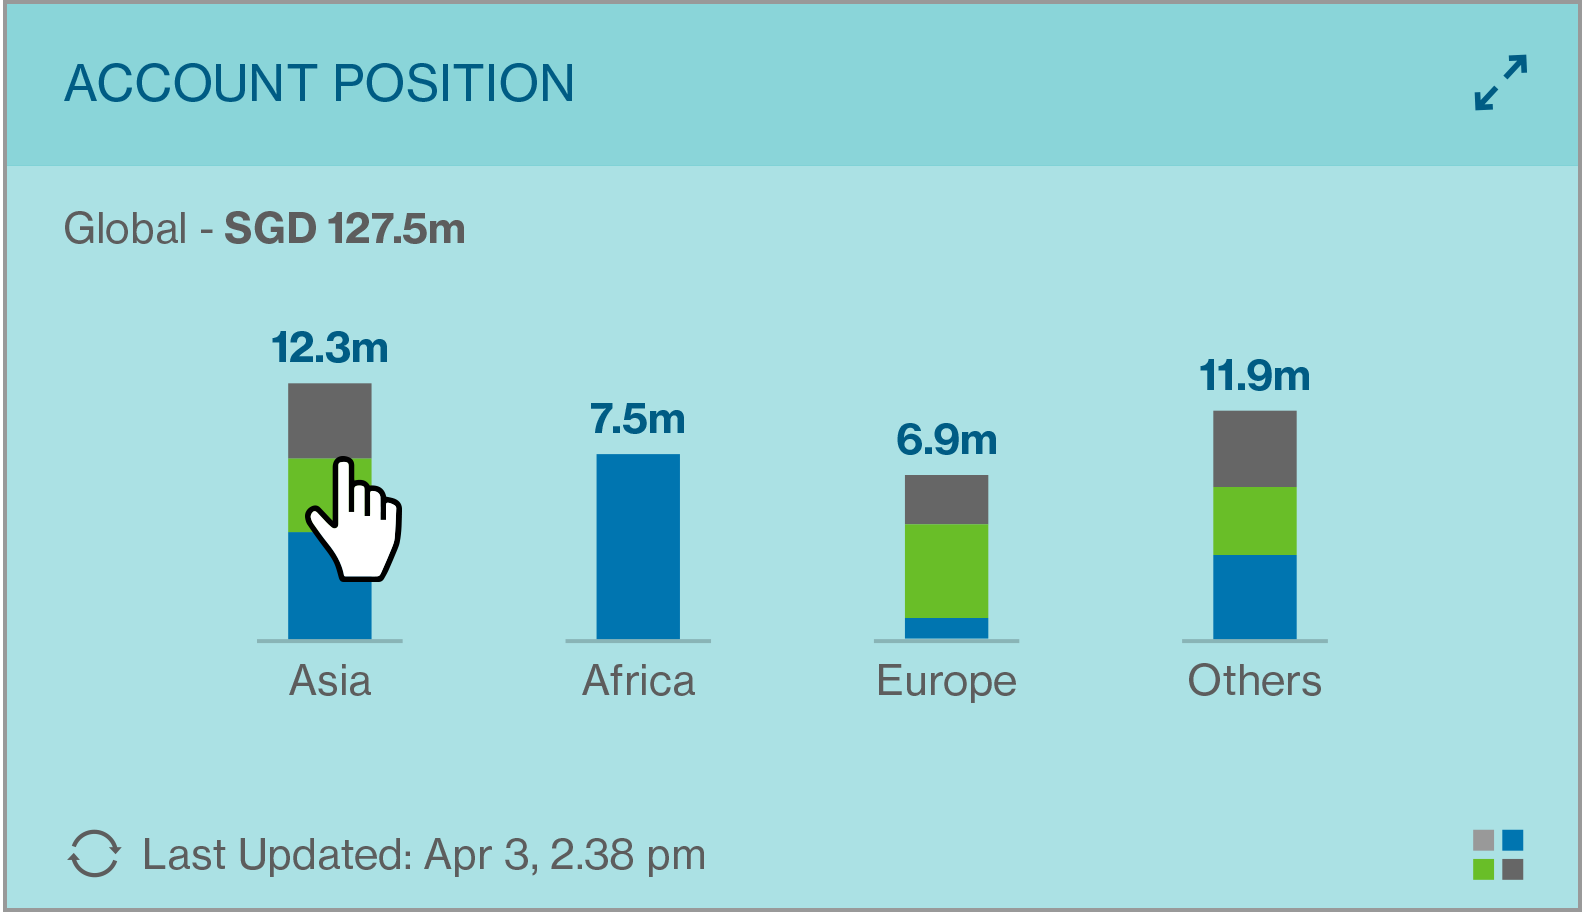
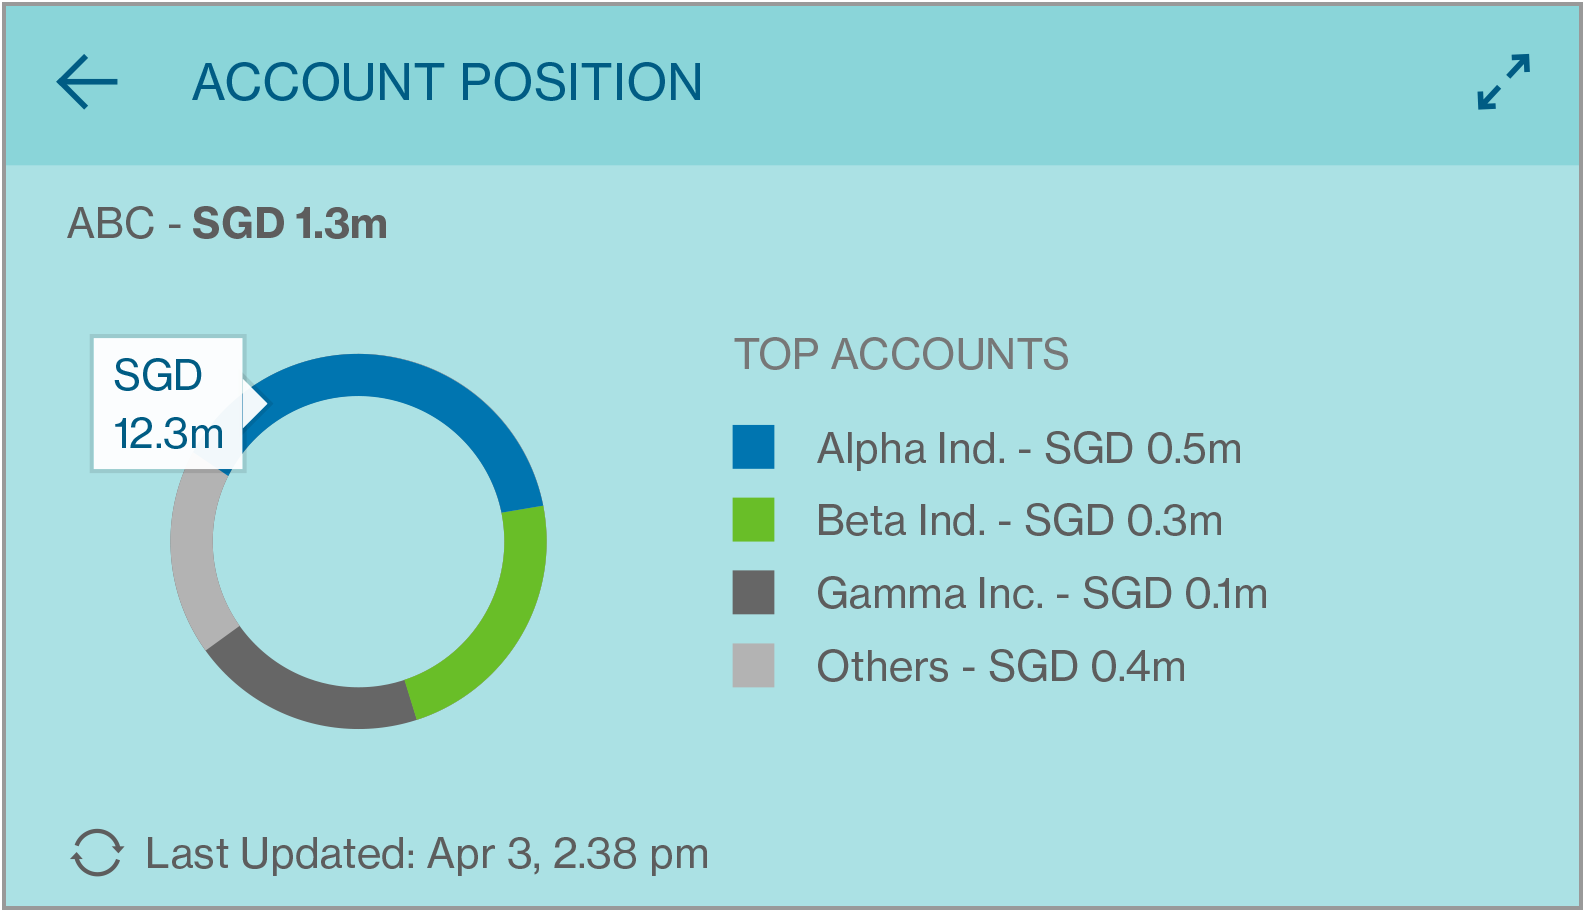
Account Position Card
This card displays the overall fund position of a group across all regions, countries, entities and currencies. In this Account Position card, there are 4 levels of account balances drill-down supported. (Region – Country – Entity – Account)

When region “Asia” is selected, country where account balances are available within Asia will be shown.
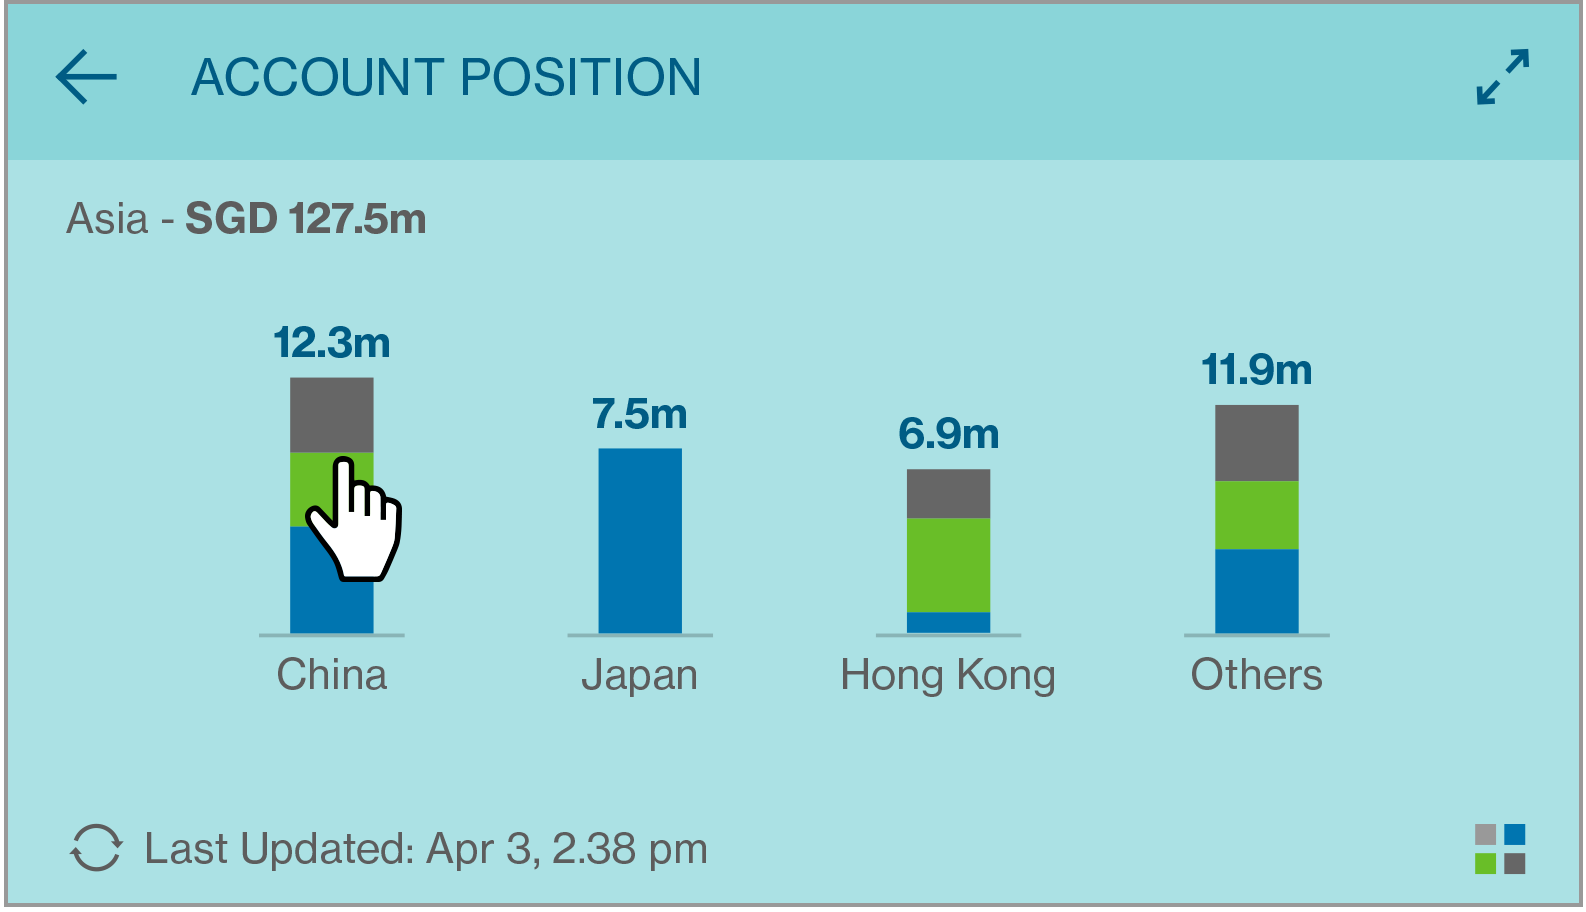
When country “China” is selected, account balances of all entities within the country will be shown.
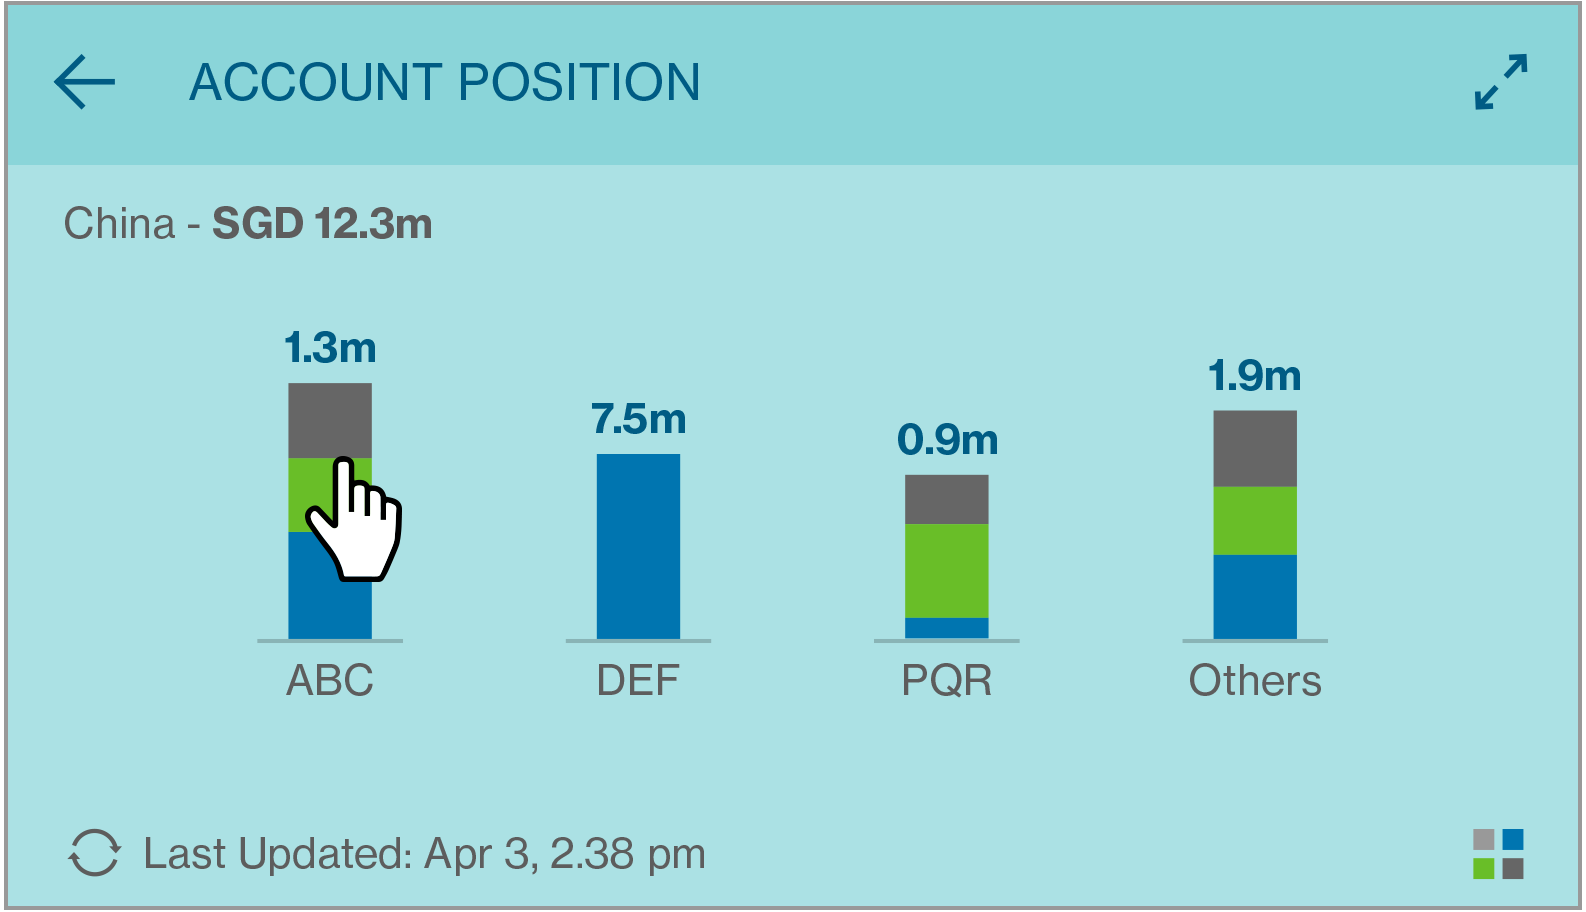
When company ABC is selected, the top accounts from ABC will be shown in a pie chart with account balances of each account.
Quick Navigation Card
Quick Navigation Card enables users to quickly access screens and journeys within Straight2Bank. When the users click on any of the links within the widget, the user is re-directed to the Create/Manage/Approve Transaction/Payee/Reports screens based on the user role.
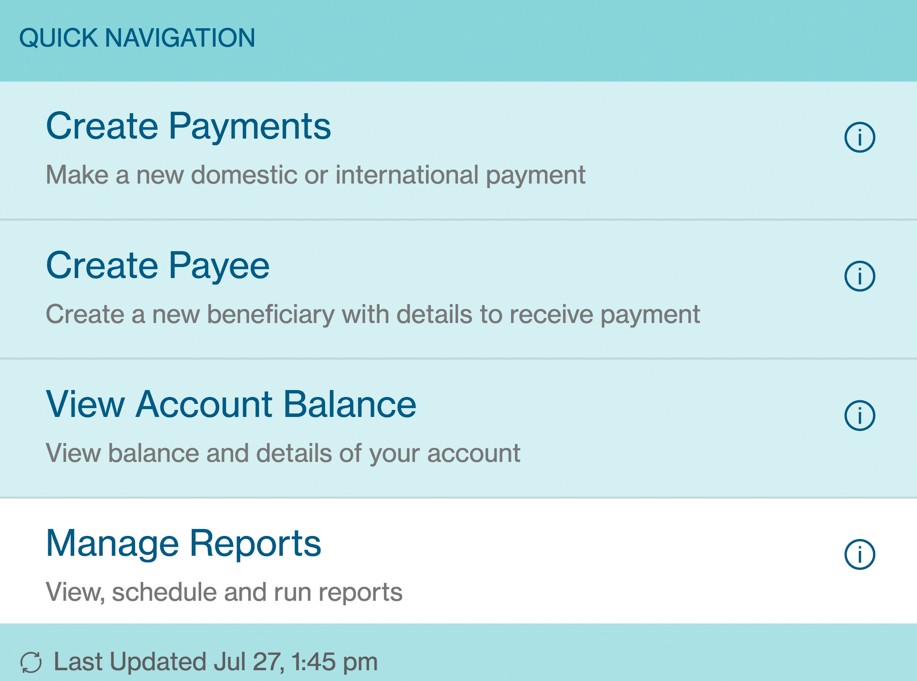
The new dashboard widget Quick Navigation Card will be available in card library for all users by default. Also, approver will get ‘Approve Pay- ment’ and ‘Approve Payee‘ as first two links in card instead of ‘Create Payment‘ & ‘Create Payee‘ along with other links.
Entitlements
| Operator | Operator+Authoriser | Authoriser | Viewer |
|---|---|---|---|
| Create Payment | Create + approve Payment | Approve Payment | View Account Balance |
| Create Payee | Create + approve Payee | Approve Payee | Manage Reports |
| View Account Balance | View Account Balance | View Account Balance | |
| Manage Reports | Manage Reports | Manage Reports |