- Get Started
- Training Videos
- Book an FX Hedge
- Execute an FX Hedge
- Manage FX Transactions
- Affirmation
- Confirmation
- Document Submission & Processing of Proof of Underlying
- Reports
- Utilisation
Background
Straight2Bank NextGen (S2B NG) is a user-friendly platform designed to give you the freedom to book your foreign exchange deals from your office desk.
With S2B NG, you have access to an integrated exposure management portal which allows you to book an FX, manage documents and carry out the appropriate validations all in one place.
S2B NG gives you access to Standard Chartered’s award winning cross-asset research and strategy supported by FX fundamental, flow quantitative and technical analysis. Get access to both thematic FX research and high conviction actionable ideas.
Book a deal on the go with the S2B NG. Verify your documents and review and confirm your trades electronically with just a click of a button. Rollover or cancel your orders quicker and easier. Make payments and get instant reports on your FX deals in real time with S2B NG.
User Profiles
User Profiles will be setup during the onboarding stage.
| Profile Name | Functions List | Roles |
|---|---|---|
| Treasury Officer | Request for hedge, Upload Document, Request for hedge events, View Dashboard | Operator |
| Treasury Approver | Execute hedge, Authorize Document, View Confirmations, Execute post hedge events, View Dashboard | Authorizer |
| Enquiry User | View Dashboard | Inquirer |
| Back Office User | Upload Document, View Confirmations, Authorize Document, View Dashboard, Execute payment, Execute settlement | Authorizer |
| Authorized Signatory | View Confirmations, Authorize confirmations, View Dashboard, Authorize Document, Execute payment, Execute settlement | Authorizer |
If you wish to make any changes to your User Profile, please drop an email to FMO.Flowbanker@sc.com
Book / Execute an FX Hedge
Proof of Underlying Upload and Mark Off
Affirmation & Confirmation
Reports
Book an FX
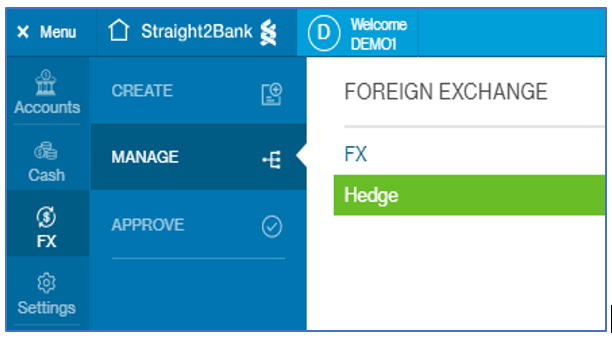
To begin, go to the Menu and click on the FX icon and select Create, then Hedge.
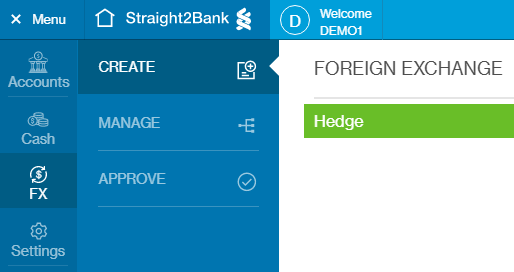
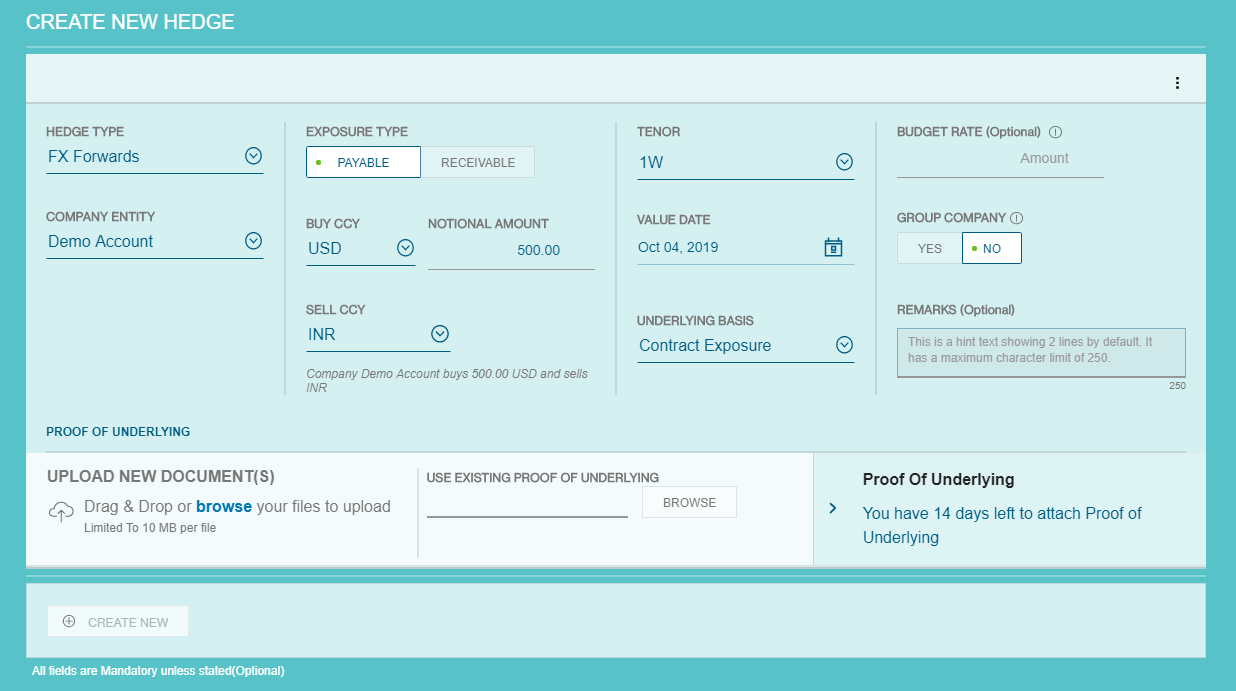
You will be brought to the Create New Hedge page.
Here, you will be required to fill in the different fields to create or duplicate a new transaction.
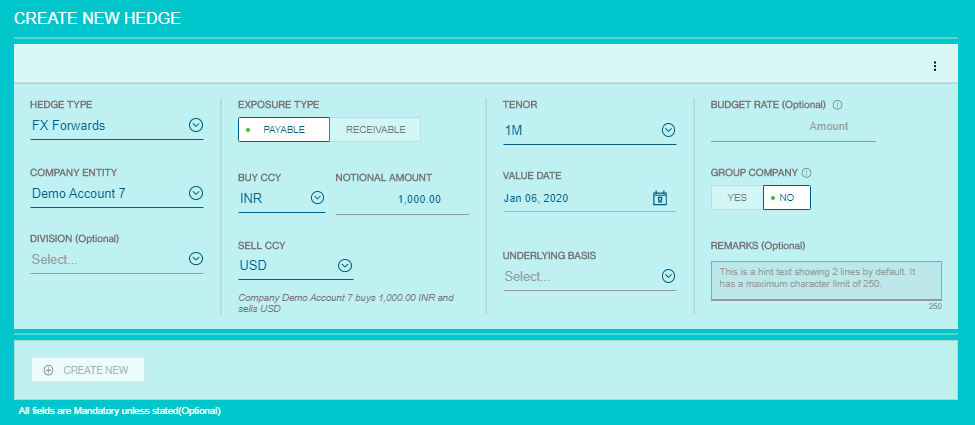
- Start by selecting your Hedge Type.
- Choose your Company Entity from the dropdown list.
- The Division field is optional. This field will be automatically filled if it is applicable.
- Choose your Exposure Type as either Payable or Receivable.
- Based on the exposure type, populate your Buy and Sell Currency accordingly
- Key in the required Notional Amount.
- The Tenor field will be automatically filled for Hedge Type up to Spot. If you are booking an FX Forward, select the Tenor from the dropdown list.
- The Value Date will be automatically generated once the Tenor field is selected. If you wish to manually select a Value date, you may enter the date or select from the date picker.
- In the Underlying Basis field, choose from Contracted Exposure, Past Performance Limit or Simplified Hedge Form (where applicable). If you have selected Contracted Exposure, you can upload your invoice in PDF format during FX booking. If you have selected Past Performance Limit or Simplified Hedge Form, the limits will be displayed before booking your FX.
- The Group Company field is also optional. This only applies when the deal is booked with the company being a Group Company.
- Fill in any remarks you might have in the Remarks section. This is also optional and can be left blank.
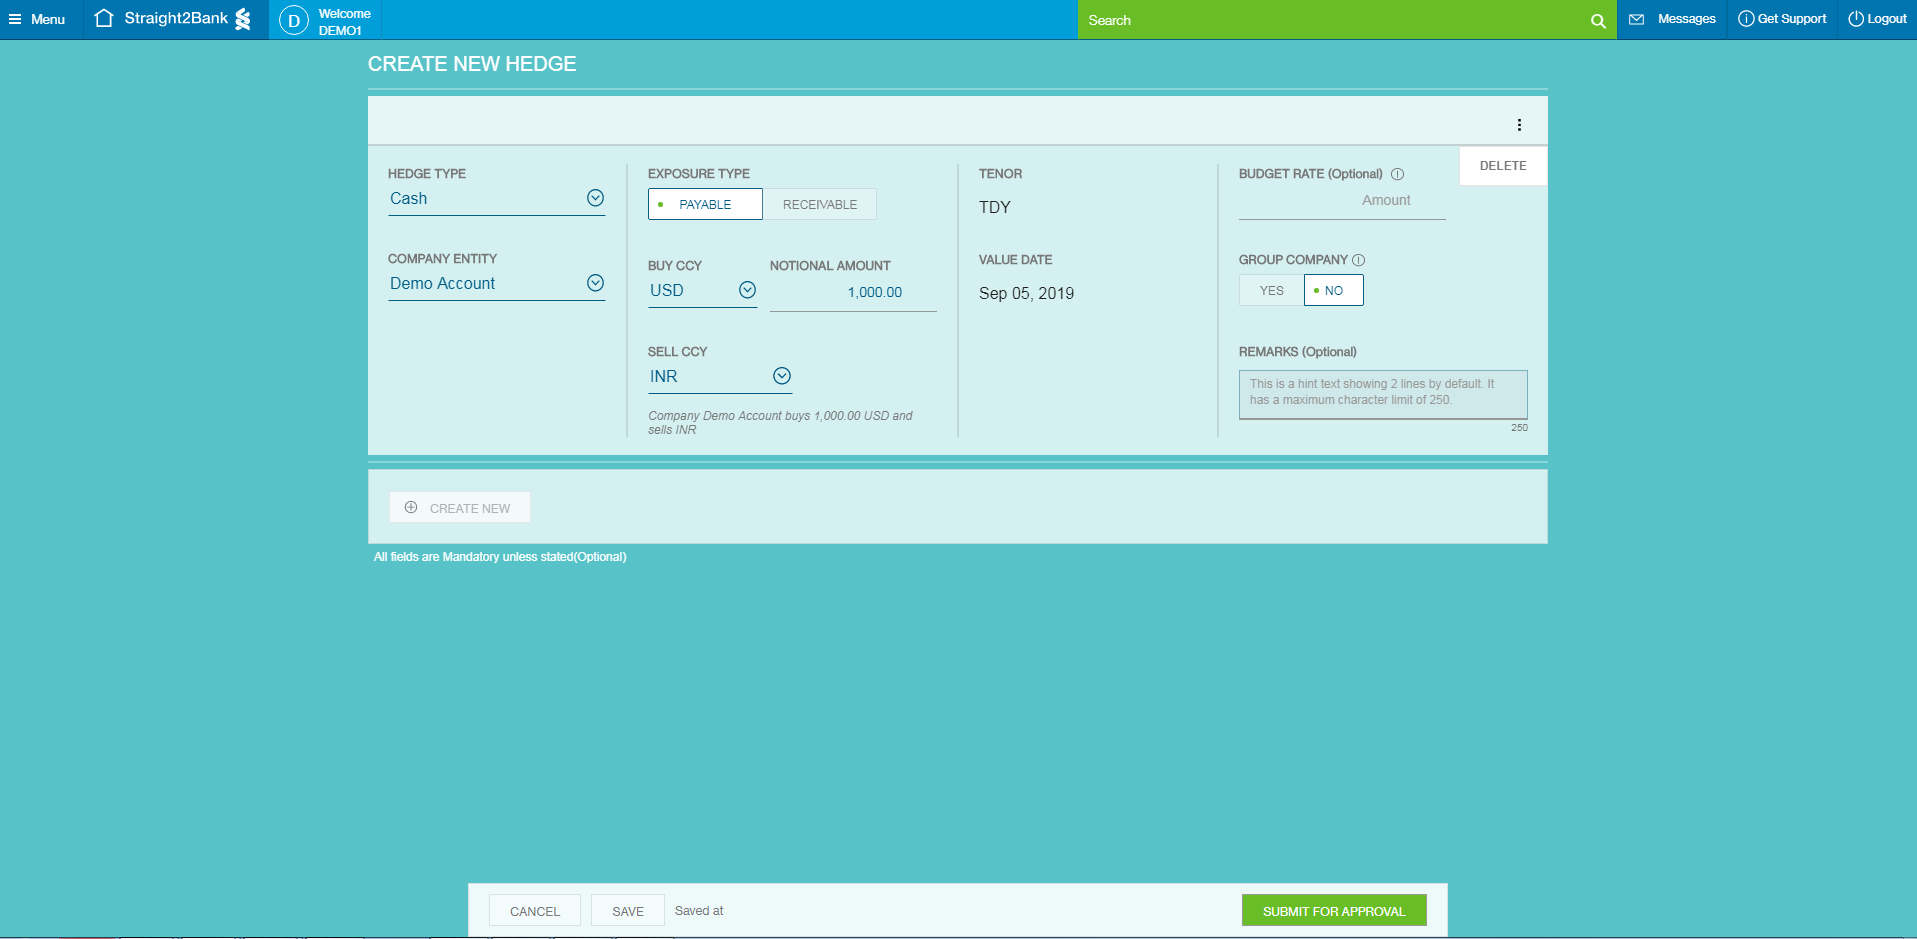
Once you have filled in all the information required to create your new FX Transaction, you may click on the Submit for Approval button at the bottom of the screen. Post submission, users will be brought to the Approval page, which would allow them to execute their FX Transactions based on live rates.

Duplicate an FX
If you would like to create more than one FX, you can utilise the Create New button or click on Save and select the three vertical dots and select Duplicate

Execute an FX
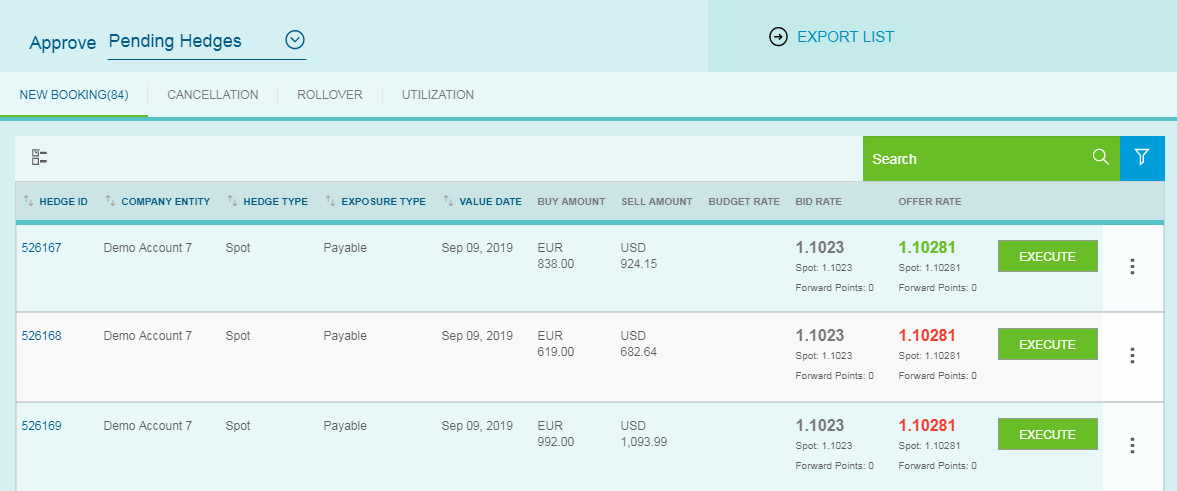
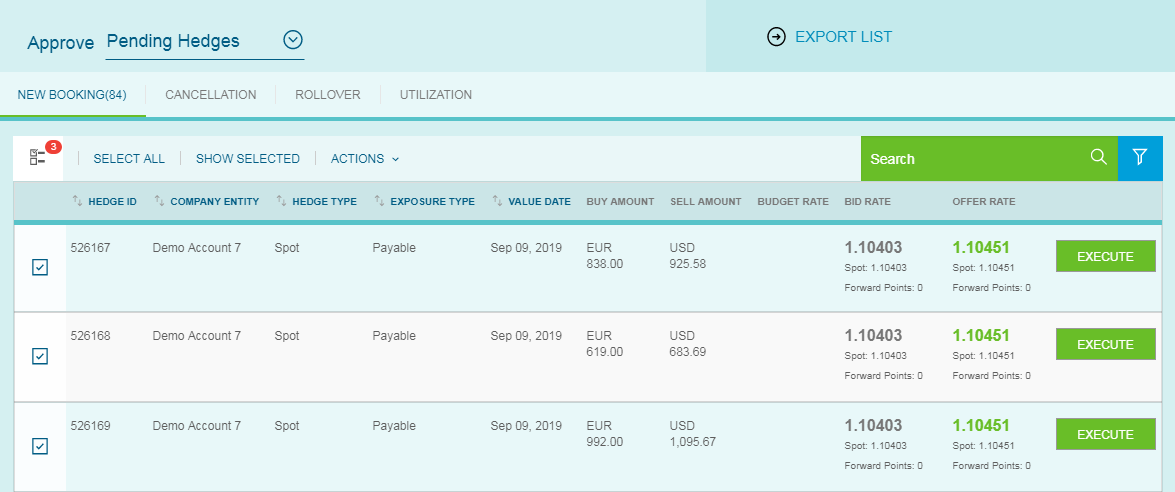
Post submission, users will be brought to the Approval page, which would allow them to execute their FX Transactions based on live rates.
Once the rate is preferable, you may execute your FX Transaction by clicking on Execute. Once your booking is executed, the status will be changed to Filled.
Bulk Execute FX
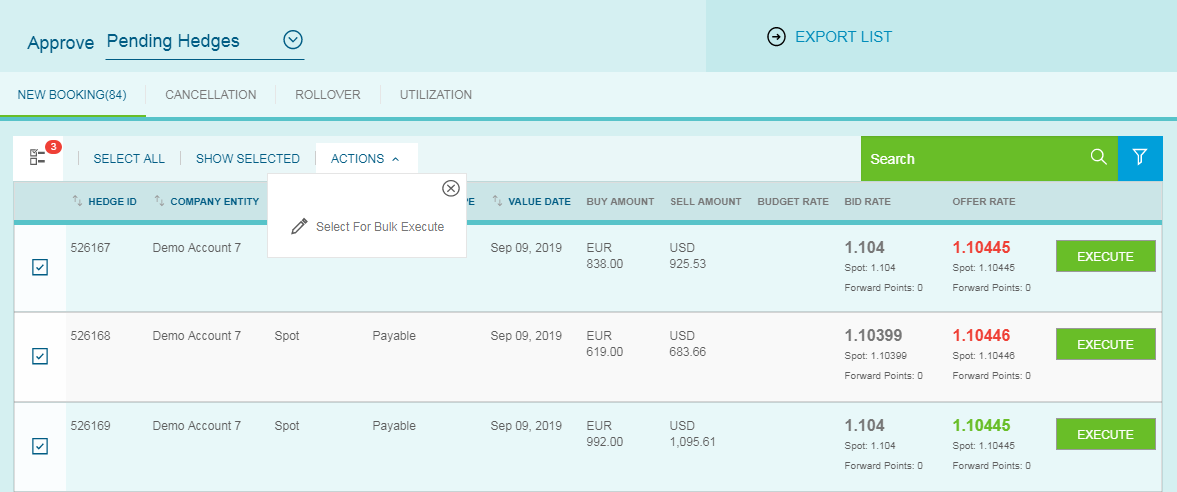
If you wish to execute more than one deal at a time, click on the Select All button, or select the FX you want executed by ticking the boxes on the left.
Once you have made your selections, click on the Actions tab and then click “Select For Bulk Execute”.
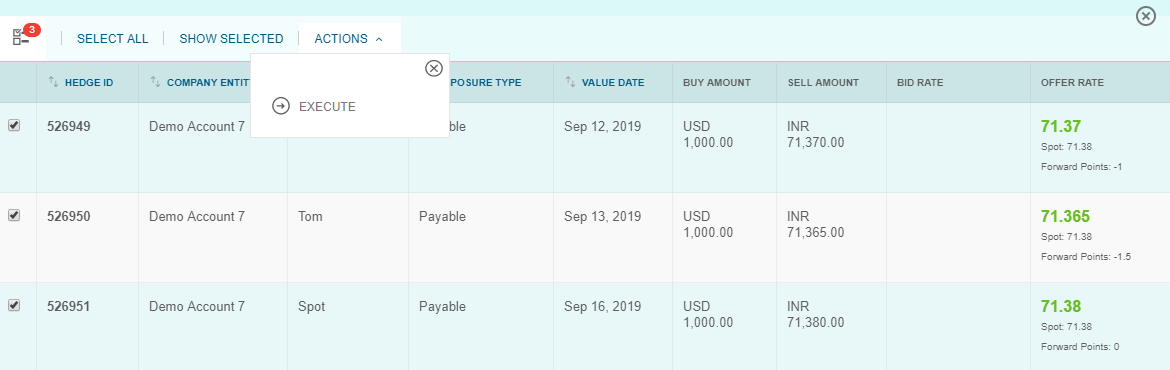
A new screen will be available for you to re-confirm the selected FX you want to execute. Click on Actions and select Execute.
Edit an FX
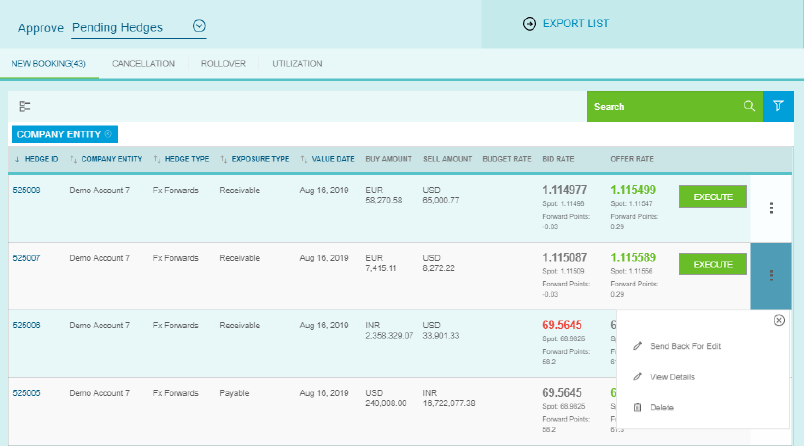
Here, you have two options depending on your User Profile.
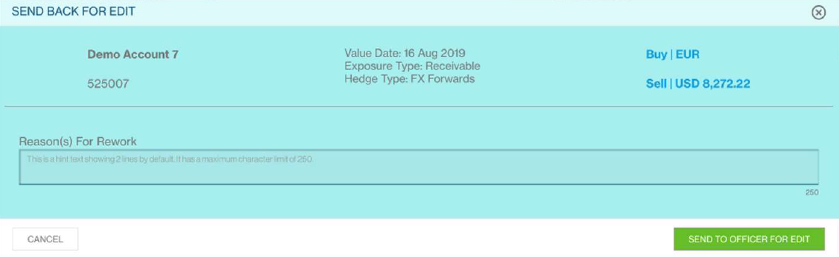
1. Send Back For Edit
By clicking this, the details will be sent back to the Maker for review and to modify the booking based on the Checker’s comments.
The Checker can add the comments in the Reason(s) For Rework box and then select Send To Officer For Edit.
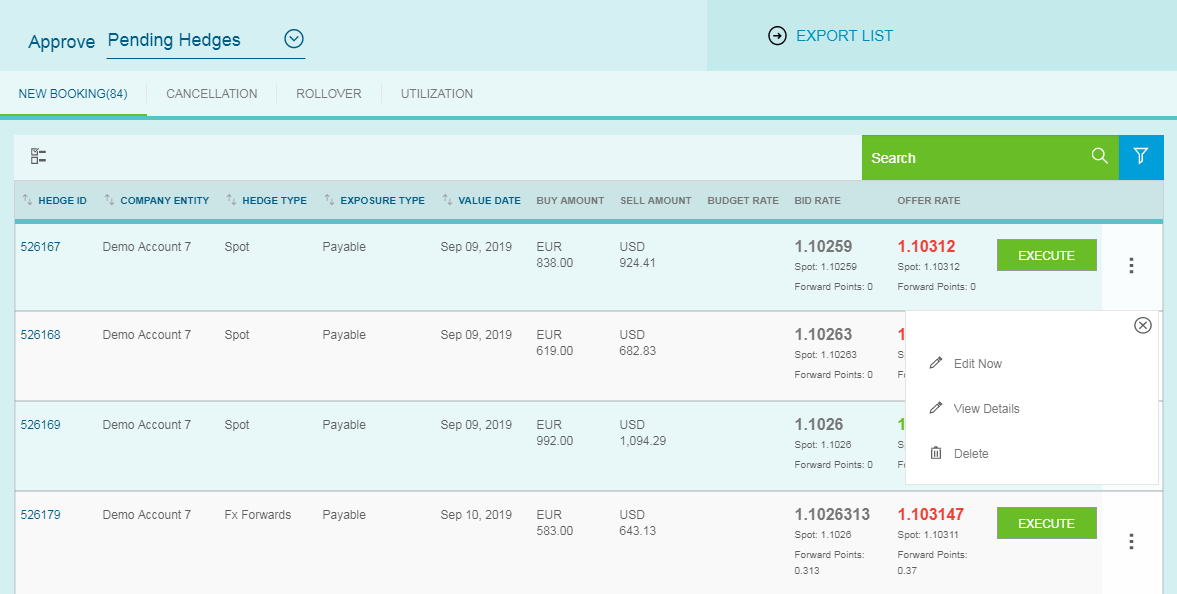
2. Edit Now
By clicking this, you will be redirected to the Create New Hedge page where you can amend your FX Transaction. After making amendments, click on Submit for Approval. You will be navigated back to the Approve Pending Hedge page for execution.

Delete an FX
If you wish to delete the FX Transaction, you may do so by clicking on Delete.
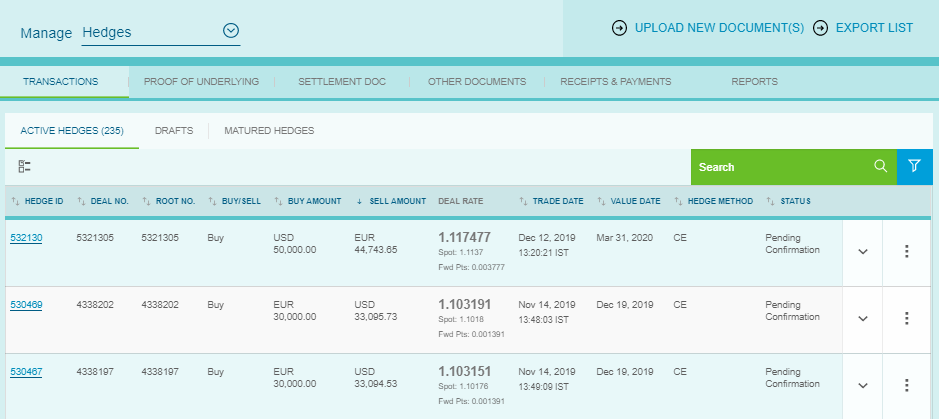
You can re-view the FX Transactions that you've executed earlier in the Manage Hedge page. To access the Manage Hedge page, click on the FX icon followed by Manage and Hedge.
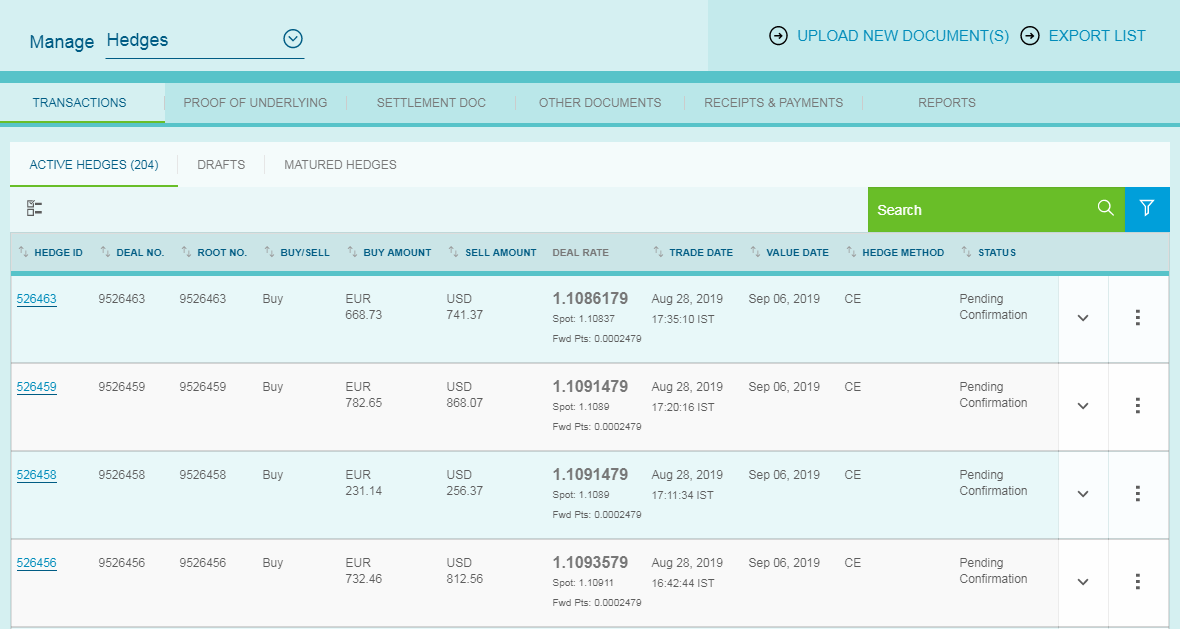
Active FX Transactions
Your active FX Transactions will be displayed in the Active Hedges tab.
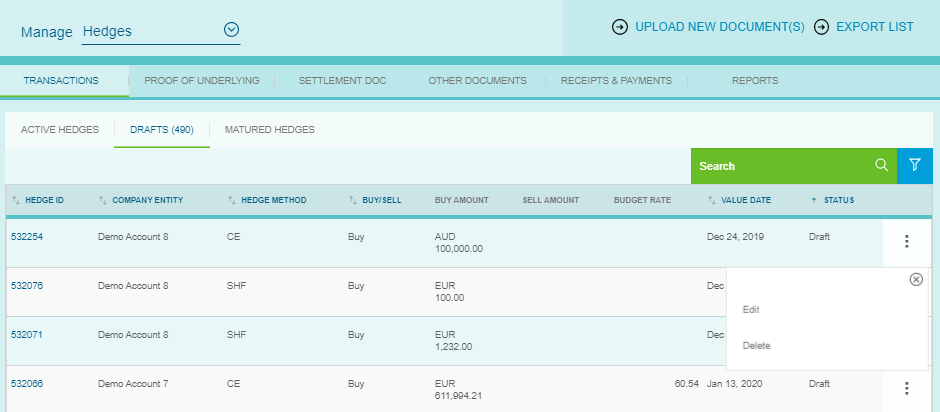
Draft FX Transactions
In the same screen, under the Drafts tab, you can view your FX Transactions that are in the Rework, Draft and Pending Approval.
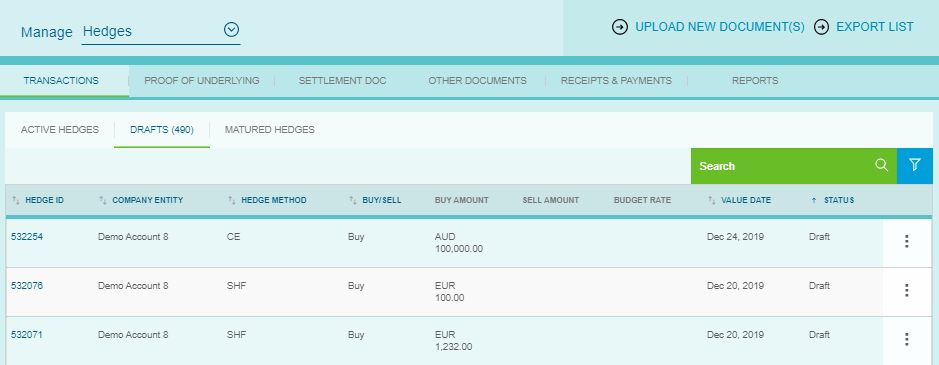
Here, you could either Edit the details of the deal or Delete the deal by clicking on the three vertical dots on the right.
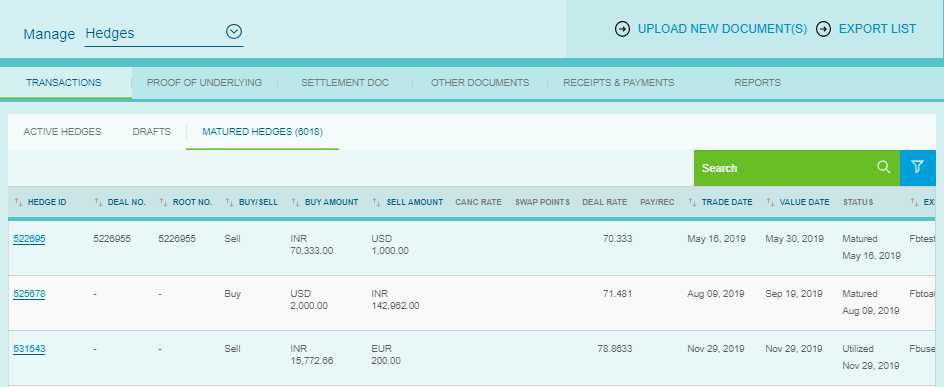
Matured FX Transaction
Under the Matured Hedges tab, you can view all the matured FX. All the FX that have been rejected or expired will also be available here.
Export List to Excel
If you wish to download a copy of your FX Transaction, click on the Export List option on the top right of your screen. A file will be available for download in an Excel format.

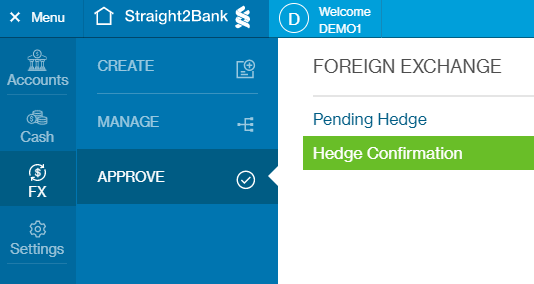
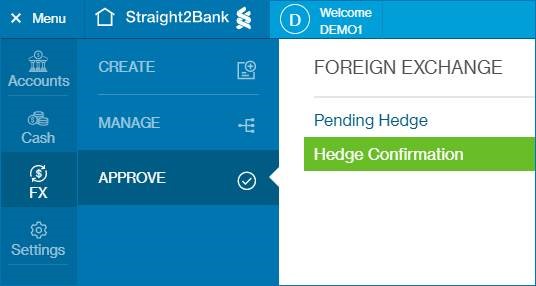
Affirmation of FX
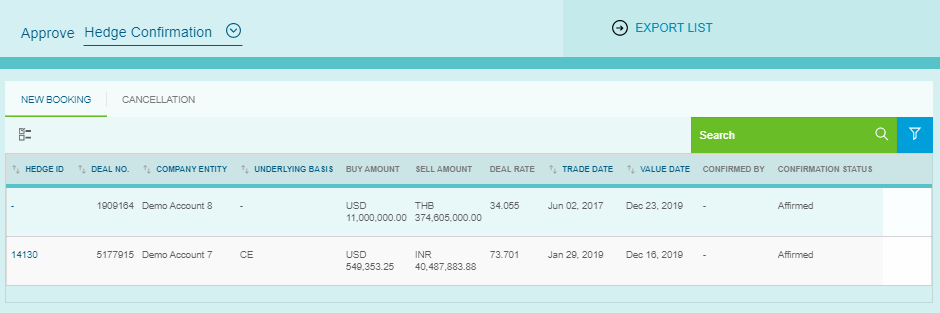
Click on the FX icon, followed by Approve and then Hedge Confirmation. Affirmations involves agreeing the trade details are accurate prior to confirmation exchange.
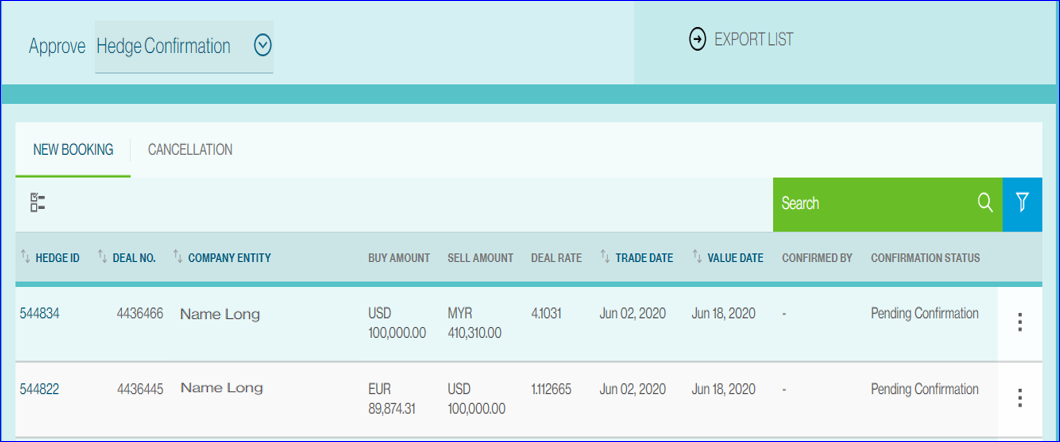
Under the New Booking tab, your trades which are Pending Confirmation will be listed here, under the confirmation status.
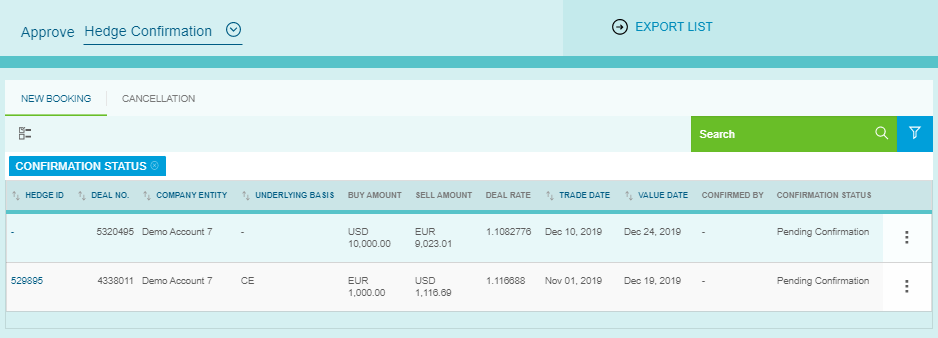
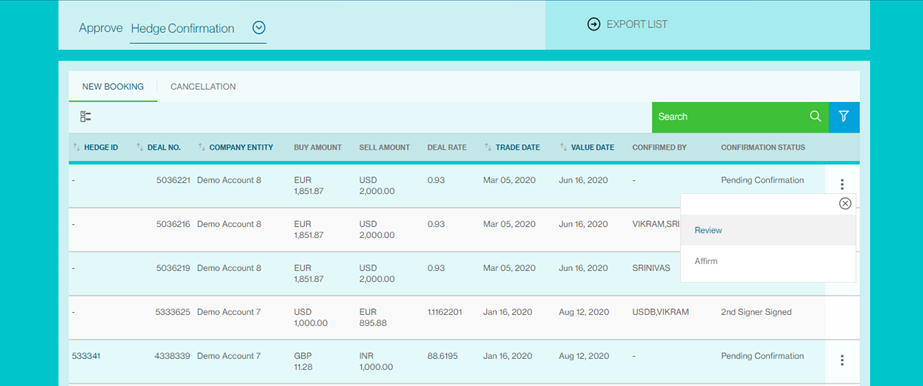
To affirm a deal, click on the three vertical dots on the right of the page corresponding to the deal you wish to affirm and select Affirm from the dropdown menu.

Once you have done so, the status of the deal will change to Affirmed.
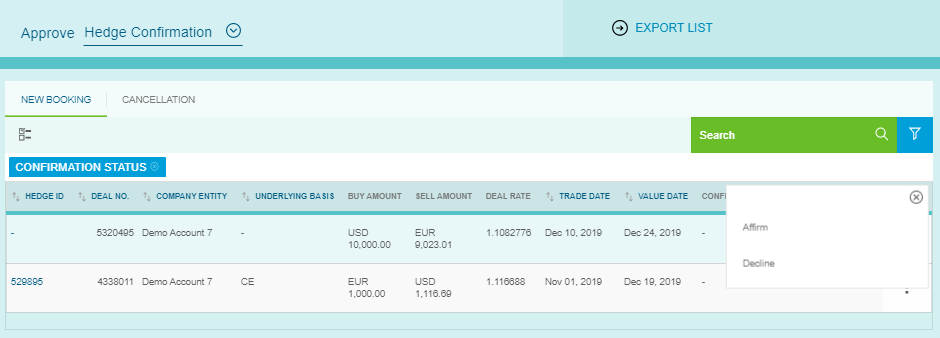
Decline Affirmation of FX
If you disagree with the deal details and wish to decline a deal, click on the three vertical dots on the right of the page corresponding to the deal you wish to decline and select Decline from the dropdown menu.
A new window will open where you must select the reason for declining and add comments in the box of maximum 250 characters.
Dropdown list for Reason For Declining are:
- Trade date
- Trade amount
- CCY Pair
- Client ID
- Value Date
- SSI Mismatch
Once the details are filled, click on Decline at the bottom of the screen.
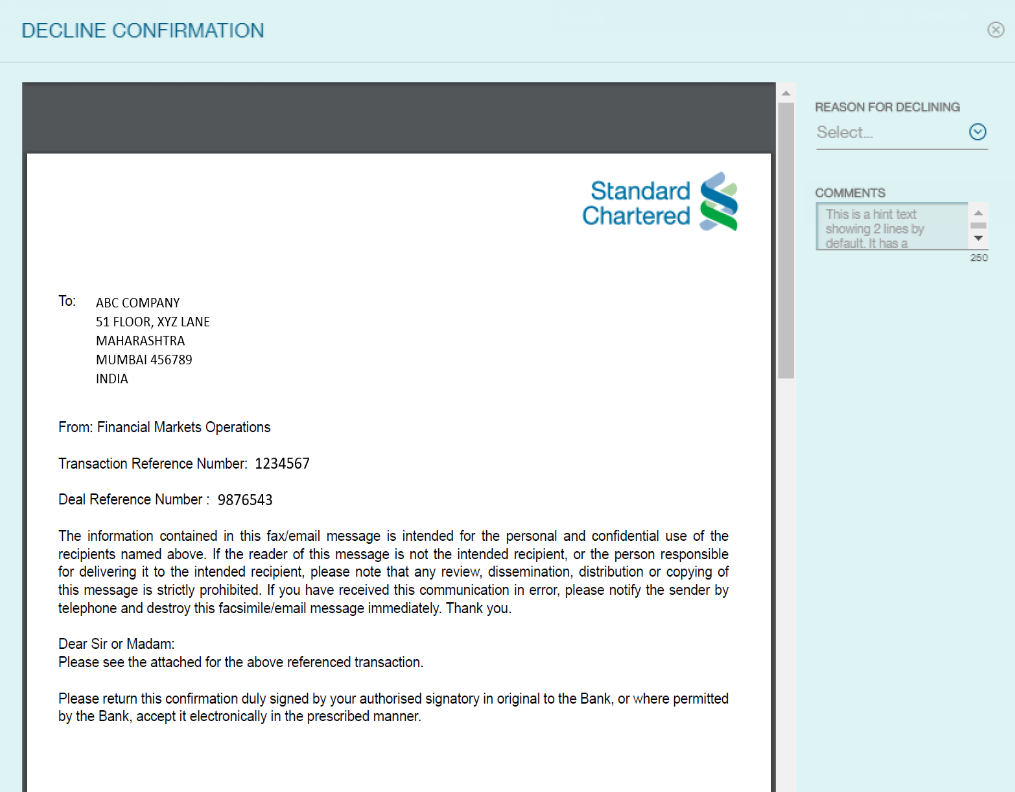
The declined FX will then be reflected under the Other Documents > Trade Confirmations blotter in the Manage Hedges page.
Click to Confirm
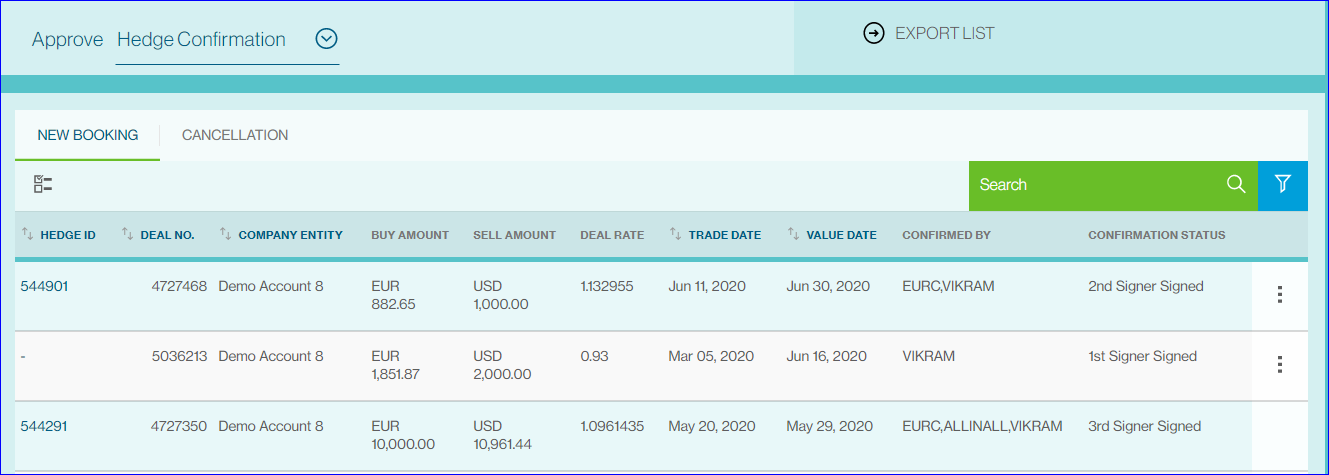
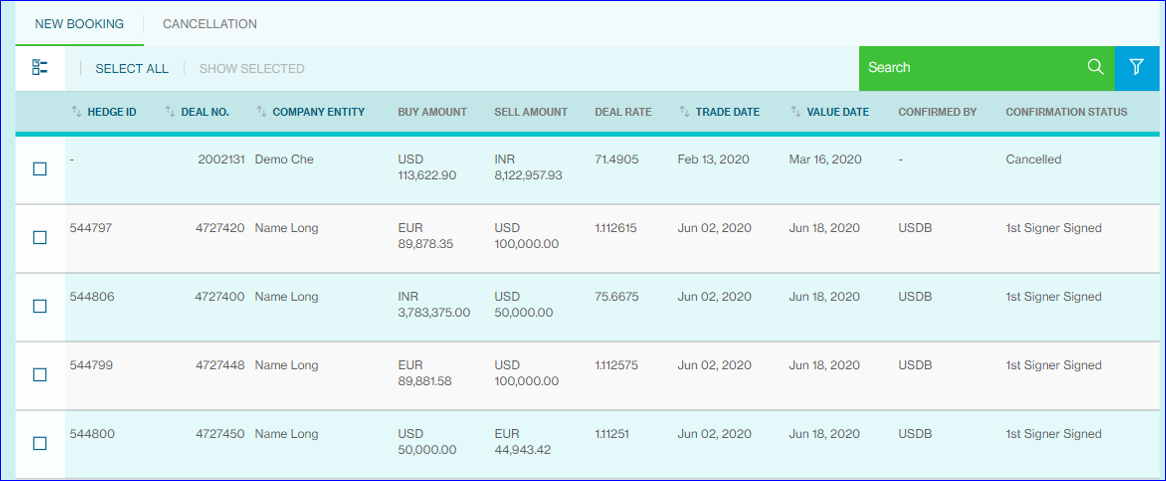
To confirm your deals, start by clicking on the FX icon, followed by Approve and then Hedge Confirmation.
Pending Trade Confirmations
This is a grid view for you to view the confirmation status of your trades.
The Confirmation Status will show as Pending Confirmation for trades that are yet to be confirmed.
Confirming a Trade
To confirm a deal, click on the ellipsis menu on the right and select the Review option.
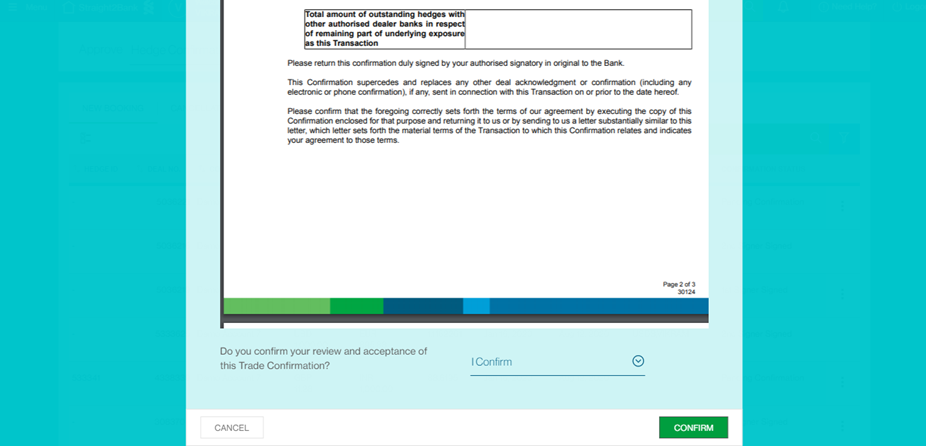
A new screen will appear for you to preview the documents before confirming the trade. Use the scroll option to view the entire document.
Once you are satisfied that the information on the documents are in order, click on I Confirm from the drop-down menu at the bottom of your screen.
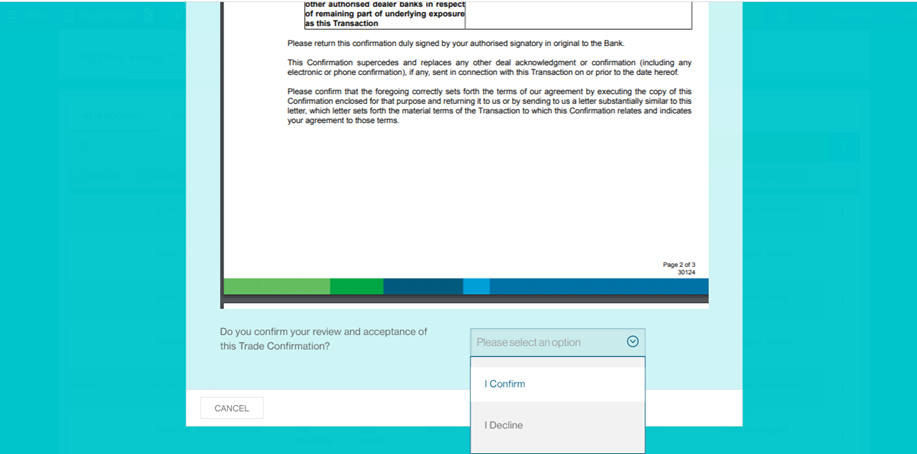
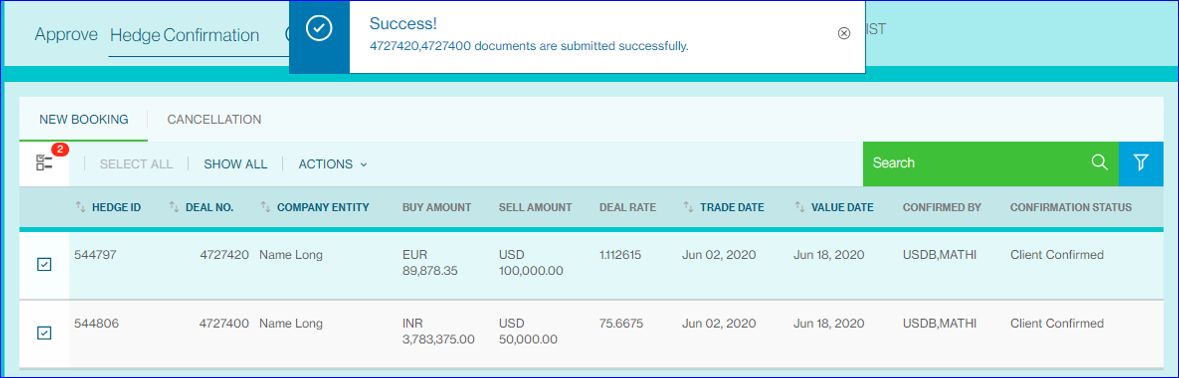
Now click on the green Confirm button to submit.
Upon successful confirmation, the confirmation status of the deal will get updated to Client Confirmed.
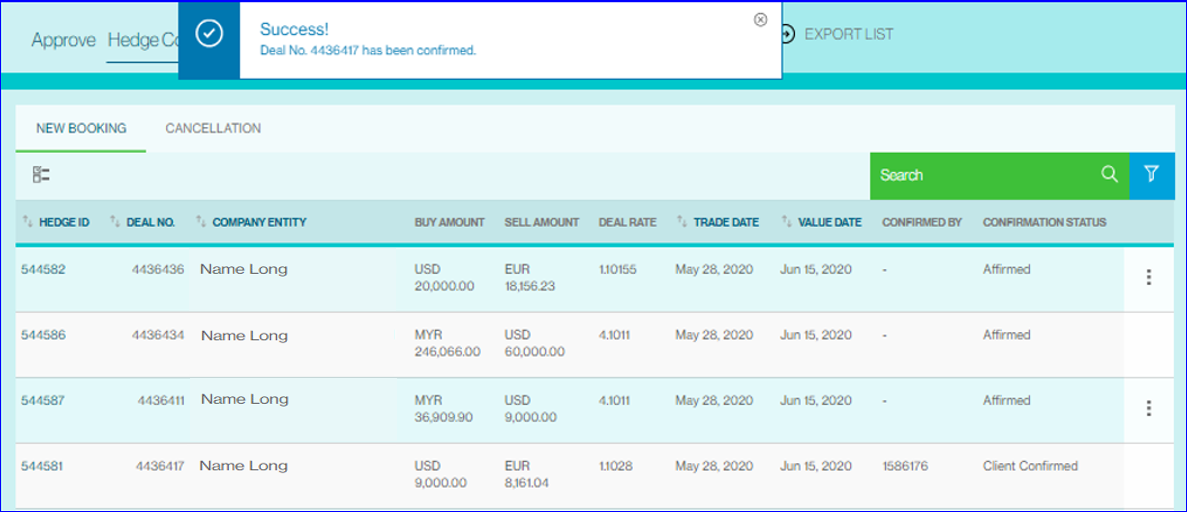
If there are multiple signatories required to confirm the document, the status will reflect accordingly.
Declining a Confirmation
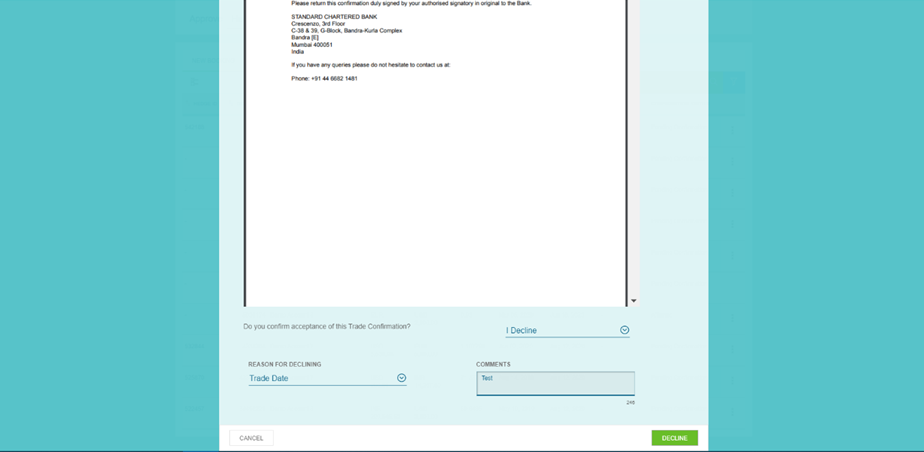
If you disagree with the deal details and wish to decline a deal, click on the ellipsis menu on the right of the page corresponding to the deal you wish to decline and select the Review option.
A preview of the document will appear. Click on the drop-down menu at the bottom of your screen and select the I Decline option and the reason for Declining. Provide further details in the comments section, followed by the green Decline button at the bottom right of the screen.
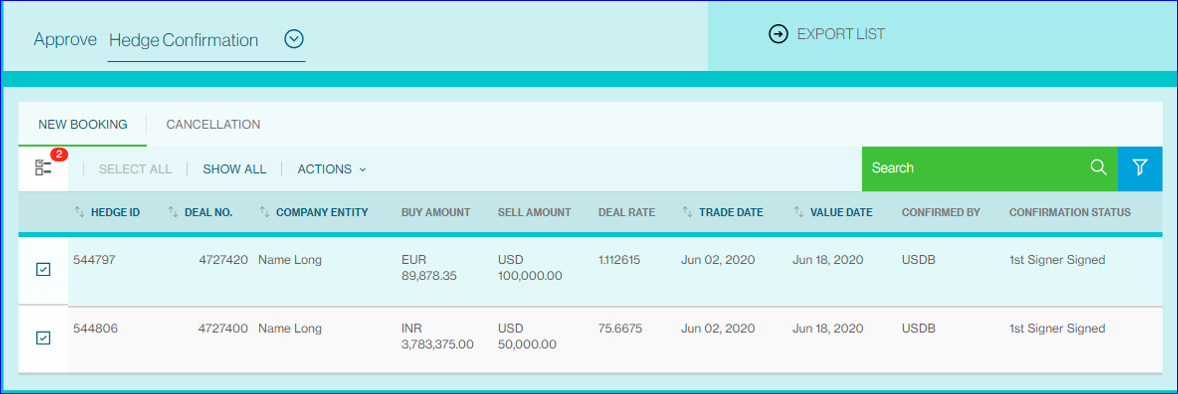
Confirming deals in Bulk
If you wish to confirm multiple deals at one go, Select FX > Approve > Hedge Confirmation from the left-hand navigation menu.

Click on the square box below the new Booking tab.
Select the deals to be confirmed and click on Show Selected.
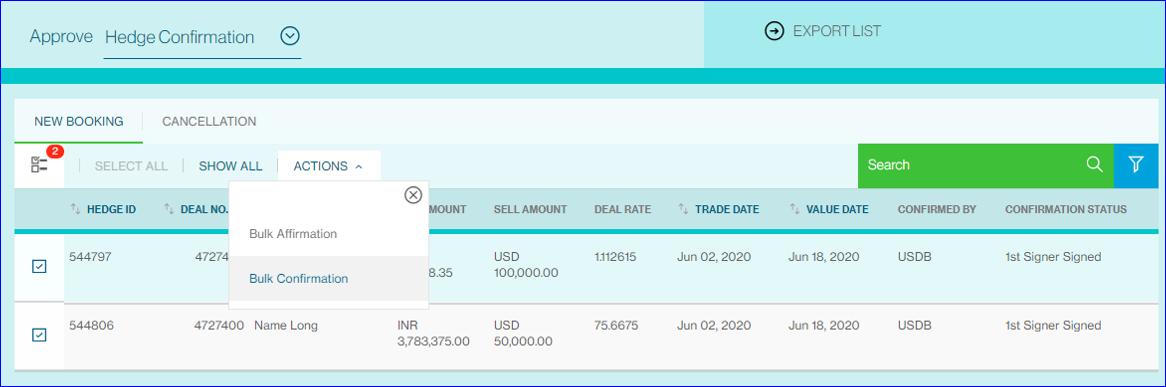
Click on Actions and select Bulk Confirmation.
On the prompt, click on Yes if you wish to confirm the multiple trades.
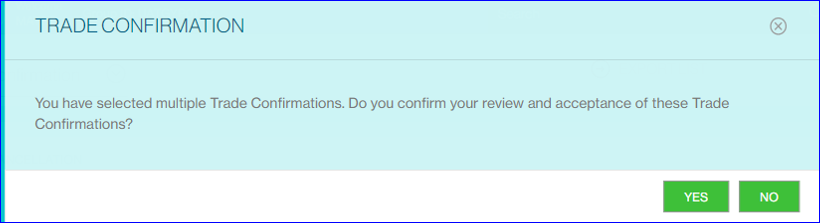
A prompt will appear to indicate successful submission and the deals status will be updated.
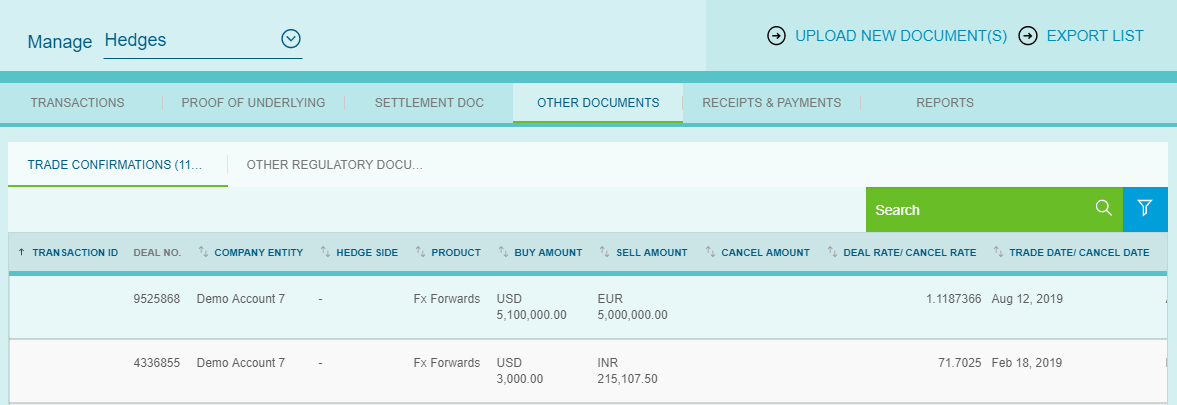
View Confirmed Deals
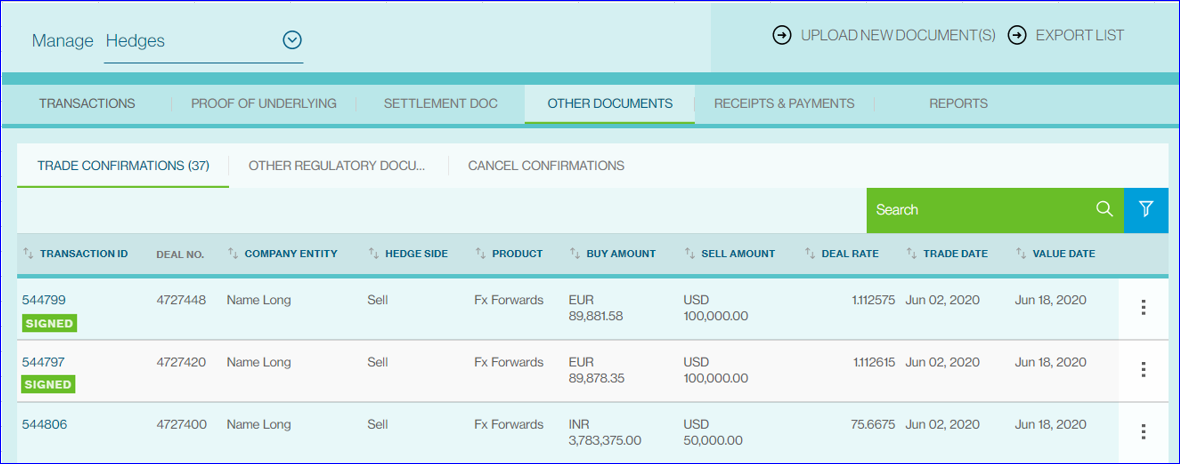
If you wish to view your confirmed deals, select FX > Manage > Hedges from the left-hand navigation menu.

Under the Other Documents tab, you will see a list of your trades. Trades that have been confirmed will be reflected as SIGNED under the Transaction ID.
To view the confirmed document, click on the ellipsis menu on the right and select View Document.
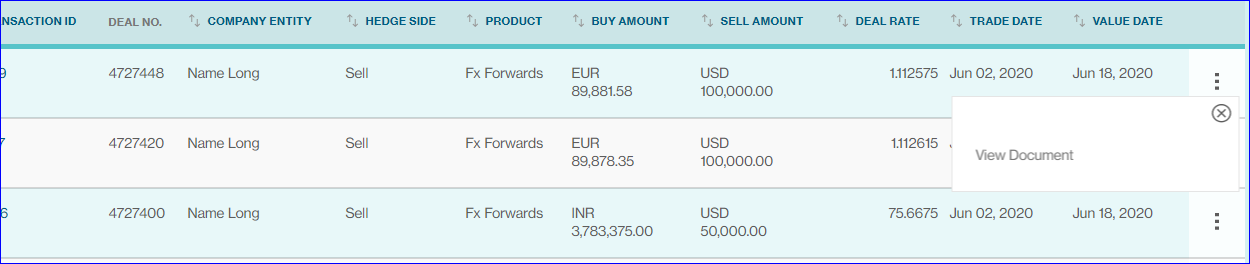
The confirmation document will be opened in a new screen.
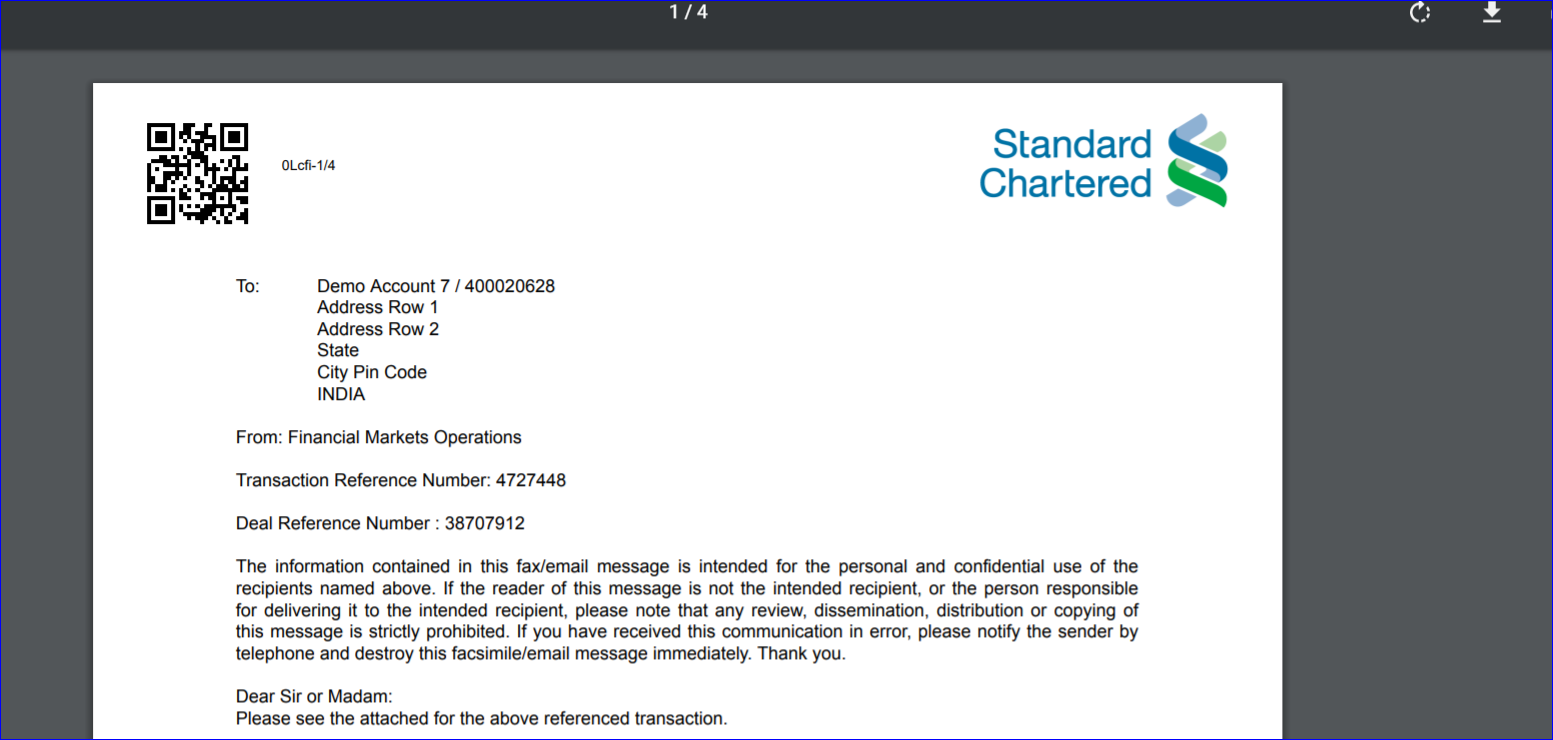
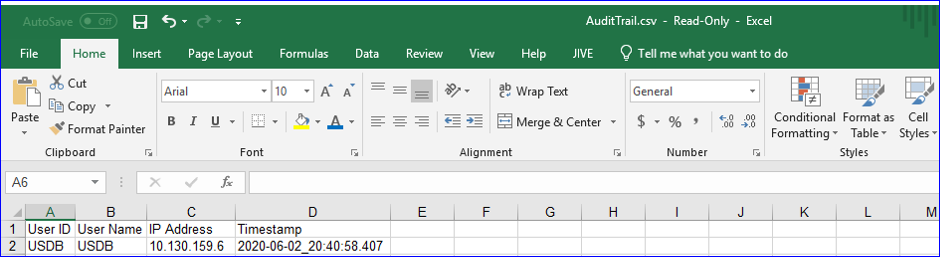
If you require viewing of the audit trail, download the document in PDF format to your desktop, open it in Adobe and click on the attach symbol found on the left side of your downloaded document, which is represented by a paperclip icon.

The audit trail information will be opened in csv format.
Upload Proof of Underlying
To carry out foreign currency derivatives transactions, supporting documents must be provided by your
company to show that you have an underlying exposure. These include invoices, purchase orders,
agreements, contracts, confirmation, letters of credit and other related documents.
This can be done by simply clicking on the browse button in the Upload New Documents box while you
are booking a new FX, or you can drag and drop the document you wish to upload on the box.
If you have previously uploaded the documents, simply select the browse button in the Use Existing
Proof of Underlying box. Note that if you wish to select a Simplified Hedge Form, this can only be done
during the time of FX Booking.
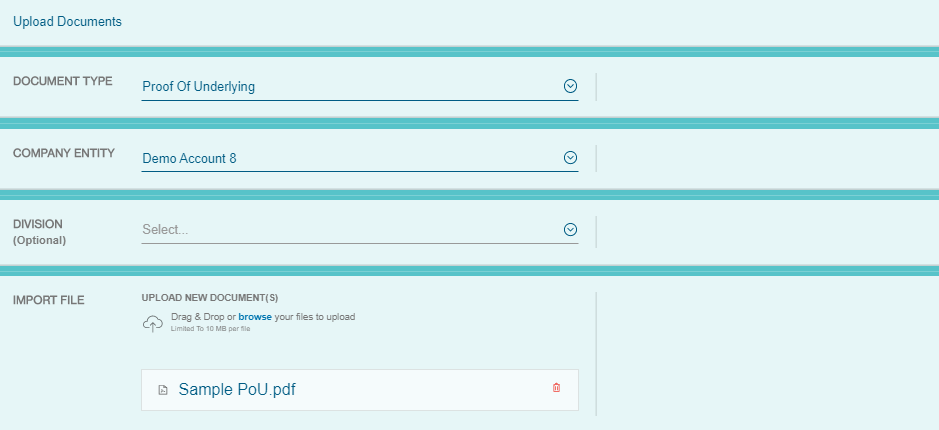
Alternatively, you can also click on Upload New Document(s) at the top right-hand corner of your screen to upload your PoU.

Fill in all the details and click on Import at the bottom of the screen

Once your documents have been uploaded, you will have to affirm your PoU.
Affirm Proof of Underlying
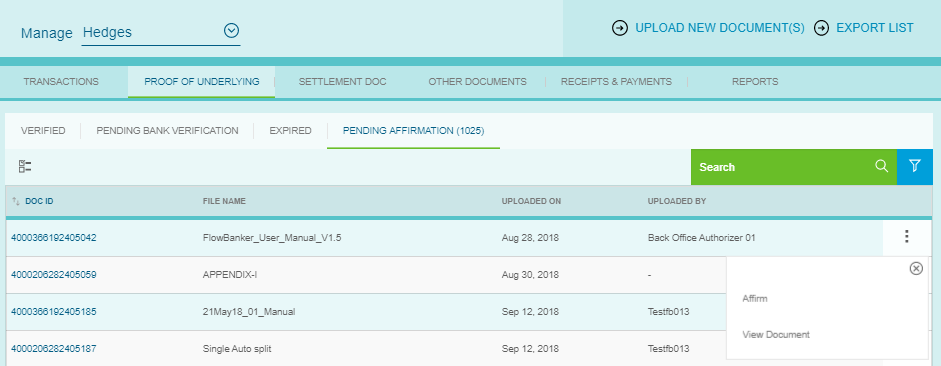
To do so, click on the FX icon and select Manage and then Hedge.
Select Proof of Underlying and your documents pending affirmation will be available under the Pending Affirmation tab.
You can then affirm your PoU documents by clicking on the three vertical dots on the right.
After successful affirmation, the documents will be reflected in the Pending Bank Verification tab. Once the bank has verified the documents, these documents will be reflected in the Verified tab and are now ready for Mark Off.
Mark Off Proof of Underlying
After you have uploaded the Proof of Underlying documents, you can Mark Off the PoU on the platform.
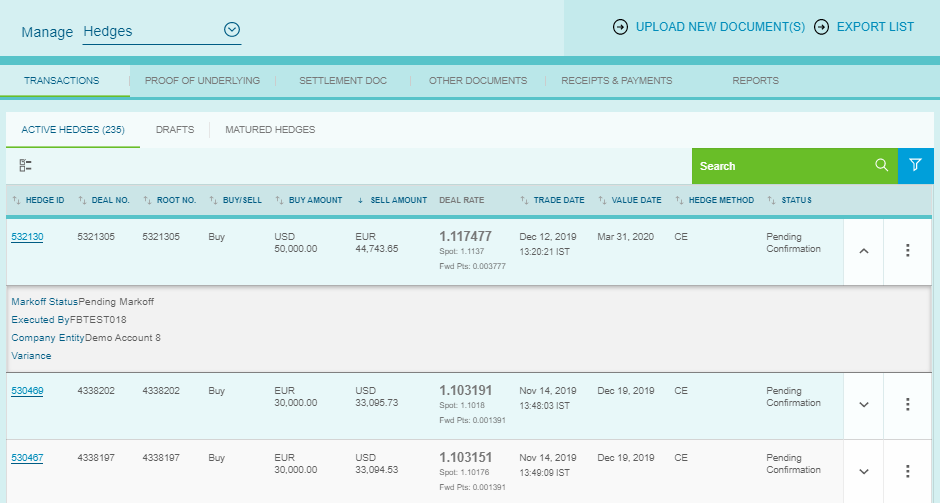
To Mark Off your document, click on the Active Hedges tab in the Manage Hedges page.
Clicking on the downward arrow will reveal the Mark Off status of the deal.
There are multiple scenarios in which PoU can be marked off.
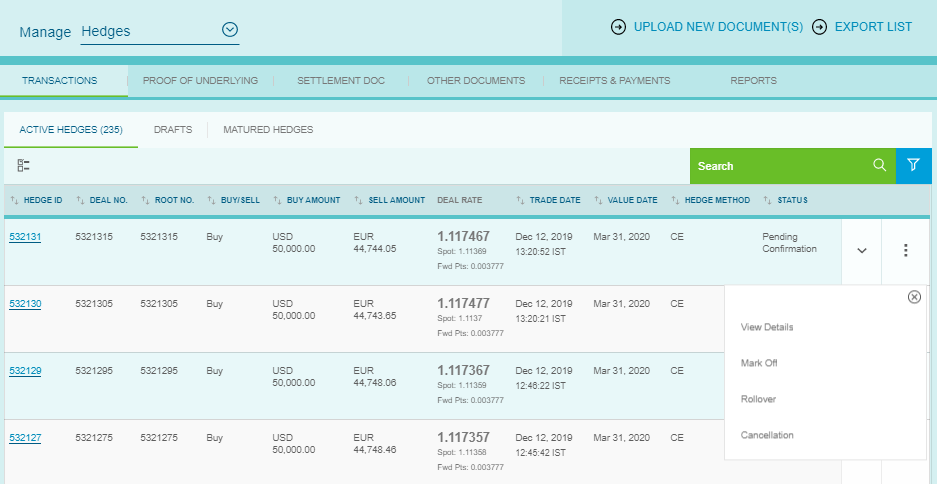
1. Single FX Transaction to Single PoU document
To Mark Off the deal, click on the three vertical dots on the right and select Mark Off.
Amount to Mark Off will be defaulted to the available mark off balance. Select a document with same currency as the transaction currency from the list of documents displayed and the document allocated amount will be defaulted to the amount to mark off.
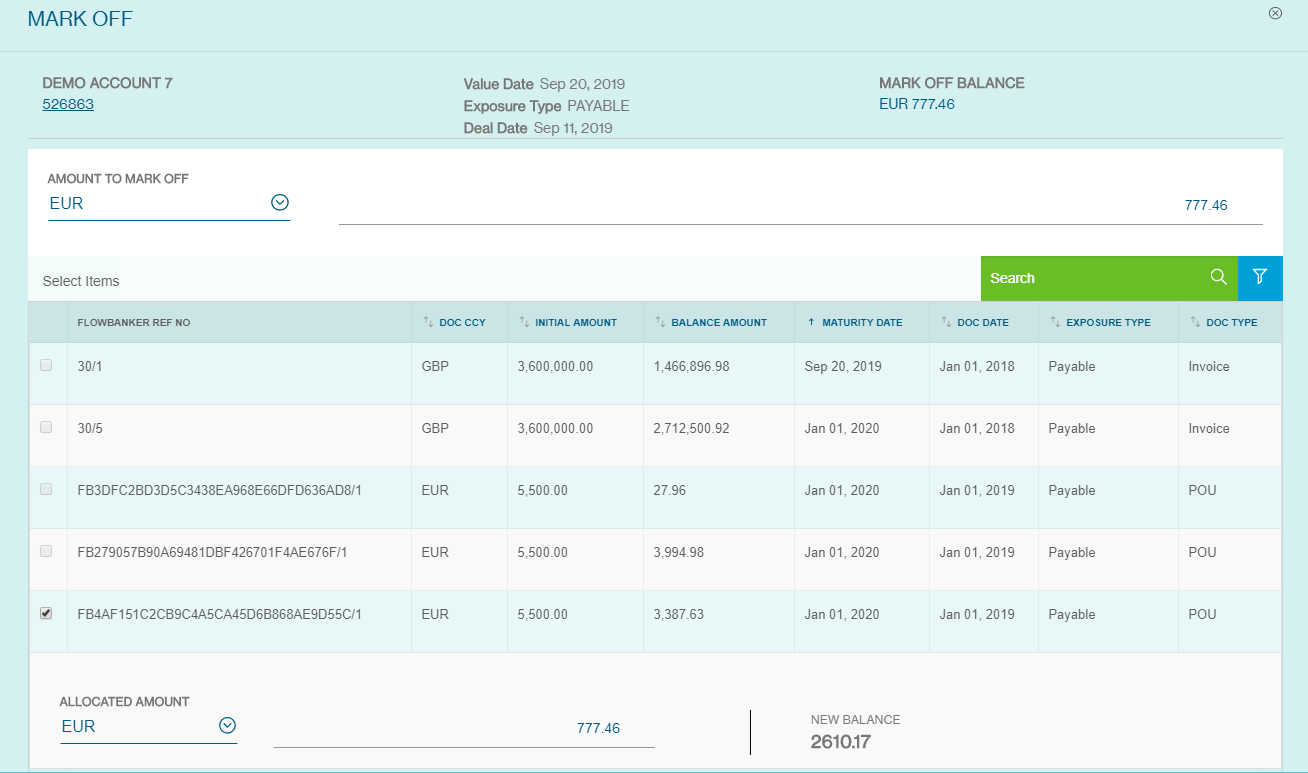
Mark Off option will only be enabled when the ‘Total Notional Amount’ and ‘Total Doc Amount’ matches.
Once you have made your selection, click on Mark Off at the bottom right.
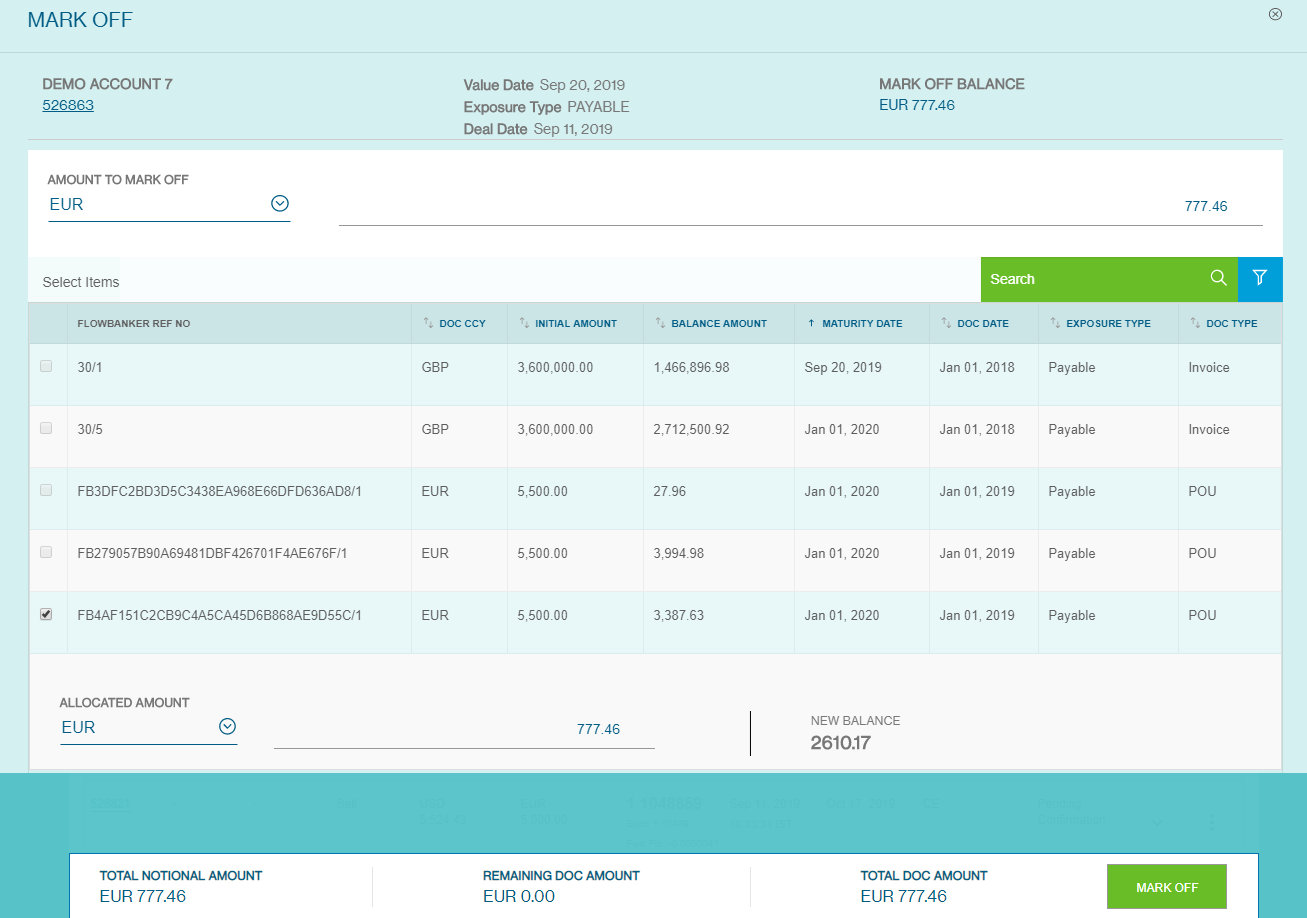
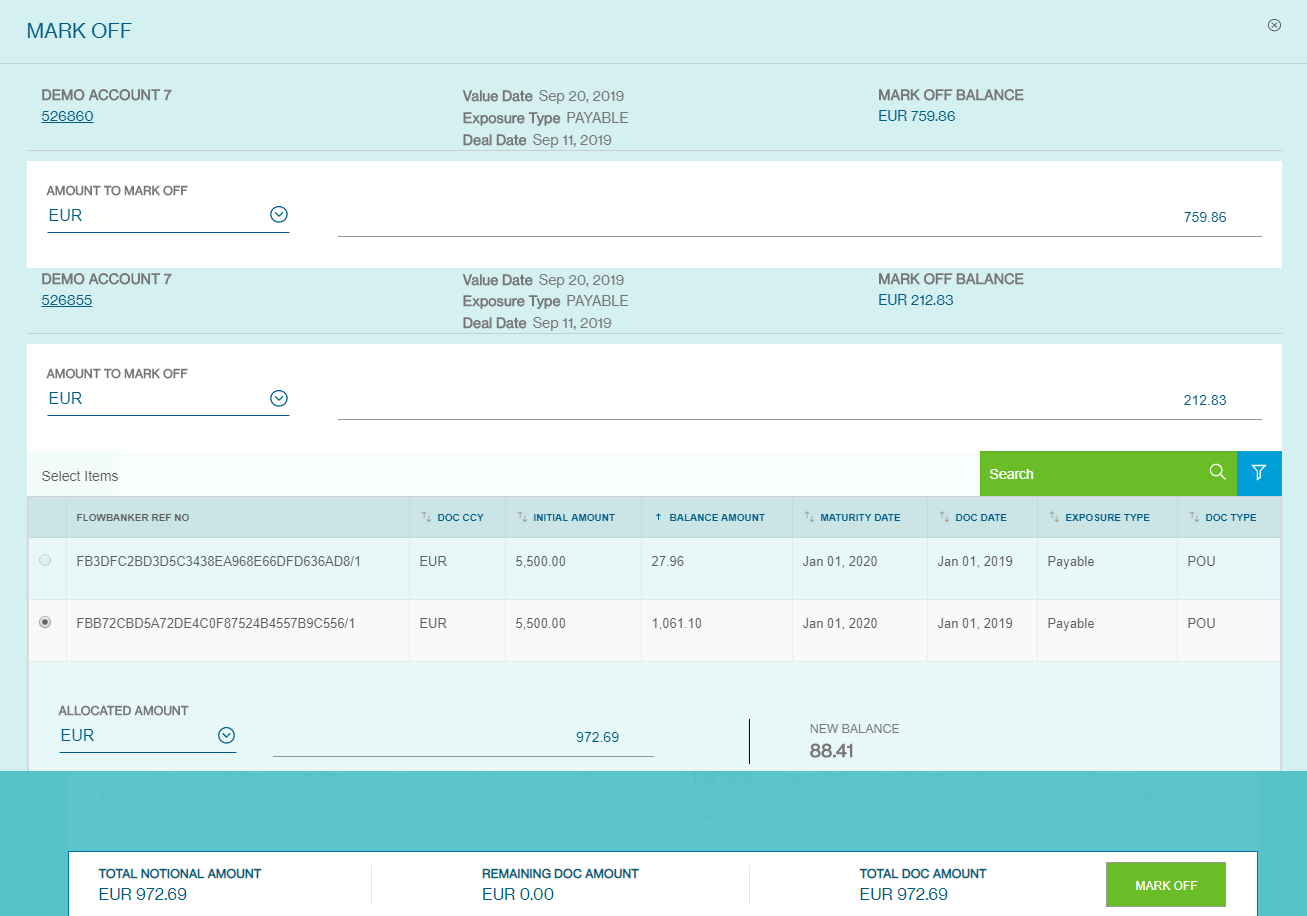
2. Single FX Transaction to Multiple Documents
Amount to Mark Off will be defaulted to the available mark off balance. Select the documents to mark off and input the amount to mark off for each PoU.
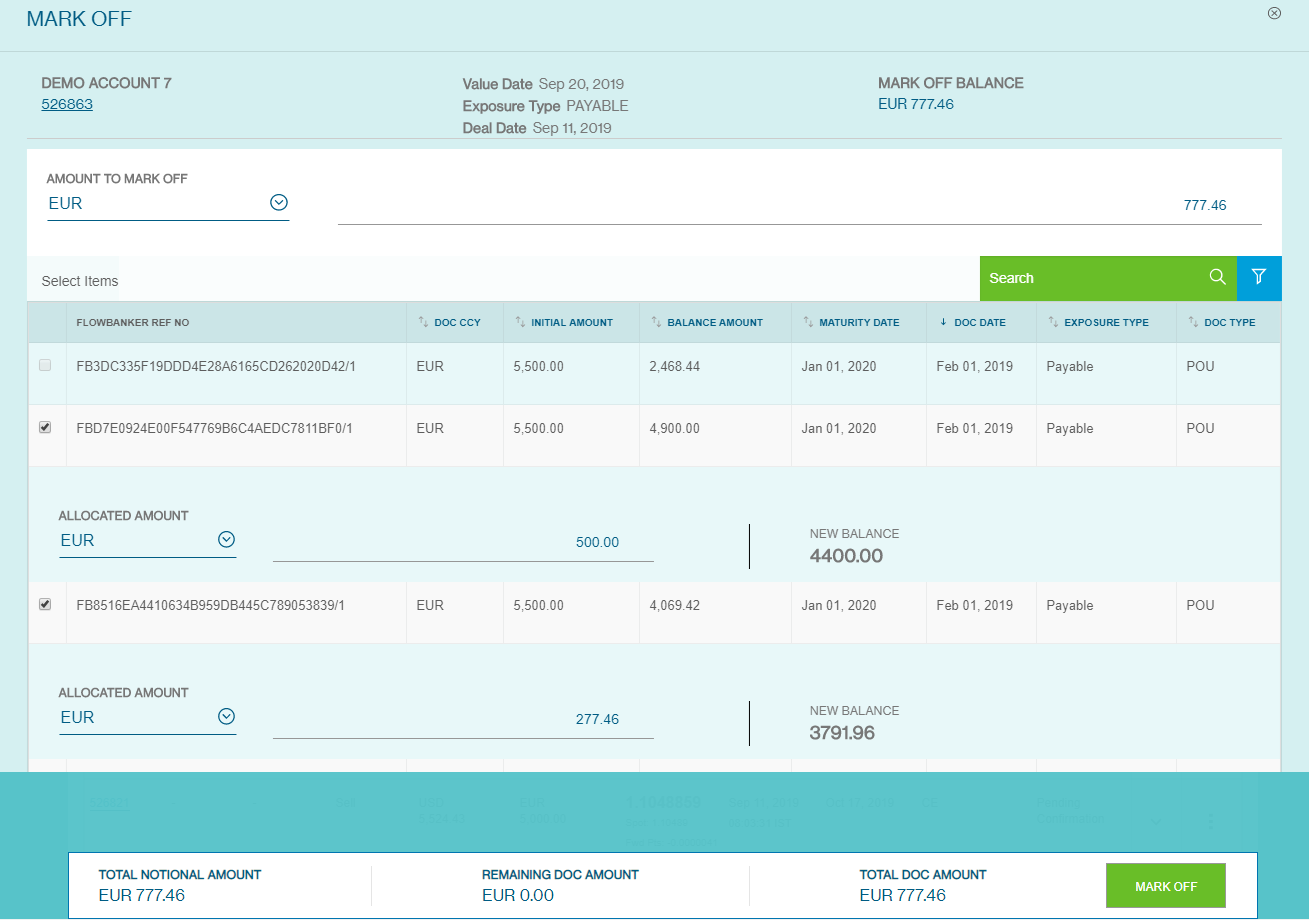
Mark Off option will only be enabled when the ‘Total Notional Amount’ and ‘Total Doc Amount’ matches.

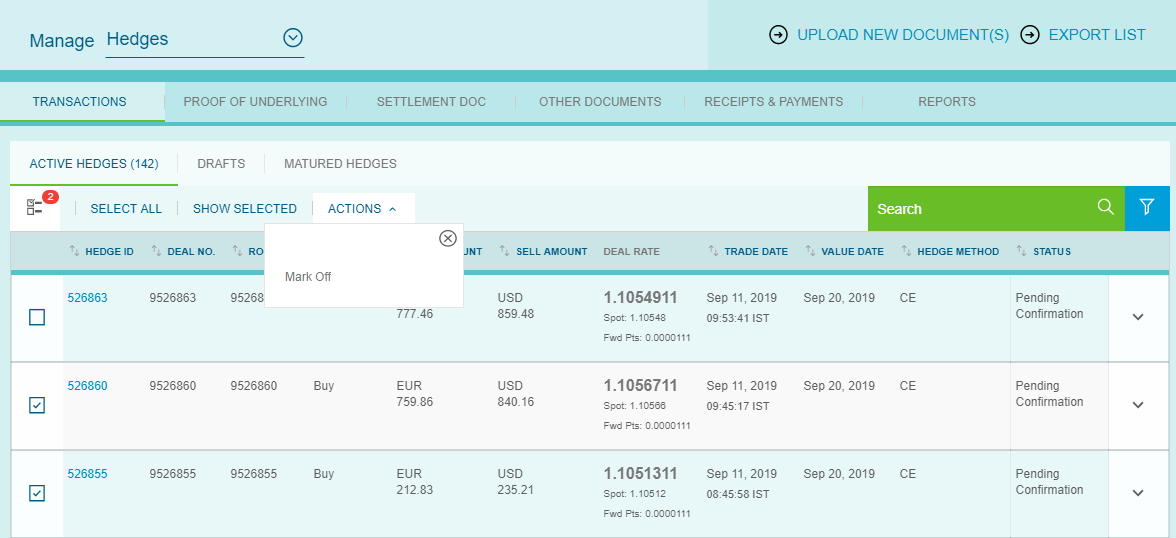
3. Multiple FX Transactions to Single PoU Document
Under the Manage Hedges screen, select multiple Transactions to Mark Off by checking the boxes on the left.
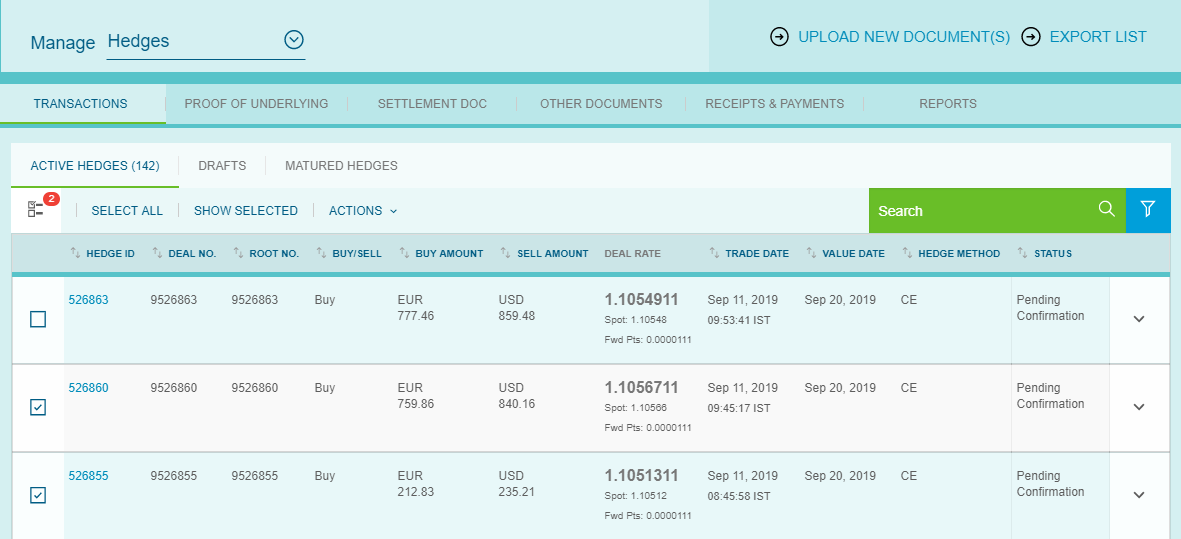
Go to Actions and click on Mark Off
Amount to Mark Off will be defaulted to the available mark off balance for each document. Select the document to Mark Off and input the allocated amount for the document.
Mark Off option will only be enabled when the Total Document Amount and Total Notional Amount matches.
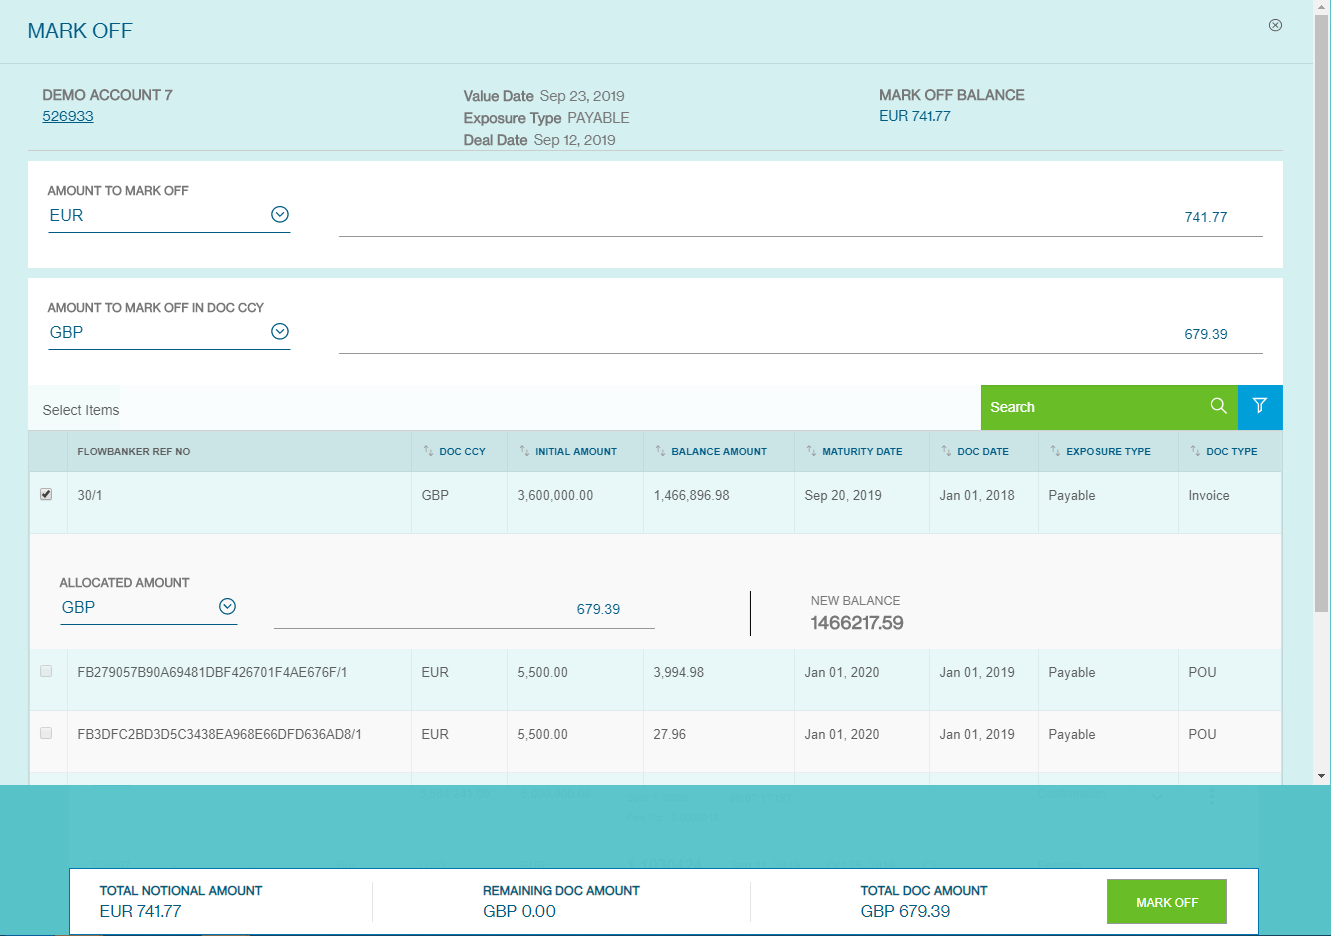
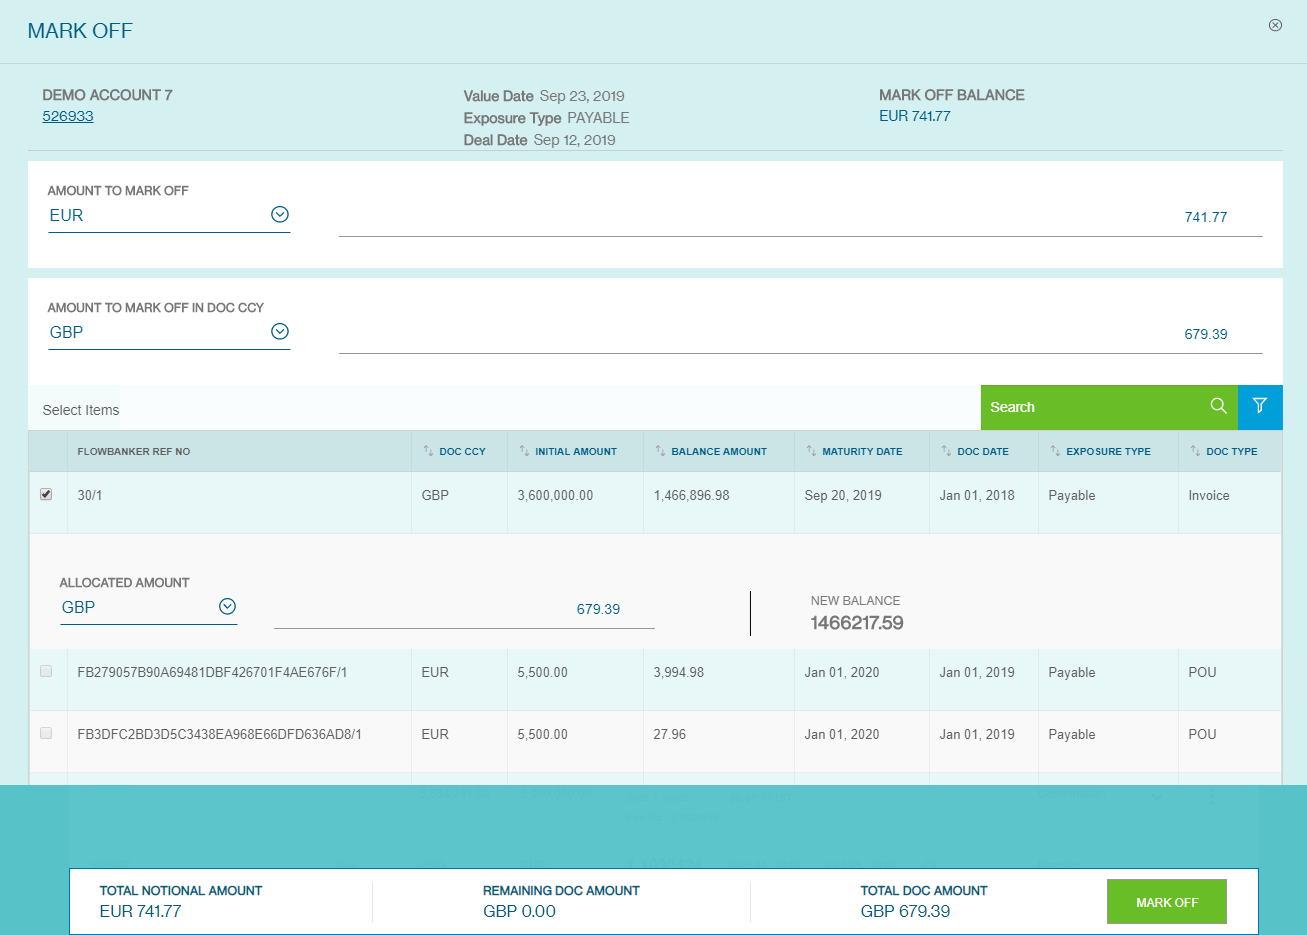
4. Cross Currency PoU Mark Off
Amount to Mark Off will be defaulted to the available mark off balance. Select a document of a currency different from the transaction currency from the list of documents displayed. An additional field ‘Amount to Mark off in Doc CCY’ is enabled and displays equivalent amount for transaction mark off amount.
Mark Off option will only be enabled when the ‘Total Doc Amount’ matches the ‘Amount To Mark Off in Doc Ccy’
Download Reports
The portal also allows you to access your reports such as Mark to Market reports via the platform.
To view your reports, click on the FX icon, followed by Manage and then Hedge
Downloading MTM Reports
On the Manage Hedges Page, Select ‘Reports’ Tab.
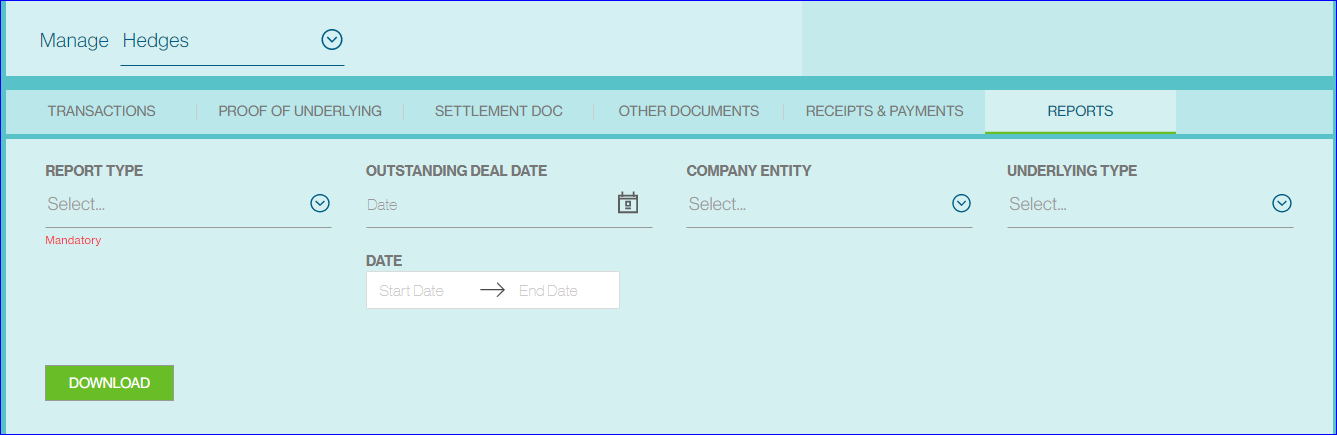
Select MTM Report as the Report Type, indicate the Company Entity and select the date required in the dropdown list. The report will be available only for the dates based on the existing setup. For monthly report, select the last date of the month.
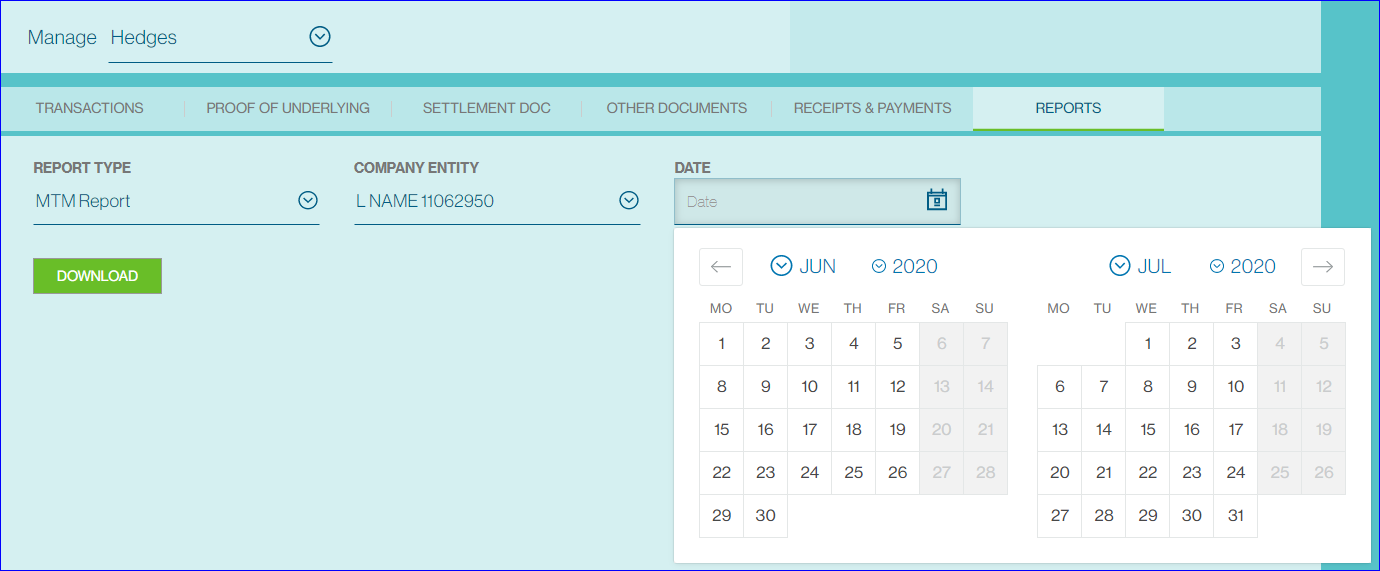
Once you have confirmed that the details are correct, click the Download button and the report will be downloaded as a.csv file.
Payments - Inwards
Begin by clicking on the FX icon followed by Manage and then Hedges. Then select the Receipts & Payments tab from the top navigation bar.
Your incoming receipts will be displayed on the Inwards tab.
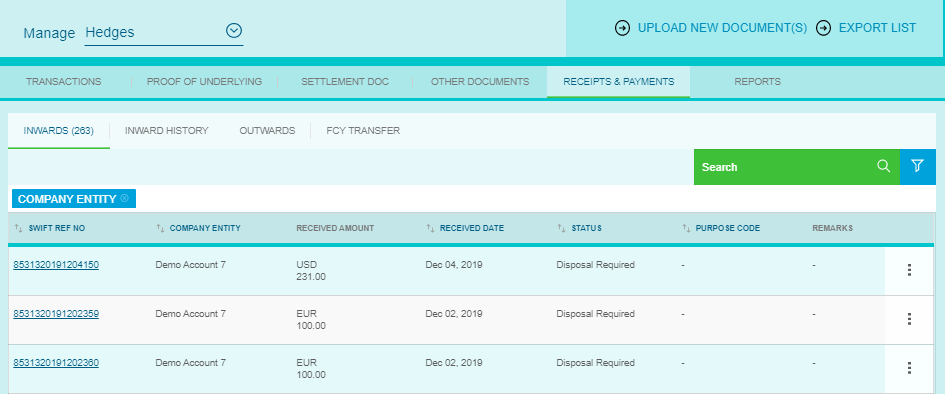
Click on the Swift Ref No if you which to view the Swift message, a pop-up screen with the Swift details will appear.

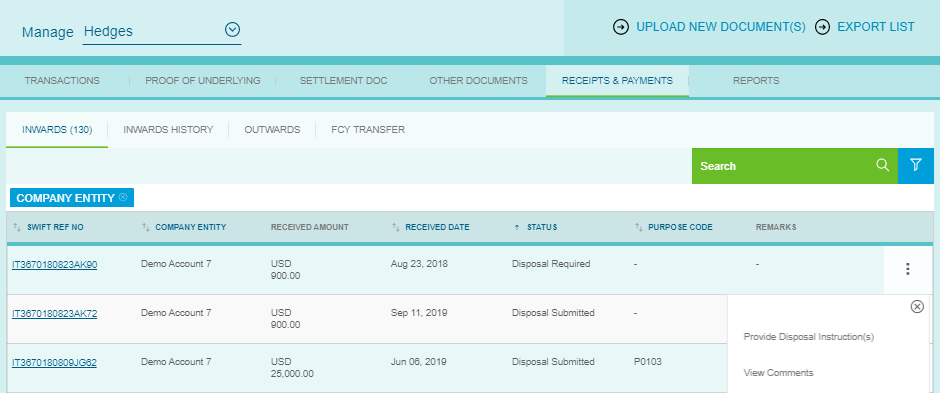
To Provide Disposal instructions click on the three vertical dots on the right and select Provide Disposal Instruction(s).
You will be prompted to select the Purpose of Payment Category and Purpose of Payment code from the dropdown.

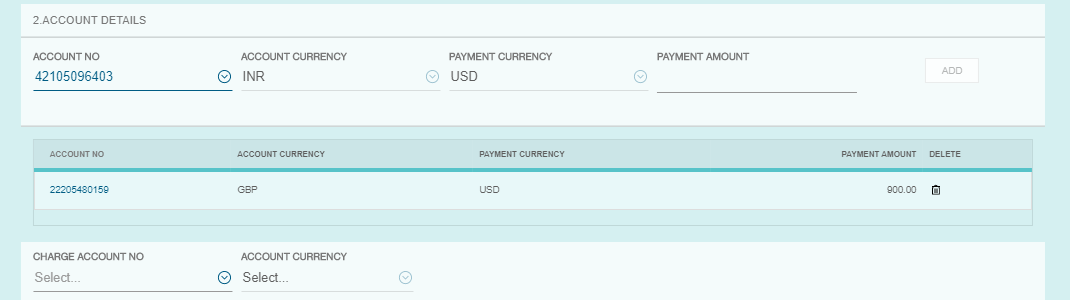
In the Account Details section, please select your account number from the drop-down list, both the currencies and payment amount will default to the account setup and transaction currency. You can then click on Add.
Pick your Charge Account No from the drop-down list and the Account Currency will be auto populated.
Next, select your Payment Option. There are two options available, Cash and Pre-Booked Deals.
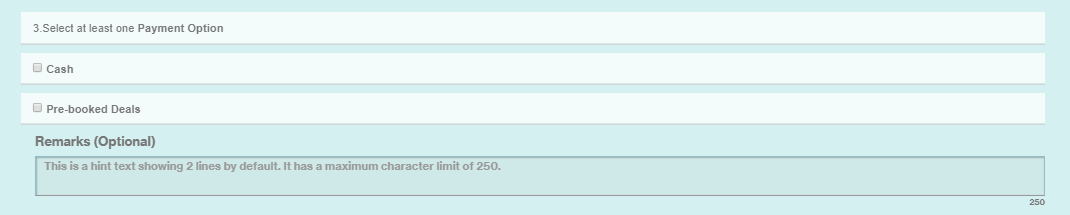
The Cash option allows you to book a fresh FX Transaction
The Pre-booked Deals option allows you to utilise previously booked FX Transactions. You would need to select a settlement date from the date picker and an amount to be utilised.
The final disposal instructions are displayed at the bottom of the screen, the Amount Received must tally with the disposal instruction amount to be able to submit the booking.

Once you have clicked on Submit, the Cash & Pre-booked Deals would be available in the Approve Pending Hedge screen under New Booking and Utilization tab respectively, for execution.
You can view all the historical inwards under Receipts & Payments in the Inwards History tab.